平台接入
平台接入是配置53AI Hub站点的关键步骤之一。你可以通过平台接入将各个智能体开发平台、云计算平台和大模型平台接入到 53AI Hub,实现智能体的统一发布和运营。你可以根据业务需求和实际情况,选择需要接入的平台。
53AI Hub 产品定位是智能体(AI Agent)的发布与运营平台存在,平台本身不提供智能体开发及编排能力。你需要将外部平台中开发好的智能体接入到 53AI Hub。
支持的平台
1. 智能体平台
支持市场上主流的智能体开发平台开发的智能体统一接入53AI Hub,进行统一发布和运营。
已支持平台包括:扣子、千帆 AppBuilder、Dify、53AI Studio、腾讯元器、FastGPT
2. 云计算平台
支持主流的云计算平台上开发的智能体统一接入到 53AI Hub,进行统一发布和运营。
已支持平台包括:阿里百炼、火山方舟、百度千帆 AppBuild
3. 大模型平台
支持主流大模型平台的基座模型能力直接接入到53AI Hub,为用户直接提供基座模型能力。
已支持平台包括:OpenAI、硅基流动、深度求索及其它兼容 OpenAI 接口的大模型平台
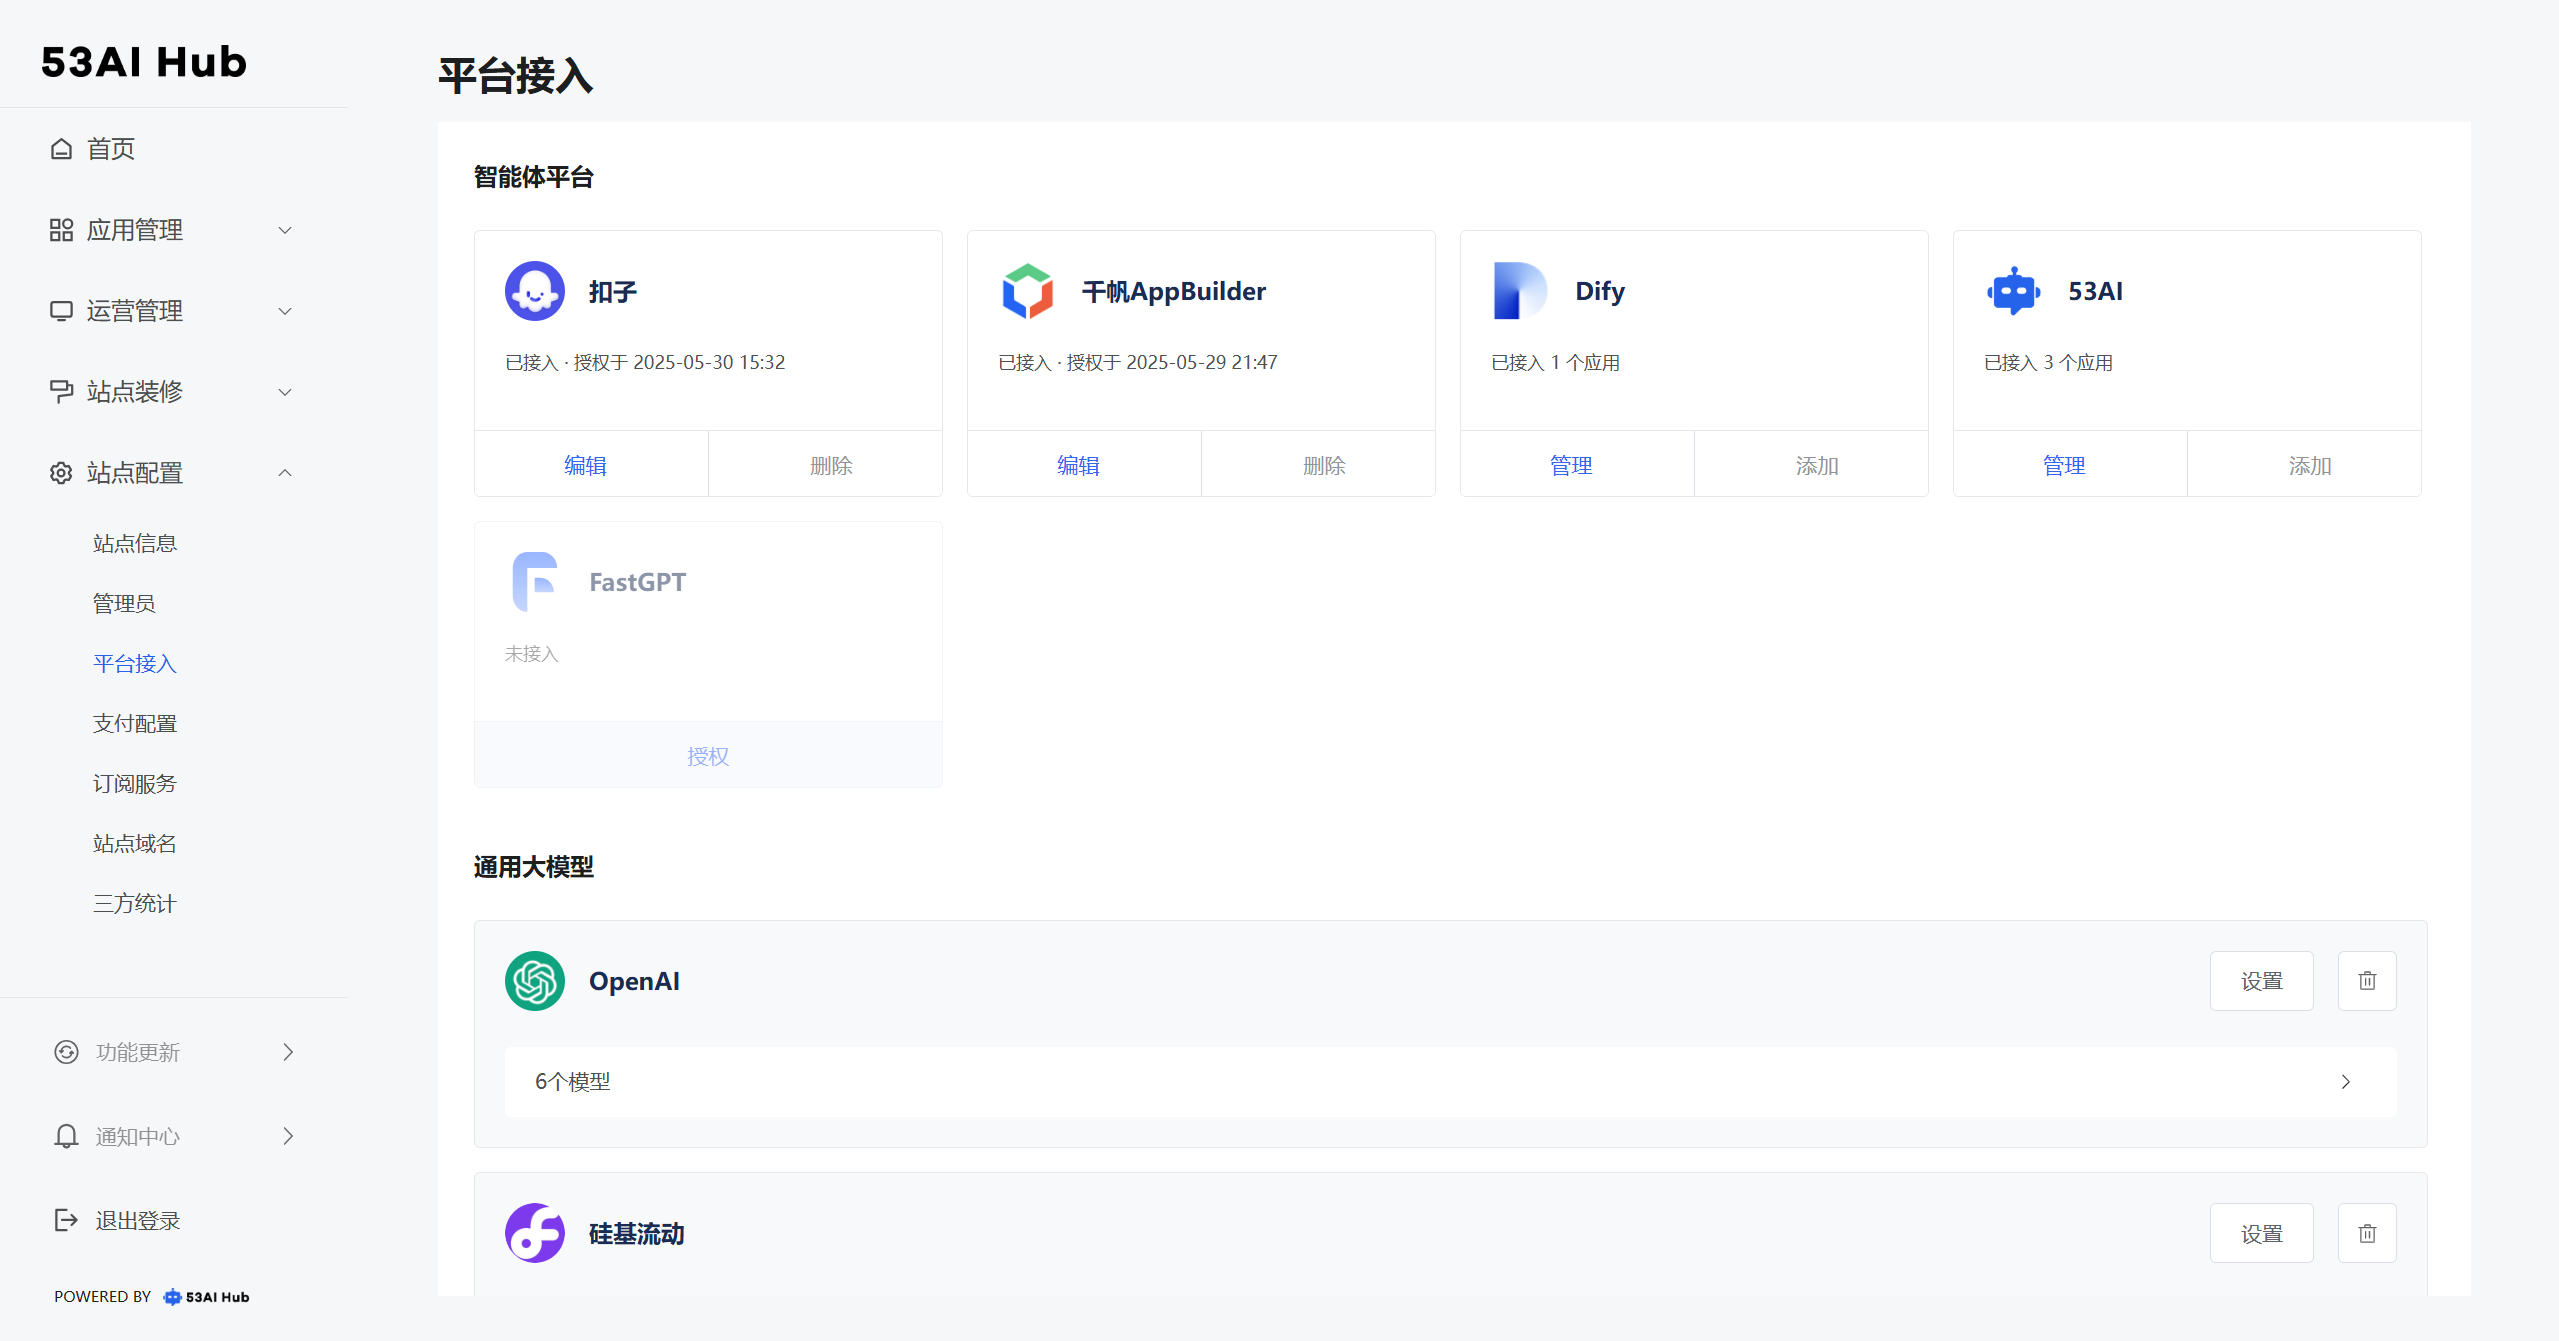
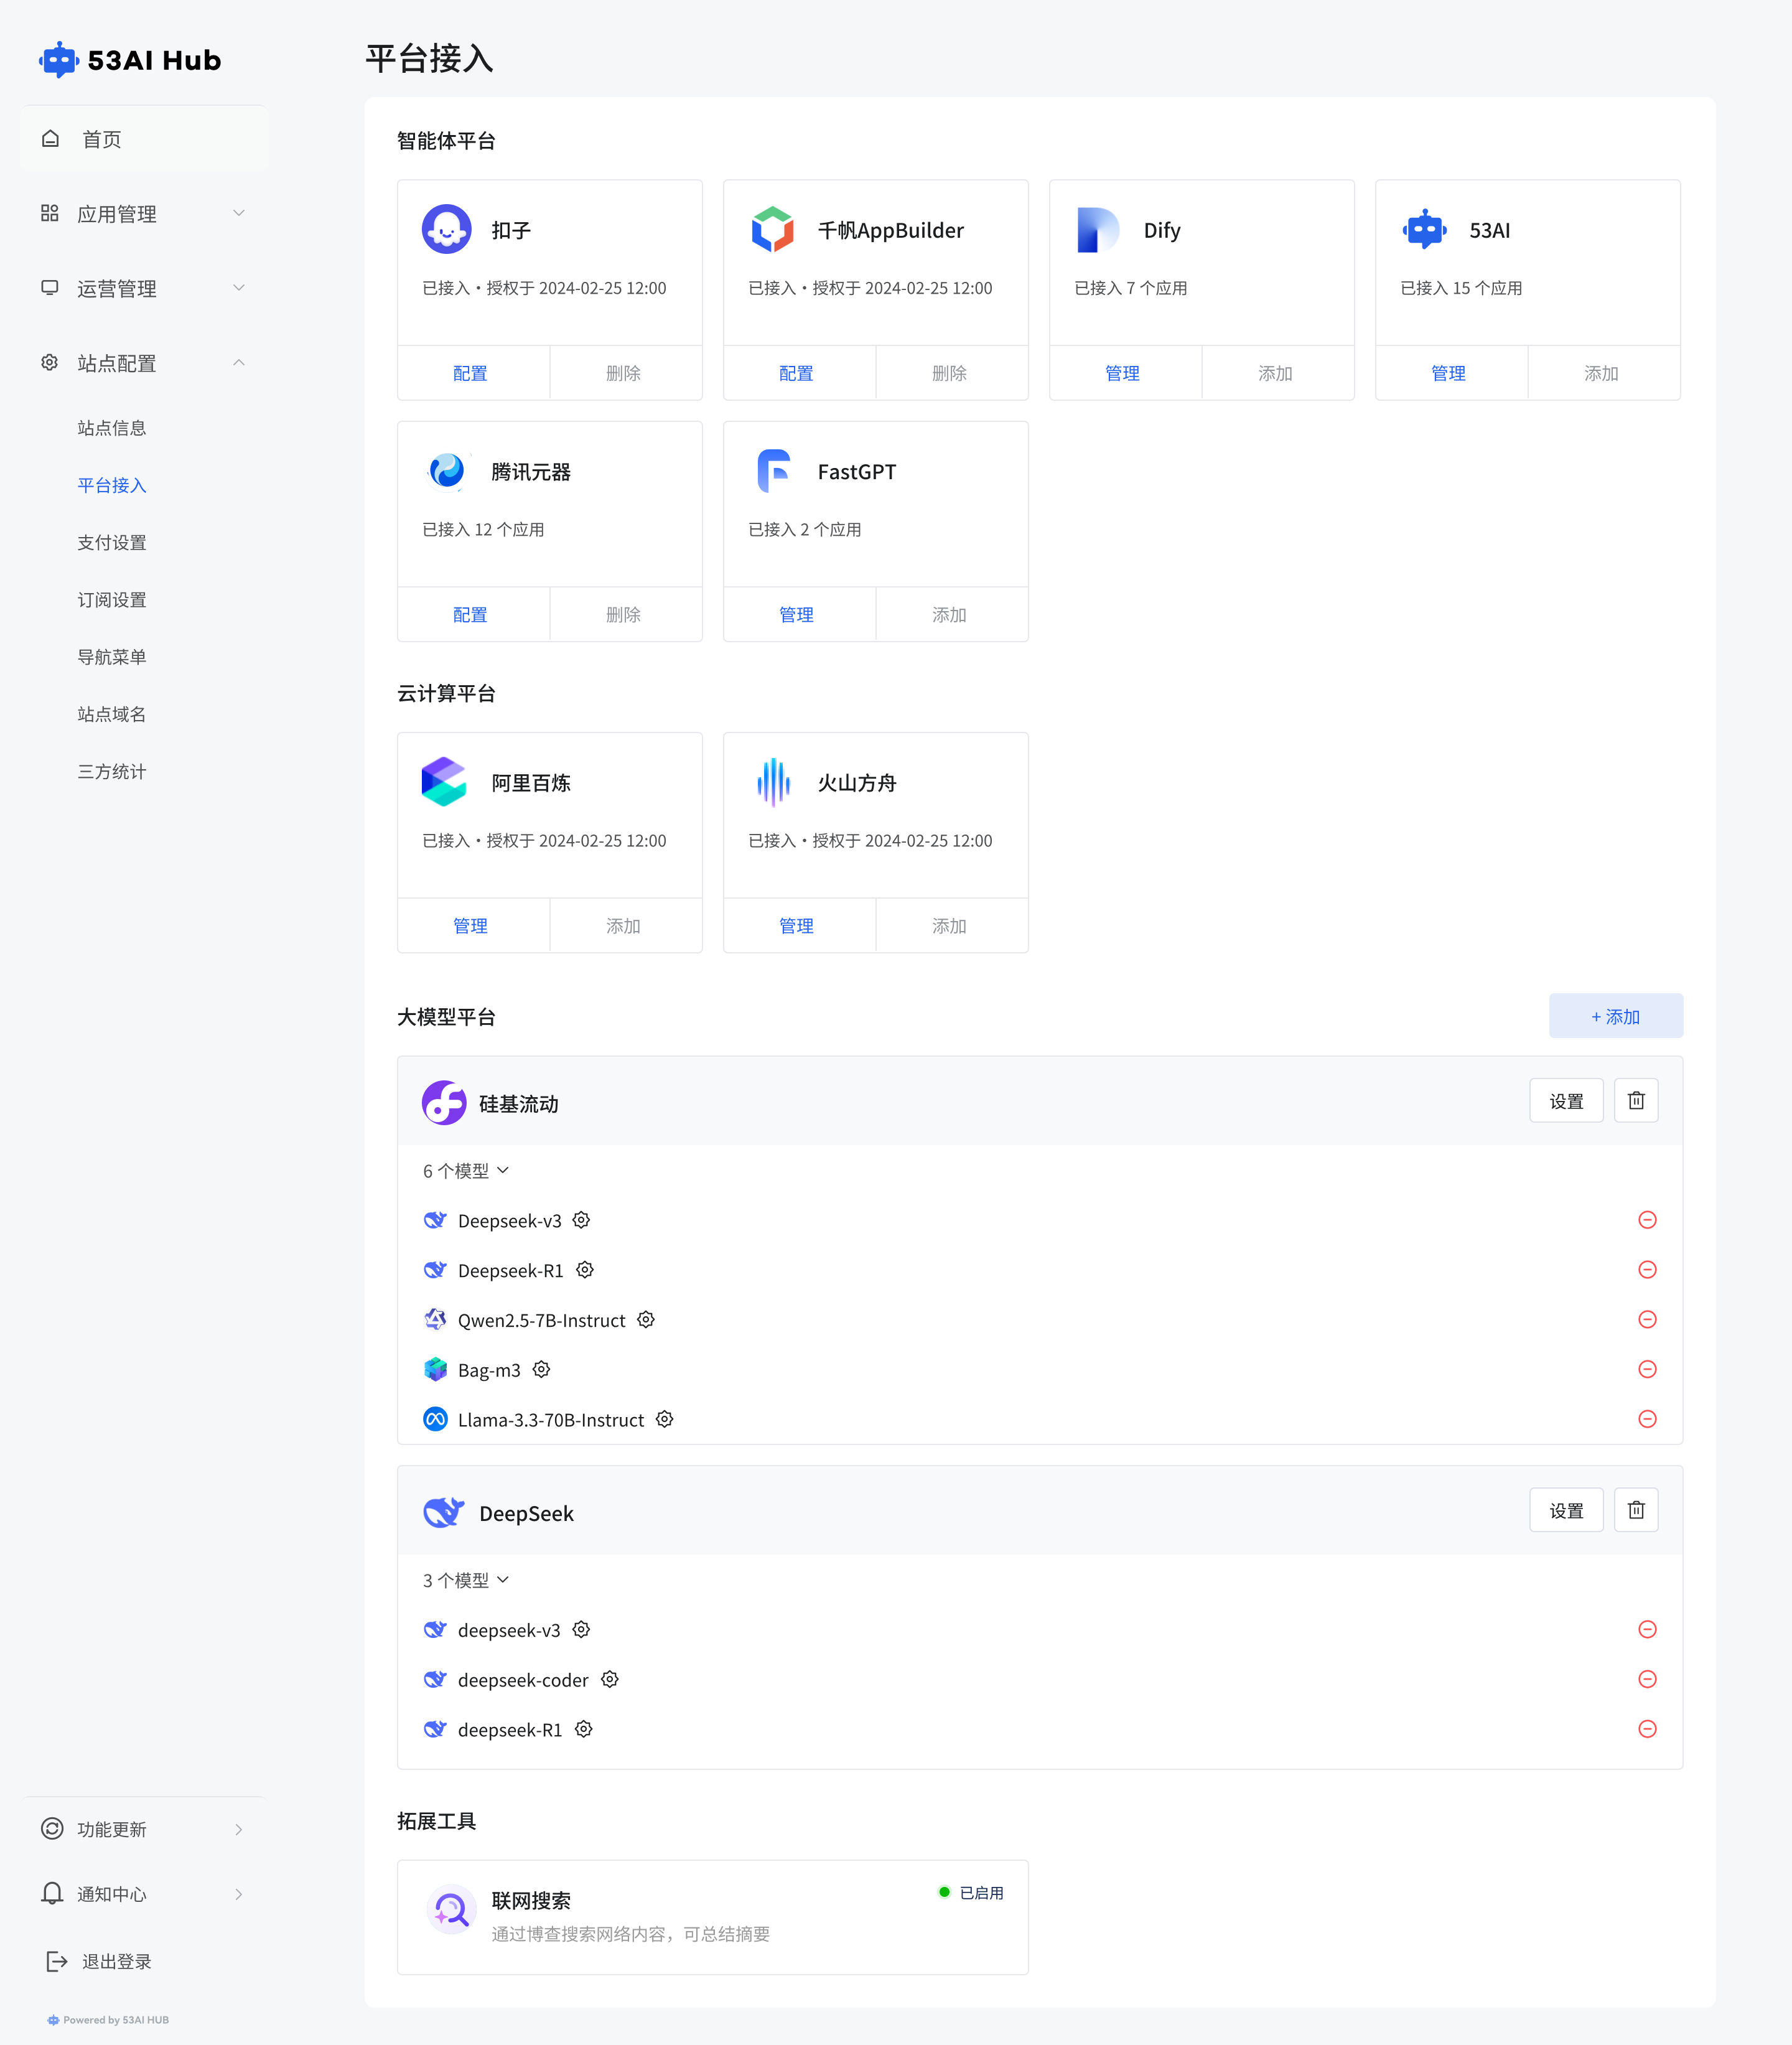
开始接入
点击站点配置-平台接入
智能体平台
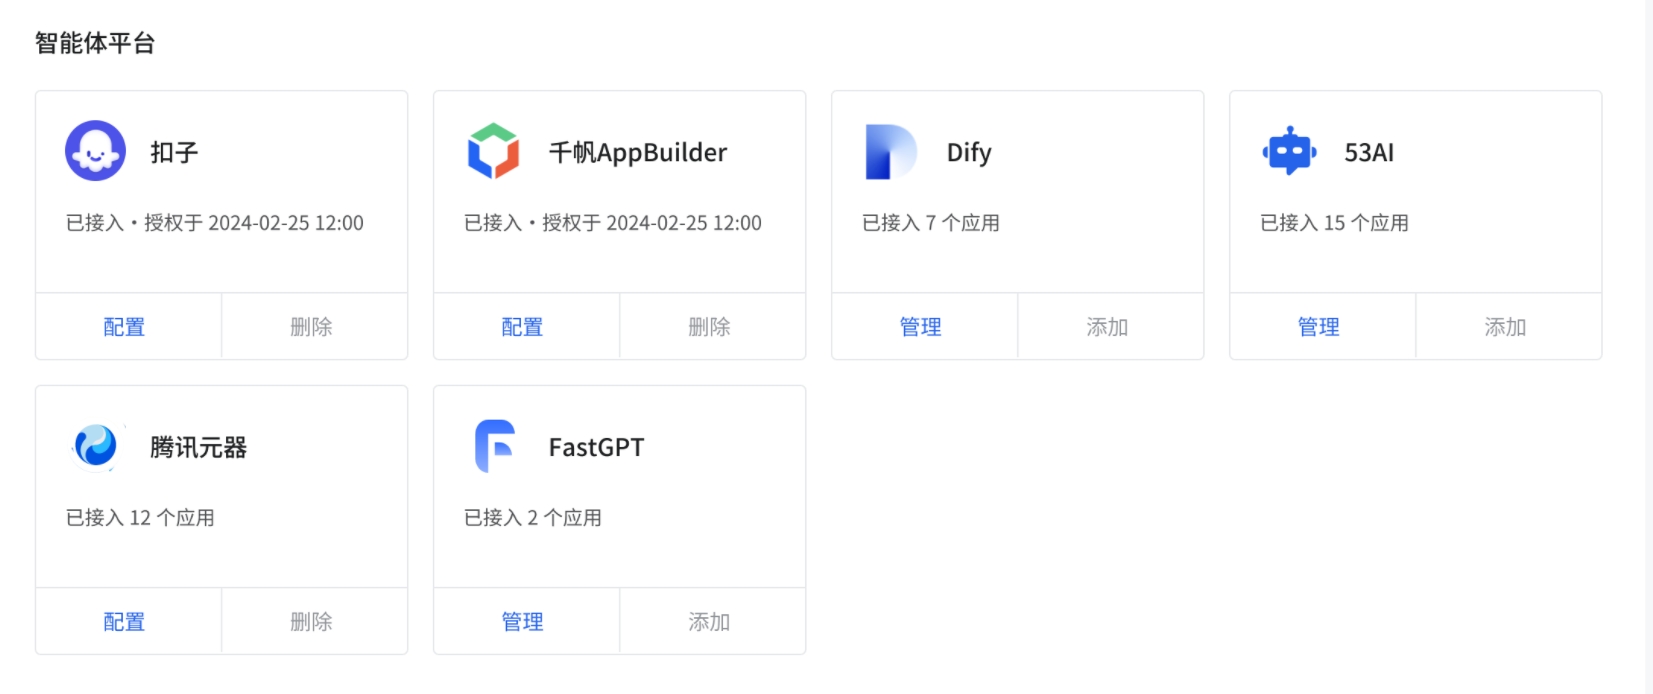
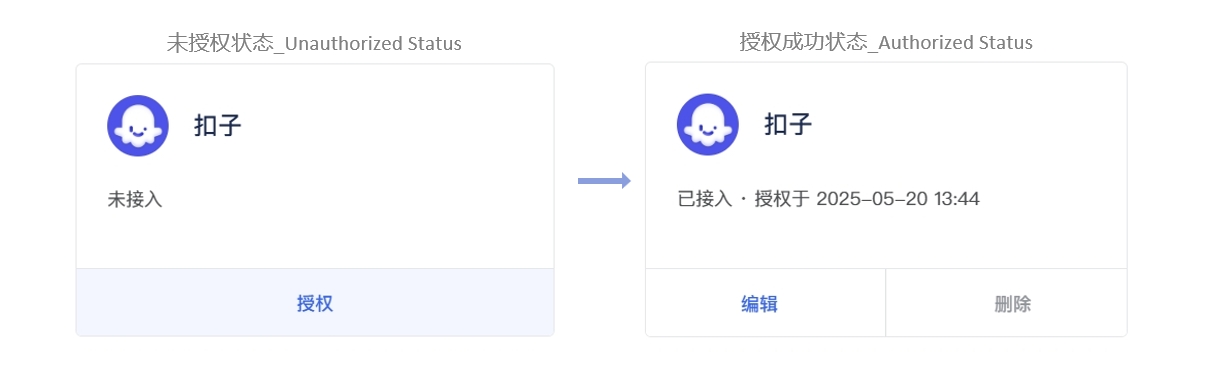
==图像对比,其实不如原本的截图直接明确==
其中扣子、千帆AppBuilder支持将平台开发的全部智能体进行统一授权
以下是扣子的平台授权及智能体添加的流程图:
mermaid
flowchart LR

subgraph one["扣子平台操作"]
direction TB
subgraph step1["创建并发布智能体"]
direction TB
A1["创建并编排智能体"] --> A2["点击发布<br>勾选 API"]
end
subgraph step2["获取API信息"]
direction TB
A3["进入授权页面<br>创建 OAuth 应用"] --> A4["填写重定向 URL<br>生成客户端密钥"] --> A5["勾选权限并点击确定"]
end
end
subgraph two["53AI Hub 平台操作"]
direction TB
subgraph step3["接入扣子"]
B1["点击扣子卡片「授权」<br>填写客户端和客户端密钥"]-->B2["点击「确定」"]
-->B3["在跳转页点击「授权」<br>页面出现“授权成功”"]
end
end
C1["接入成功<br>显示为“已接入”"]

step1 ==> step2==>step3 ==>C1

classDef difyStep fill:#FFE0B2,stroke:#FB8C00,stroke-width:2px,color:#000000
classDef hubStep fill:#BBDEFB,stroke:#1E88E5,stroke-width:2px,color:#000000
classDef successStep fill:#C8E6C9,stroke:#2E7D32,stroke-width:4px,color:#000000

classDef stepBox1 fill:#FFF3E0,stroke:#FFCC80,stroke-width:3px,color:#000000
classDef stepBox2 fill:#E3F2FD,stroke:#90CAF9,stroke-width:3px,color:#000000

class A1,A2,A3,A4,A5 difyStep
class B1,B2,B3,B4 hubStep
class C1 successStep

class step1 stepBox1
class step2 stepBox1
class step3 stepBox2
class step4 stepBox2

style one fill:transparent,stroke:#F57C00,stroke-width:4px,stroke-dasharray: 30 8,font-weight:bold
style two fill:transparent,stroke:#1976D2,stroke-width:4px,stroke-dasharray: 30 8,font-weight:bold
在扣子中的操作
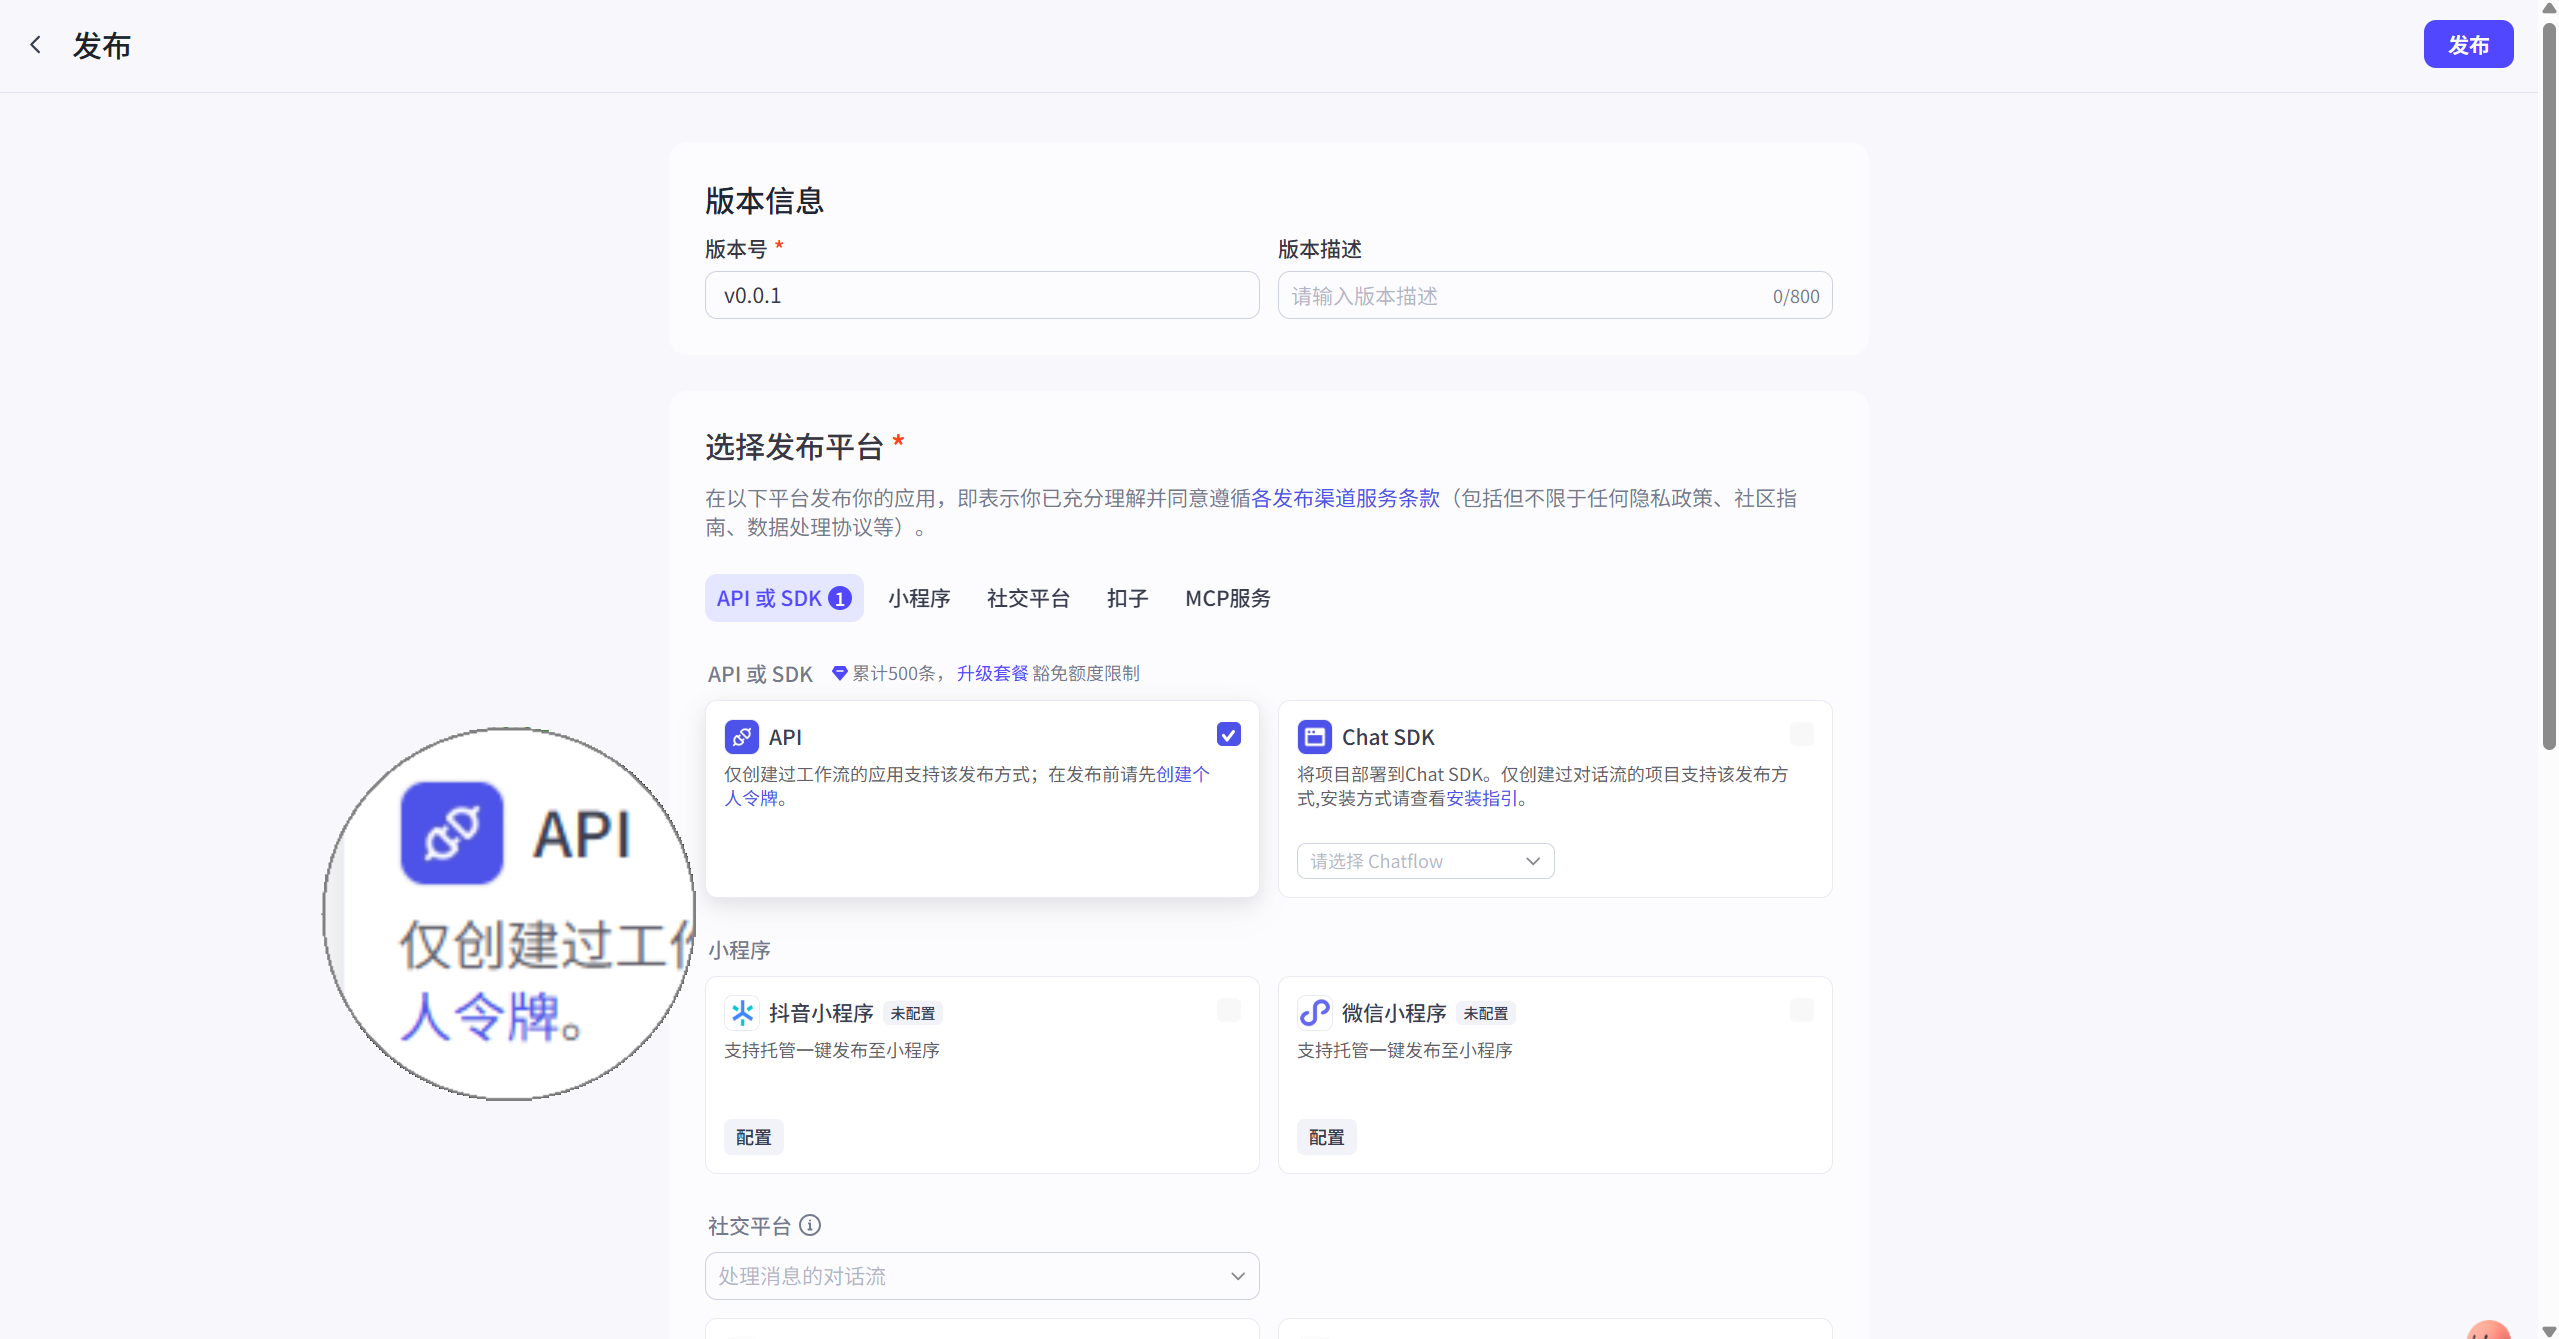
· 智能体创建与发布
- 在扣子平台创建并编排所需的智能体
- 点击「发布」按钮
- 在「选择发布平台 - API」区域,勾选 API 权限
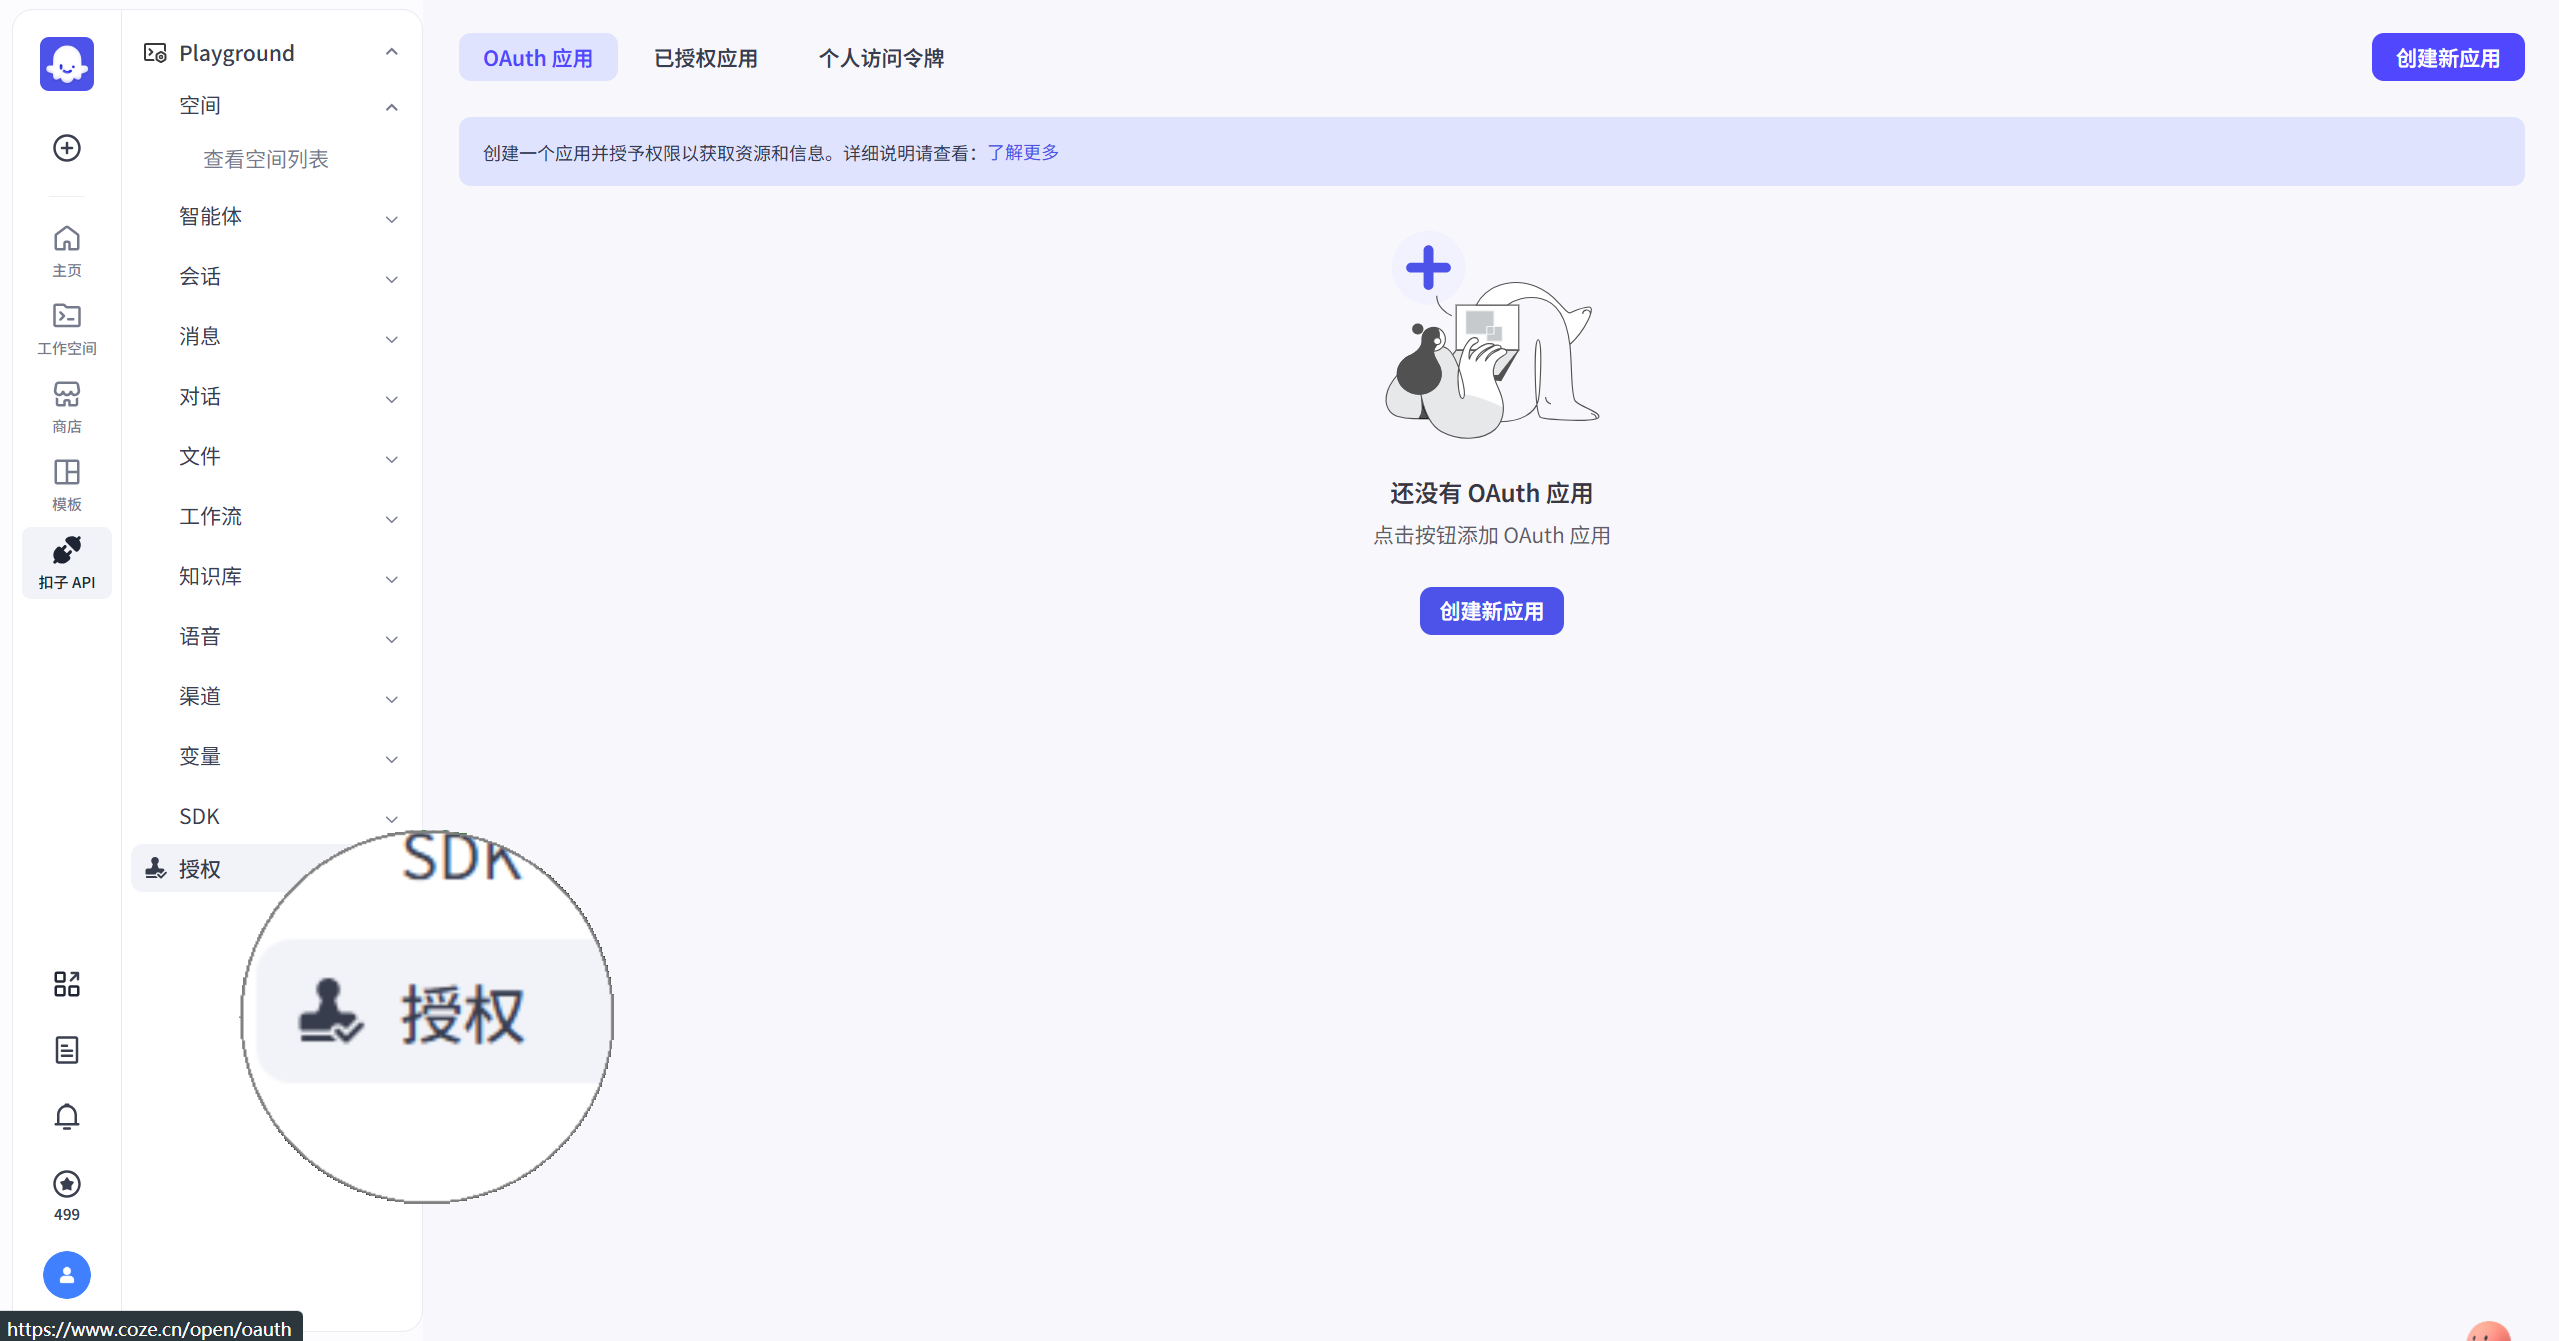
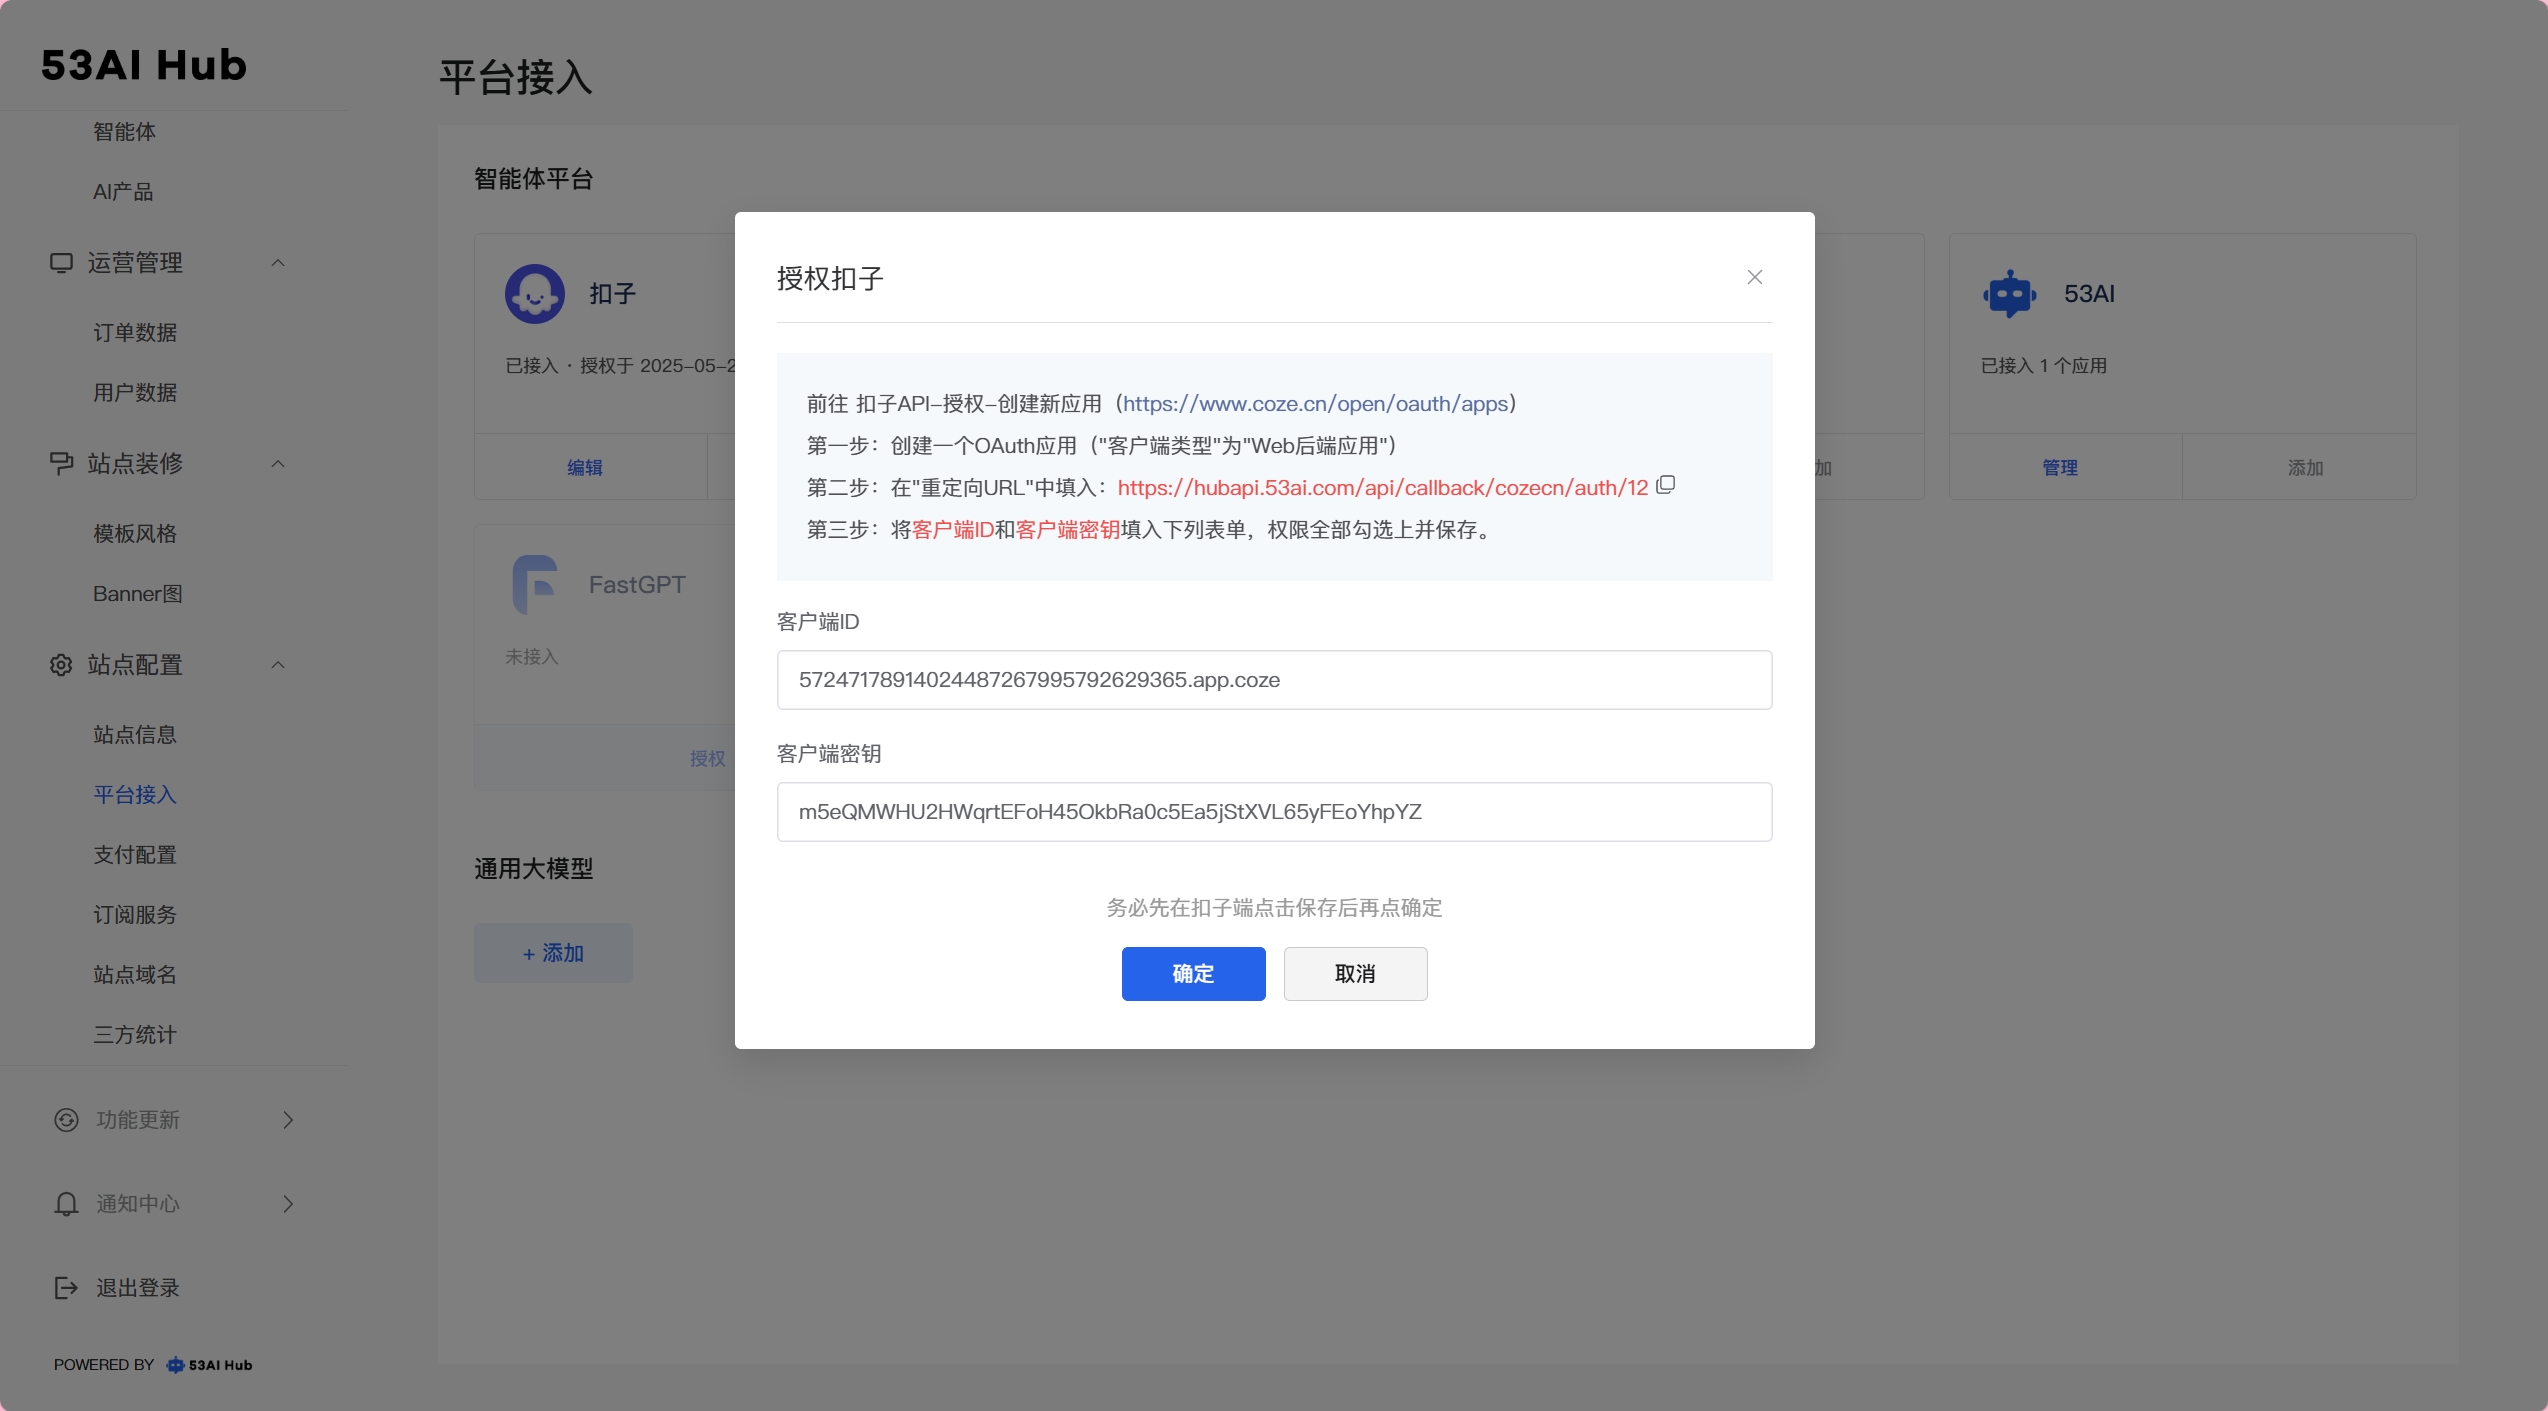
· 信息获取
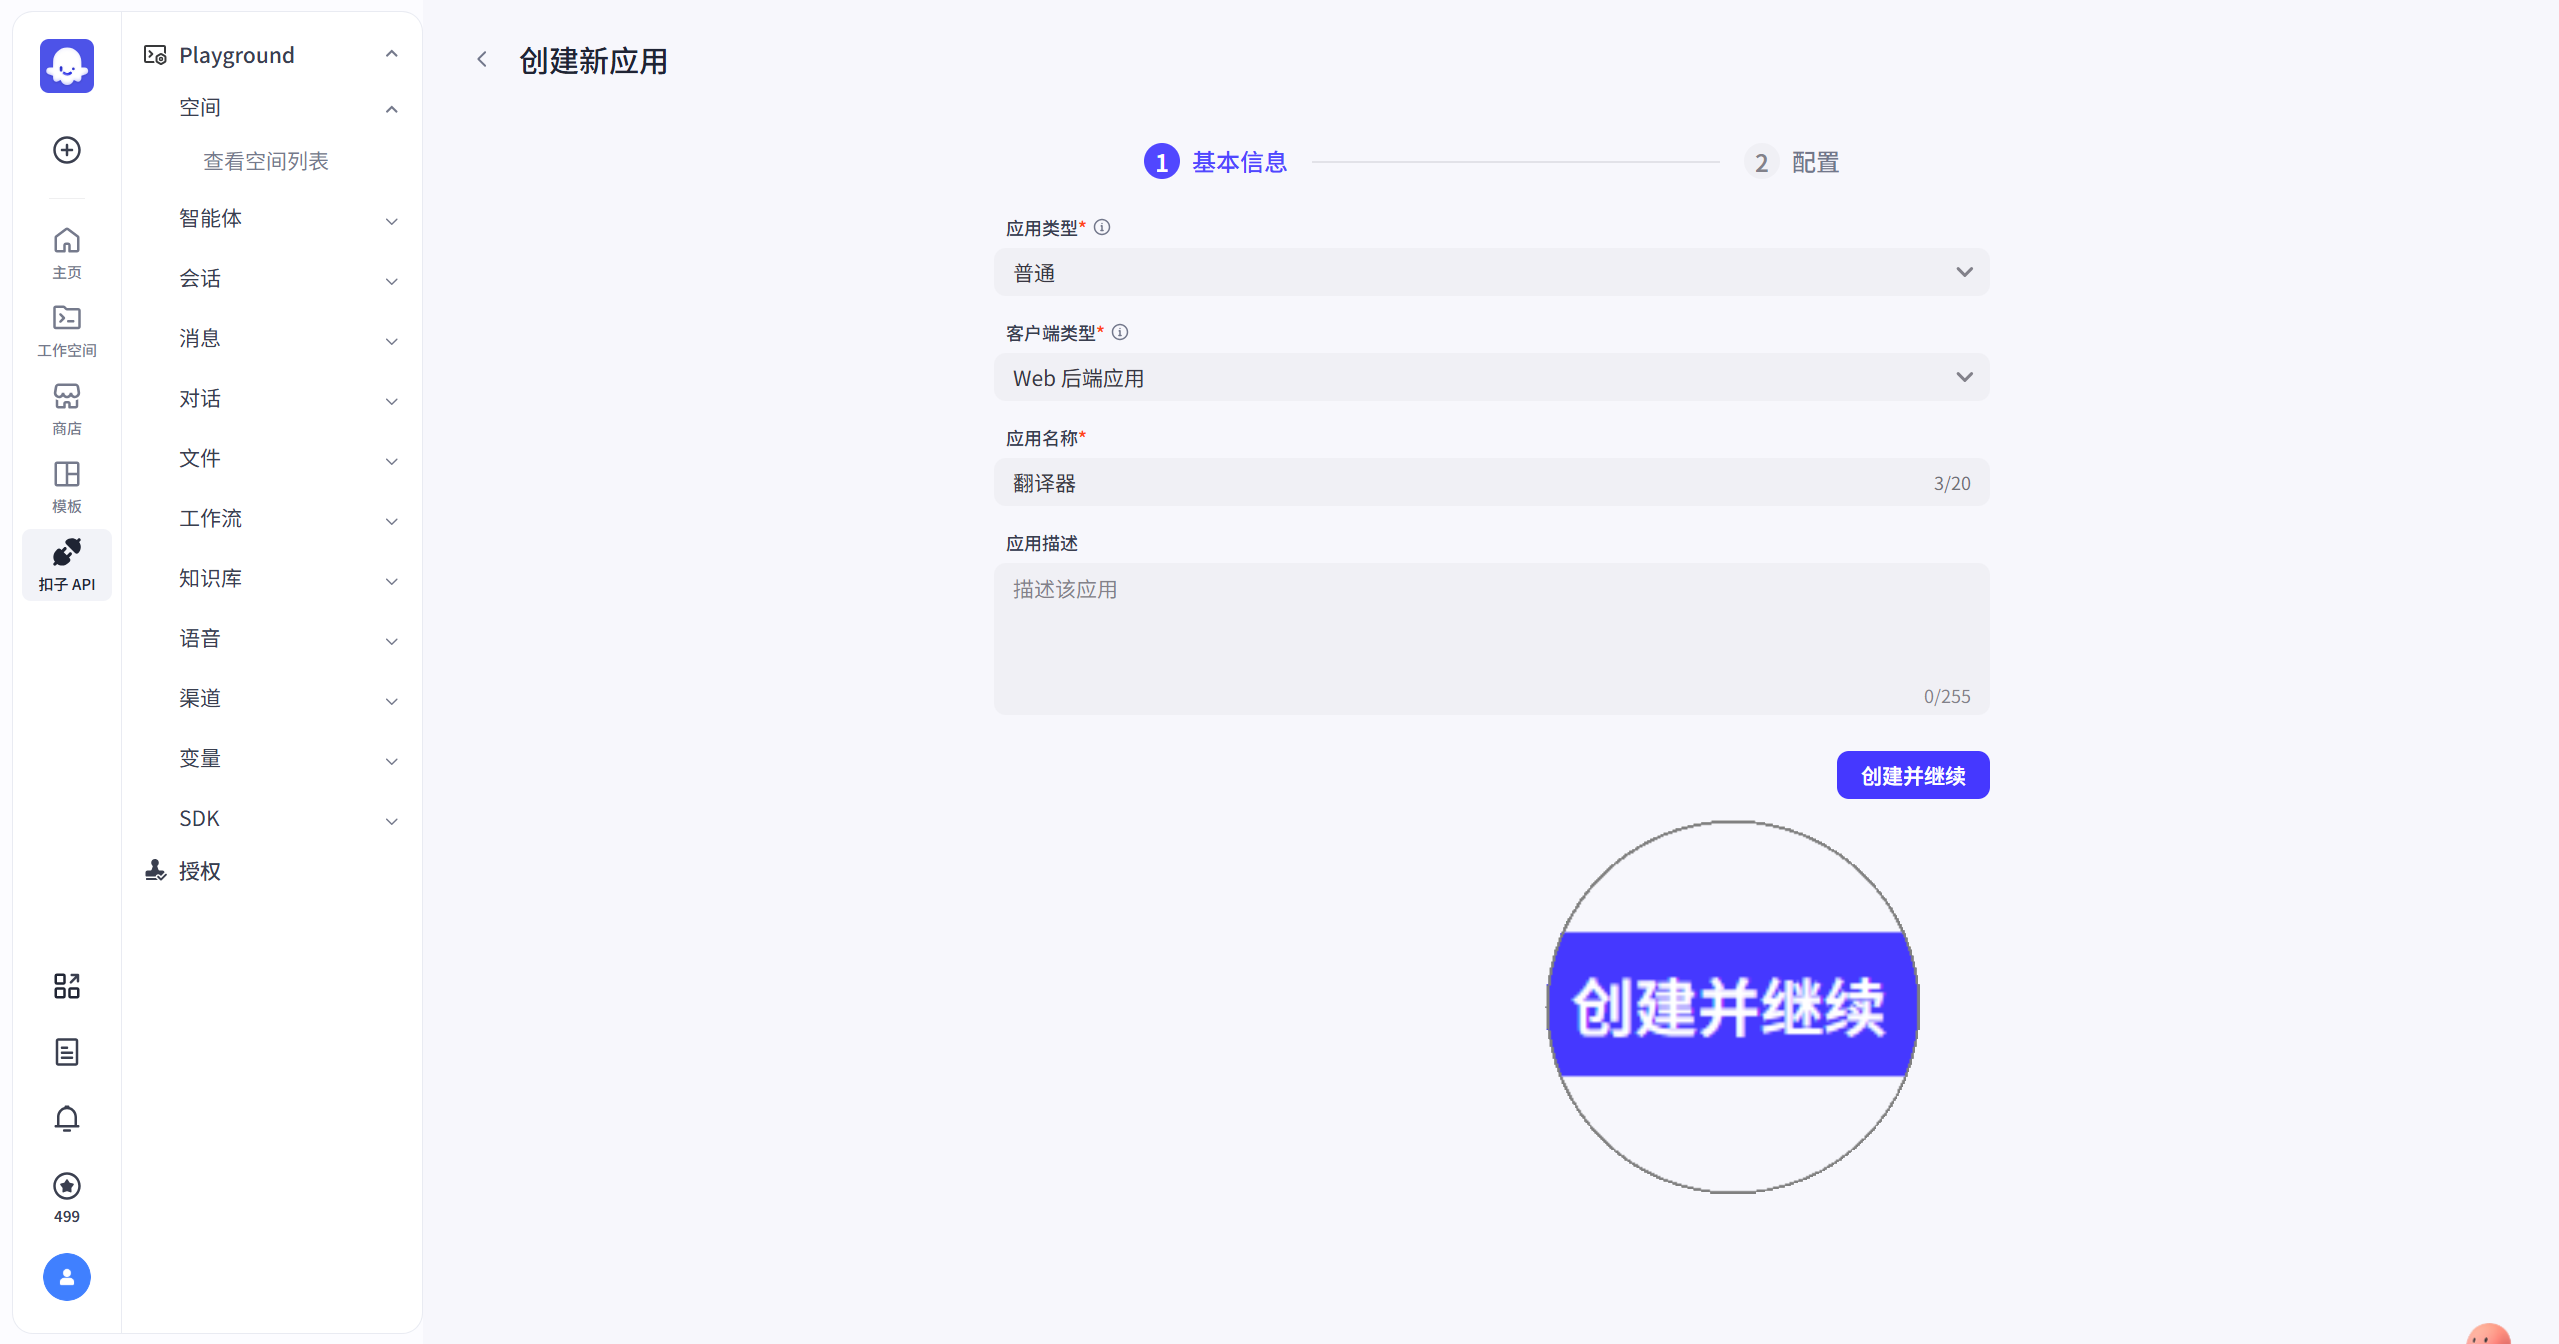
- 前往 扣子开放平台授权页面
- 创建一个 OAuth 应用,客户端类型选择「Web 后端应用」
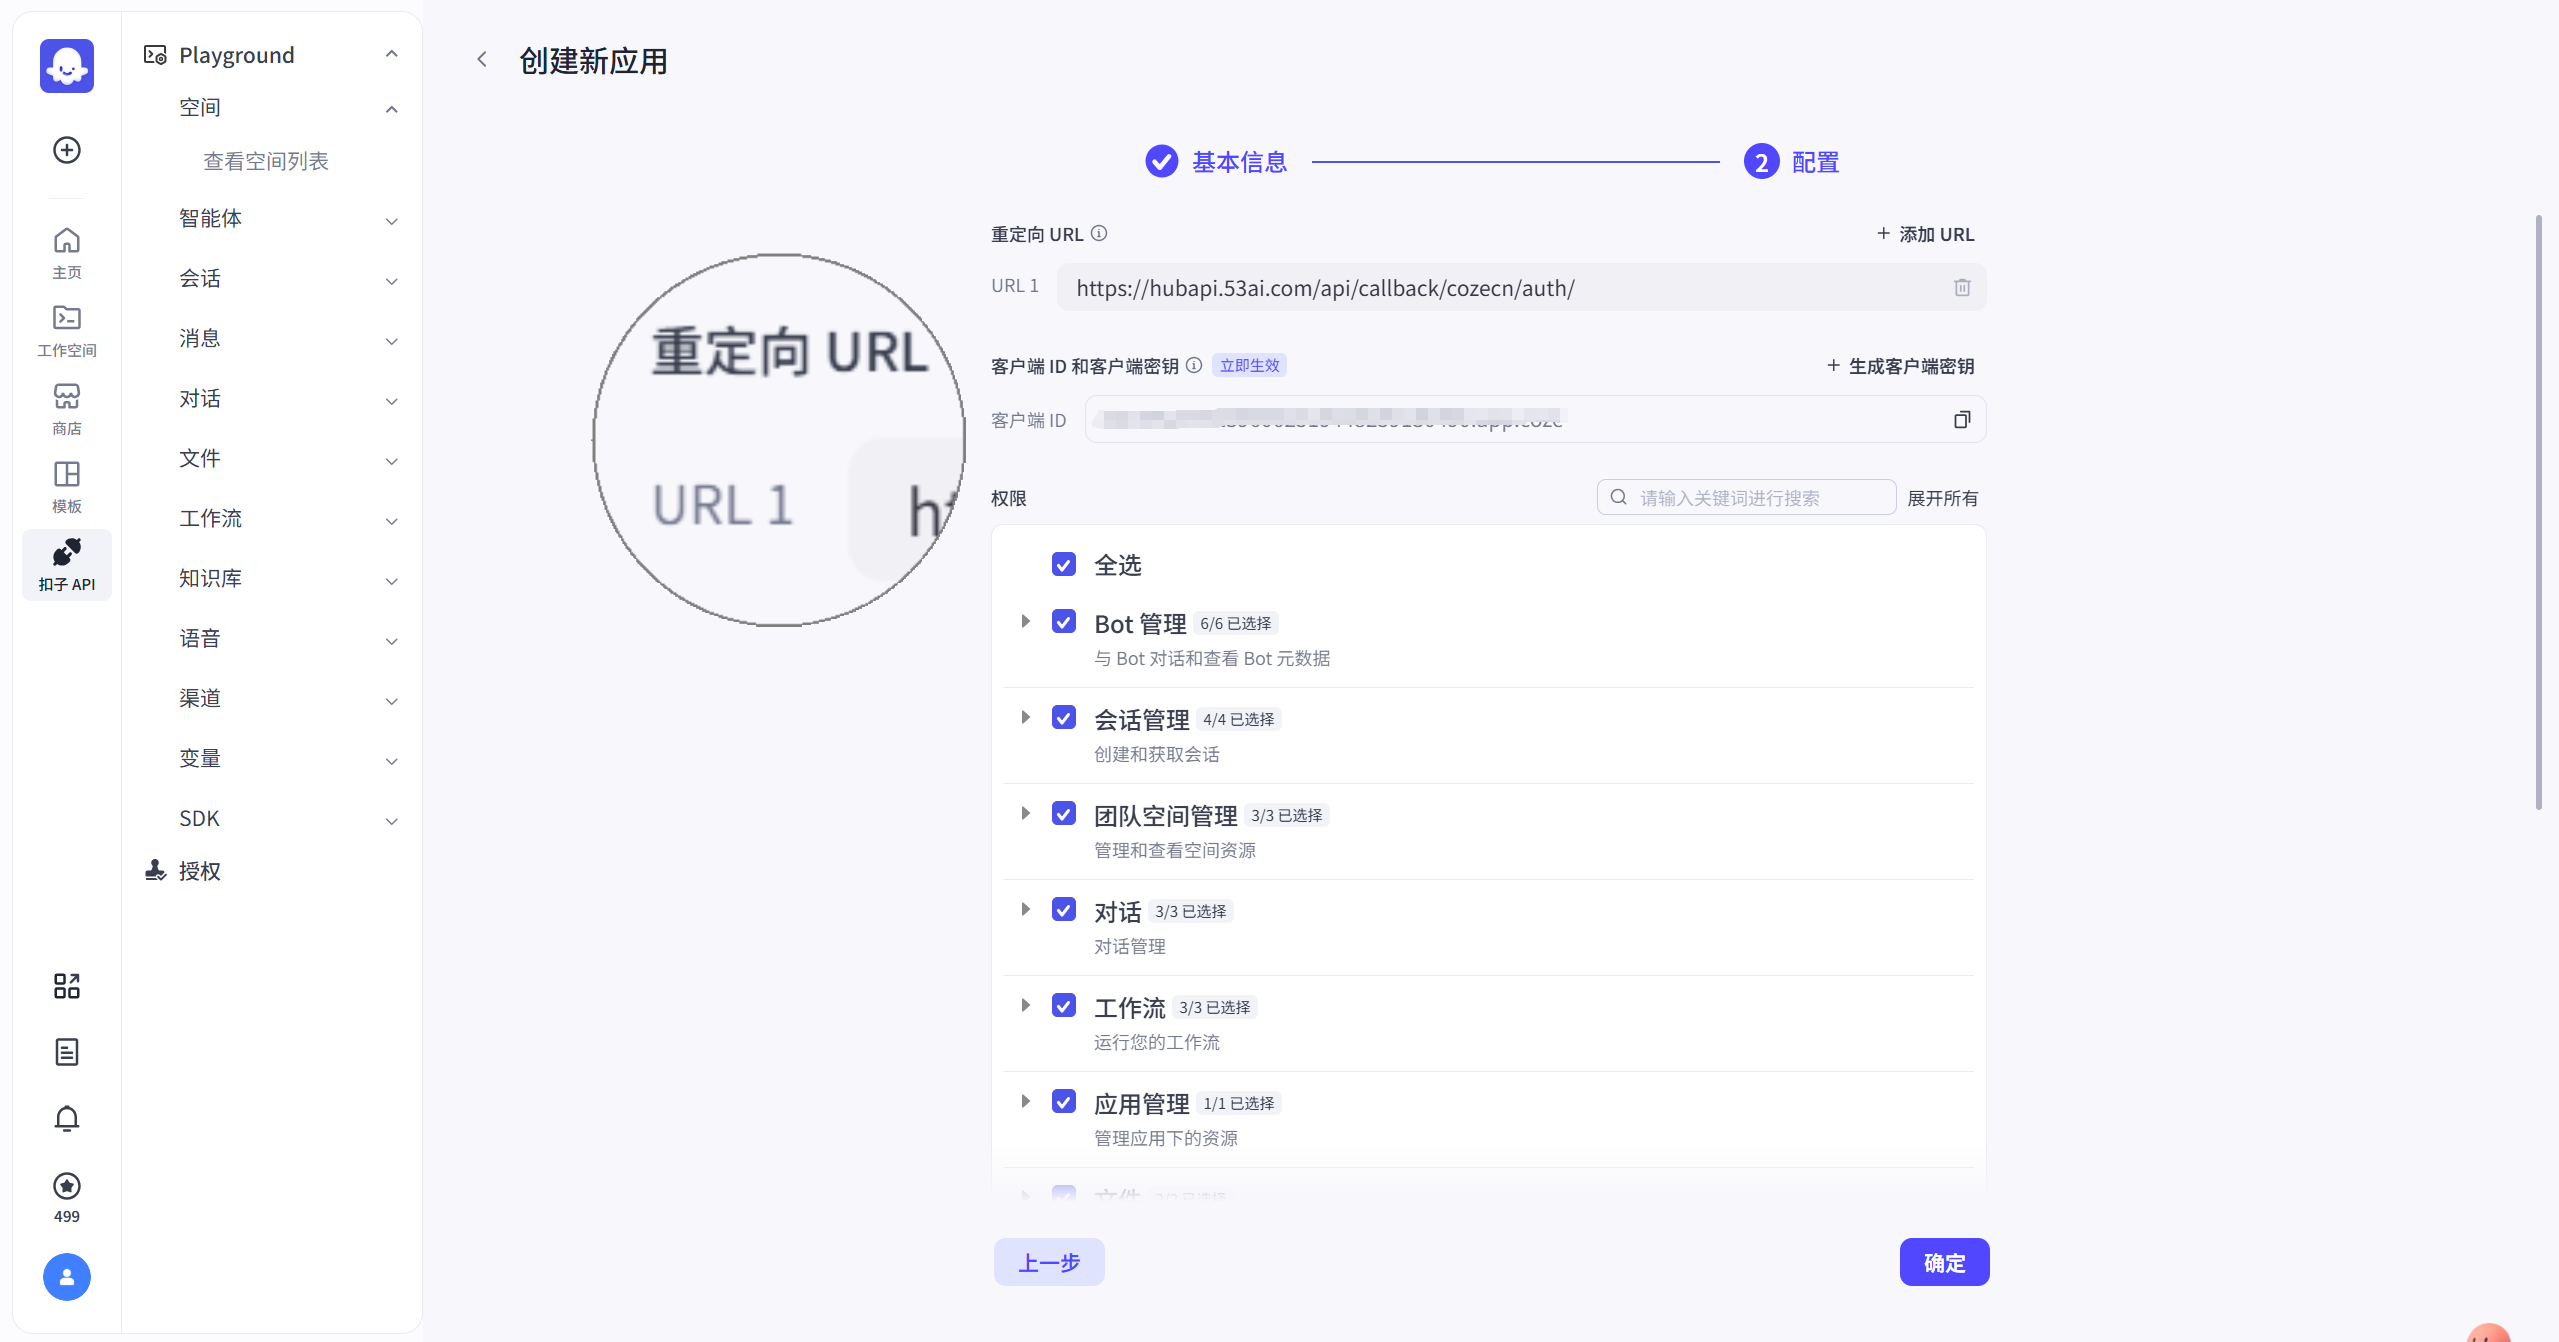
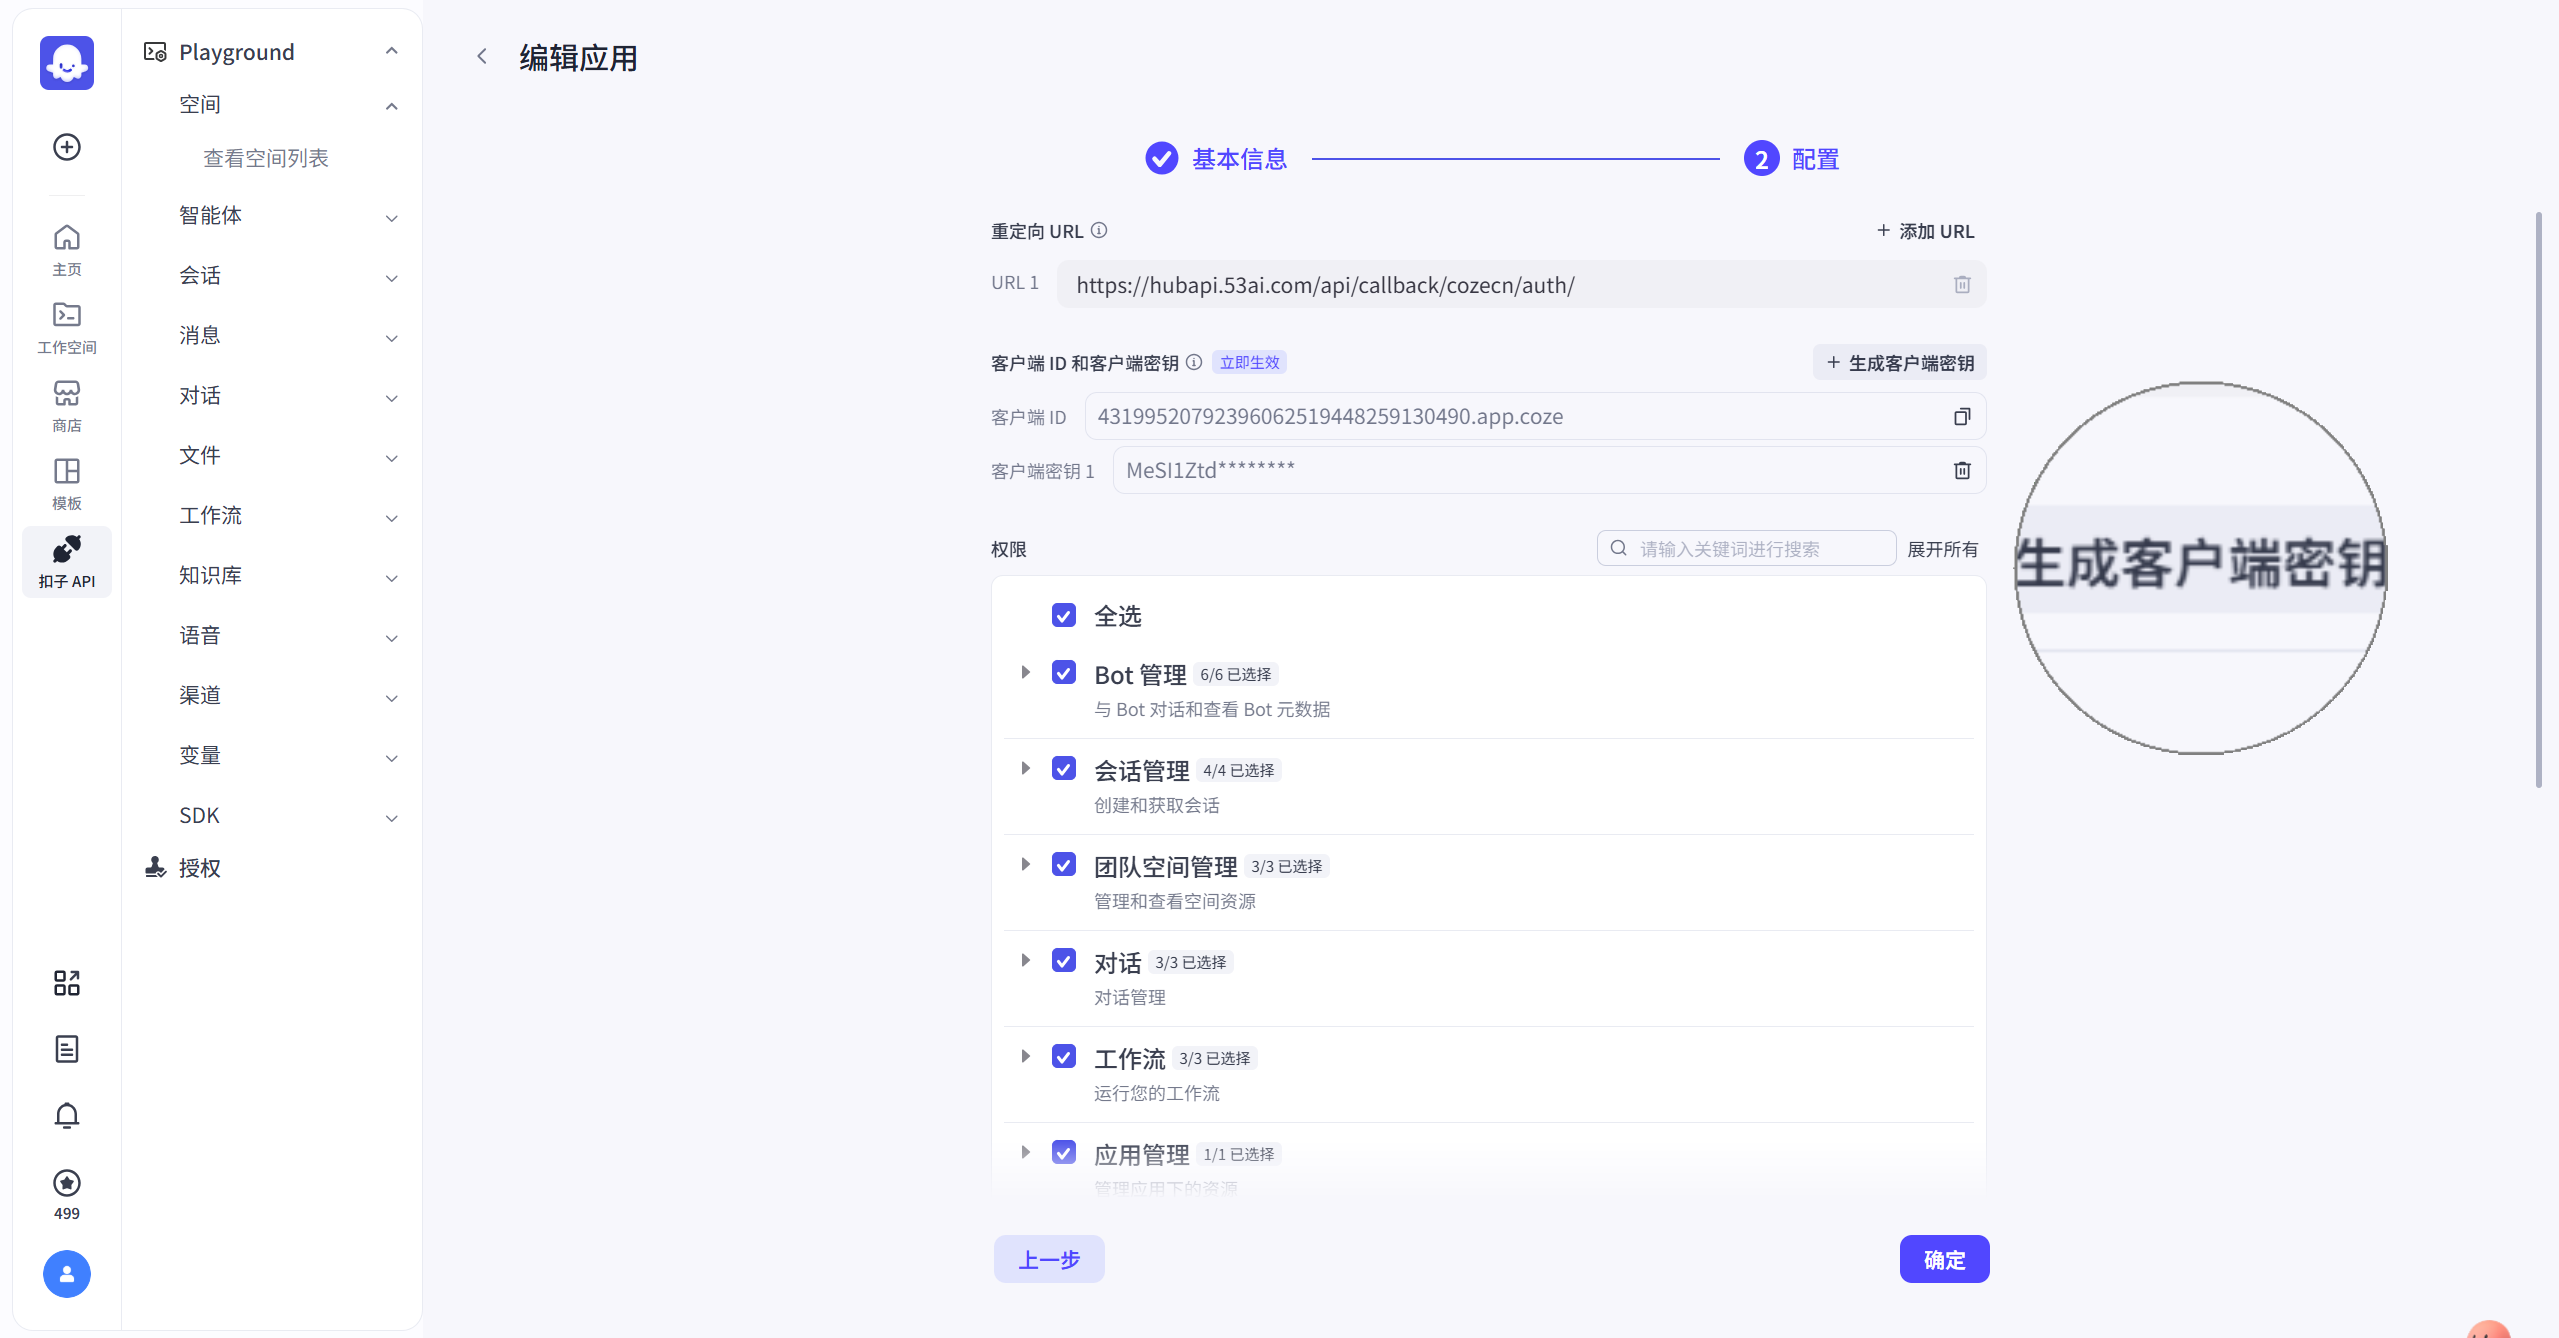
- 在“重定向 URL”栏粘贴地址:
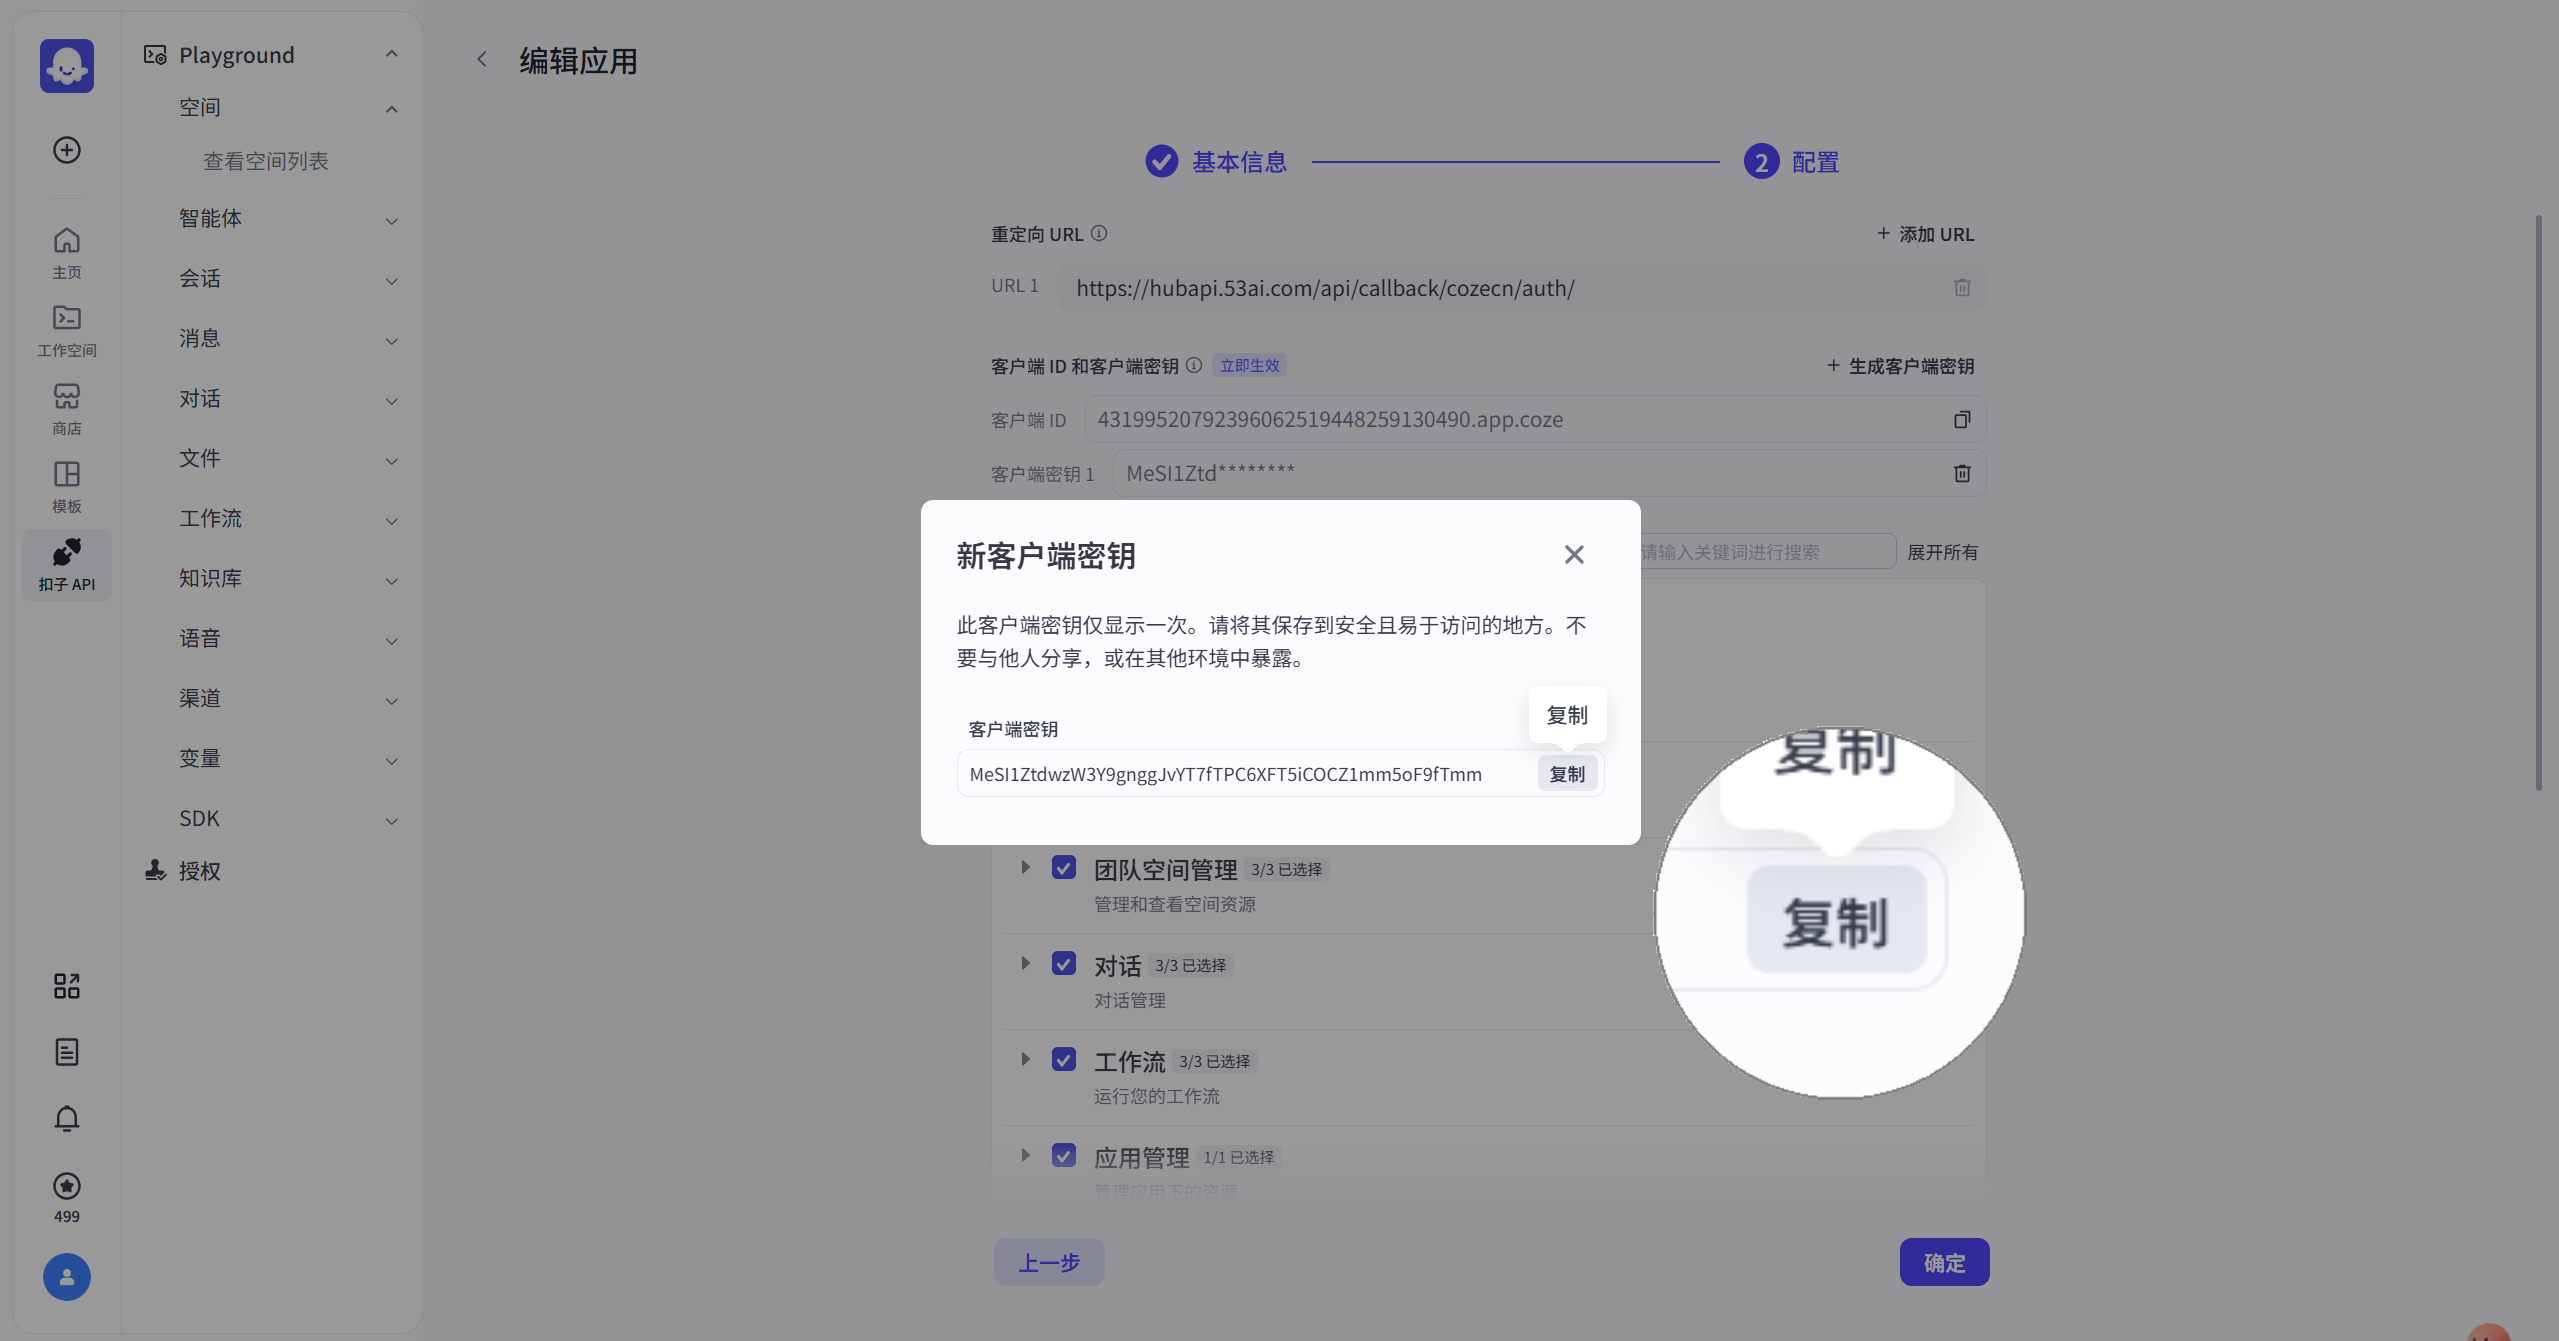
https://hubapi.53ai.com/api/callback/cozecn/auth/(可在平台接入 > 授权扣子 > 弹窗操作指引中直接复制) - 点击「生成客户端密钥」
- 勾选所需权限并点击「确定」完成设置
在 53AI Hub 中的操作
- 点击平台接入中的扣子卡片的「授权」
- 将扣子中获取的 客户端 ID 和 客户端密钥 填入对应表单
- 点击「确定」,并在跳转页点击「授权」
- 页面出现“授权成功”提示后返回 Hub,若扣子图标下方显示为「编辑 / 删除」,表示接入成功
53AI、Dify、腾讯元器支持将平台开发的全部智能体进行逐一添加
我们以Dify为例:
mermaid
flowchart LR

subgraph one["Dify 平台操作"]
direction TB
subgraph step1["创建并发布智能体"]
direction TB
A1["进入「工作室」<br>创建空白应用"] --> A2["编排并调试应用<br>点击「发布」"]
end
subgraph step2["获取API信息"]
direction TB
A3["点击「访问 API」配置接口"] --> A4["创建 API 密钥"]
end
end
subgraph two["53AI Hub 平台操作"]
direction TB
subgraph step3["添加平台信息"]
B1["点击「Dify 平台 - 管理」"]-->B2["点击「添加」<br>填写 API 密钥"]
end
subgraph step4["基础信息与配置权限"]
B3["填写基础信息<br>名称 / 分组 / 描述 / 图标"]-->B4["配置权限<br>绑定订阅等级 / 用户分组"]
end
end
C1["接入成功<br>显示为“编辑 / 删除”"]

step1 ==> step2==>step3==>step4 ==>C1

classDef difyStep fill:#FFE0B2,stroke:#FB8C00,stroke-width:2px,color:#000000
classDef hubStep fill:#BBDEFB,stroke:#1E88E5,stroke-width:2px,color:#000000
classDef successStep fill:#C8E6C9,stroke:#2E7D32,stroke-width:4px,color:#000000

classDef stepBox1 fill:#FFF3E0,stroke:#FFCC80,stroke-width:3px,color:#000000
classDef stepBox2 fill:#E3F2FD,stroke:#90CAF9,stroke-width:3px,color:#000000

class A1,A2,A3,A4 difyStep
class B1,B2,B3,B4 hubStep
class C1 successStep

class step1 stepBox1
class step2 stepBox1
class step3 stepBox2
class step4 stepBox2

style one fill:transparent,stroke:#F57C00,stroke-width:4px,stroke-dasharray: 30 8,font-weight:bold
style two fill:transparent,stroke:#1976D2,stroke-width:4px,stroke-dasharray: 30 8,font-weight:bold
在 Dify 中的操作
- 进入「工作室」页面,点击「创建空白应用」
- 编排智能体,完成调试预览后点击「发布」
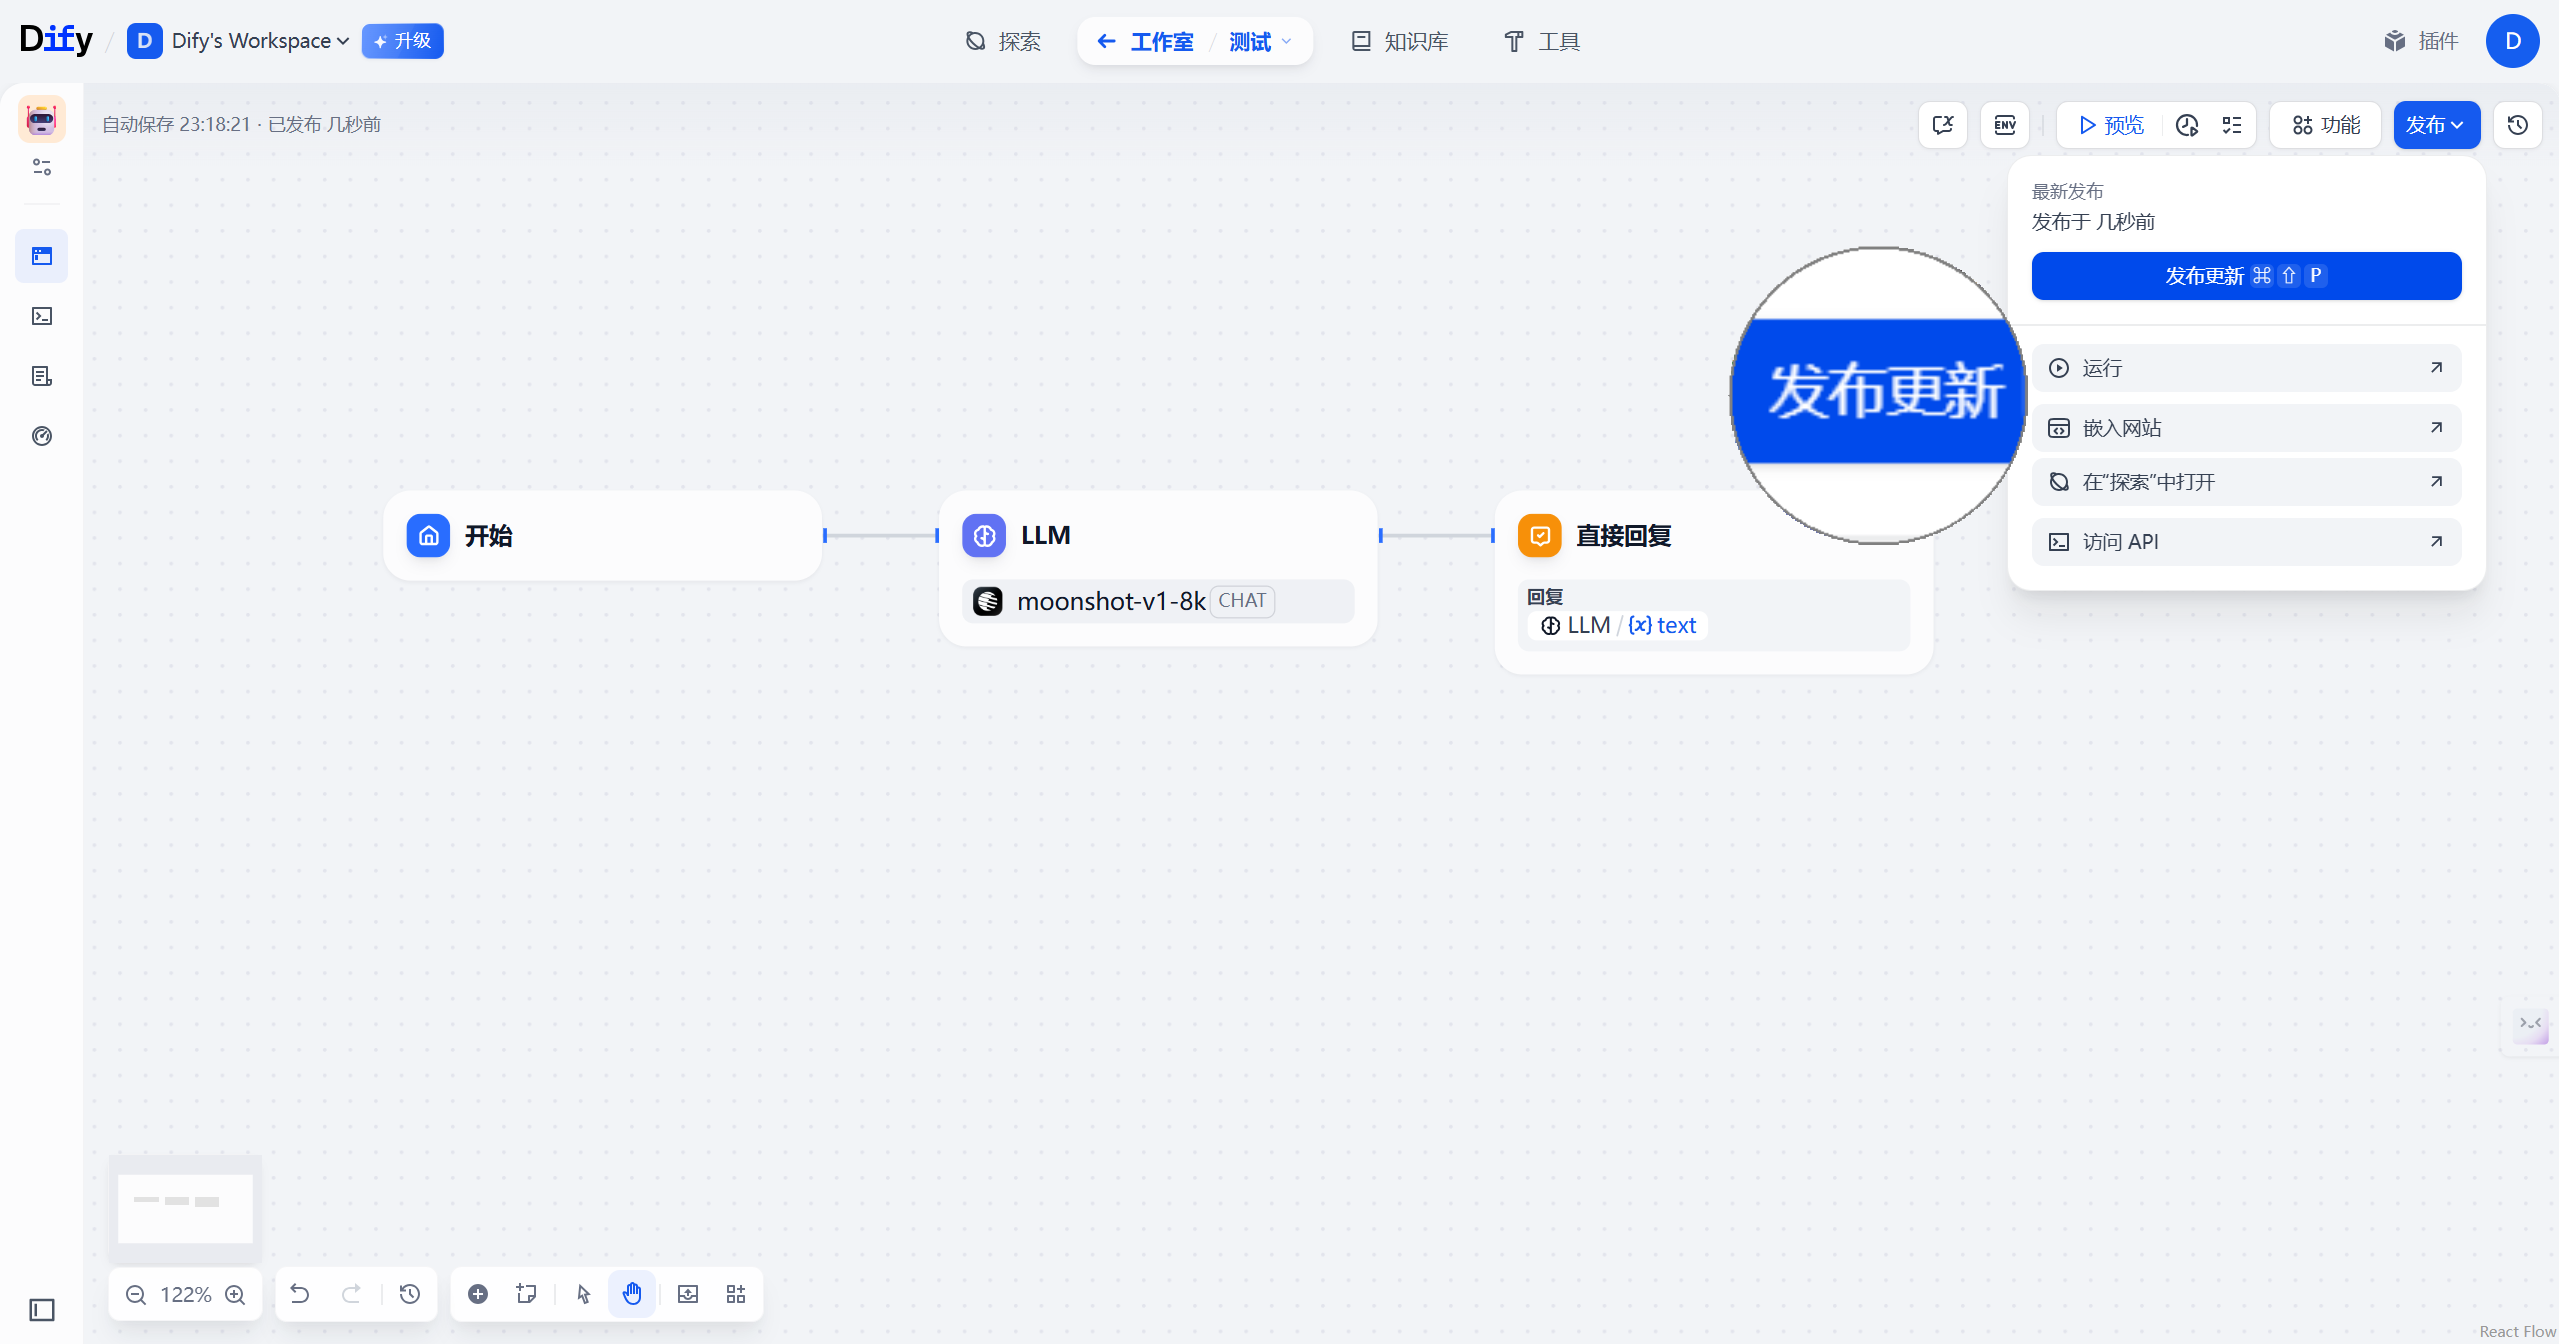
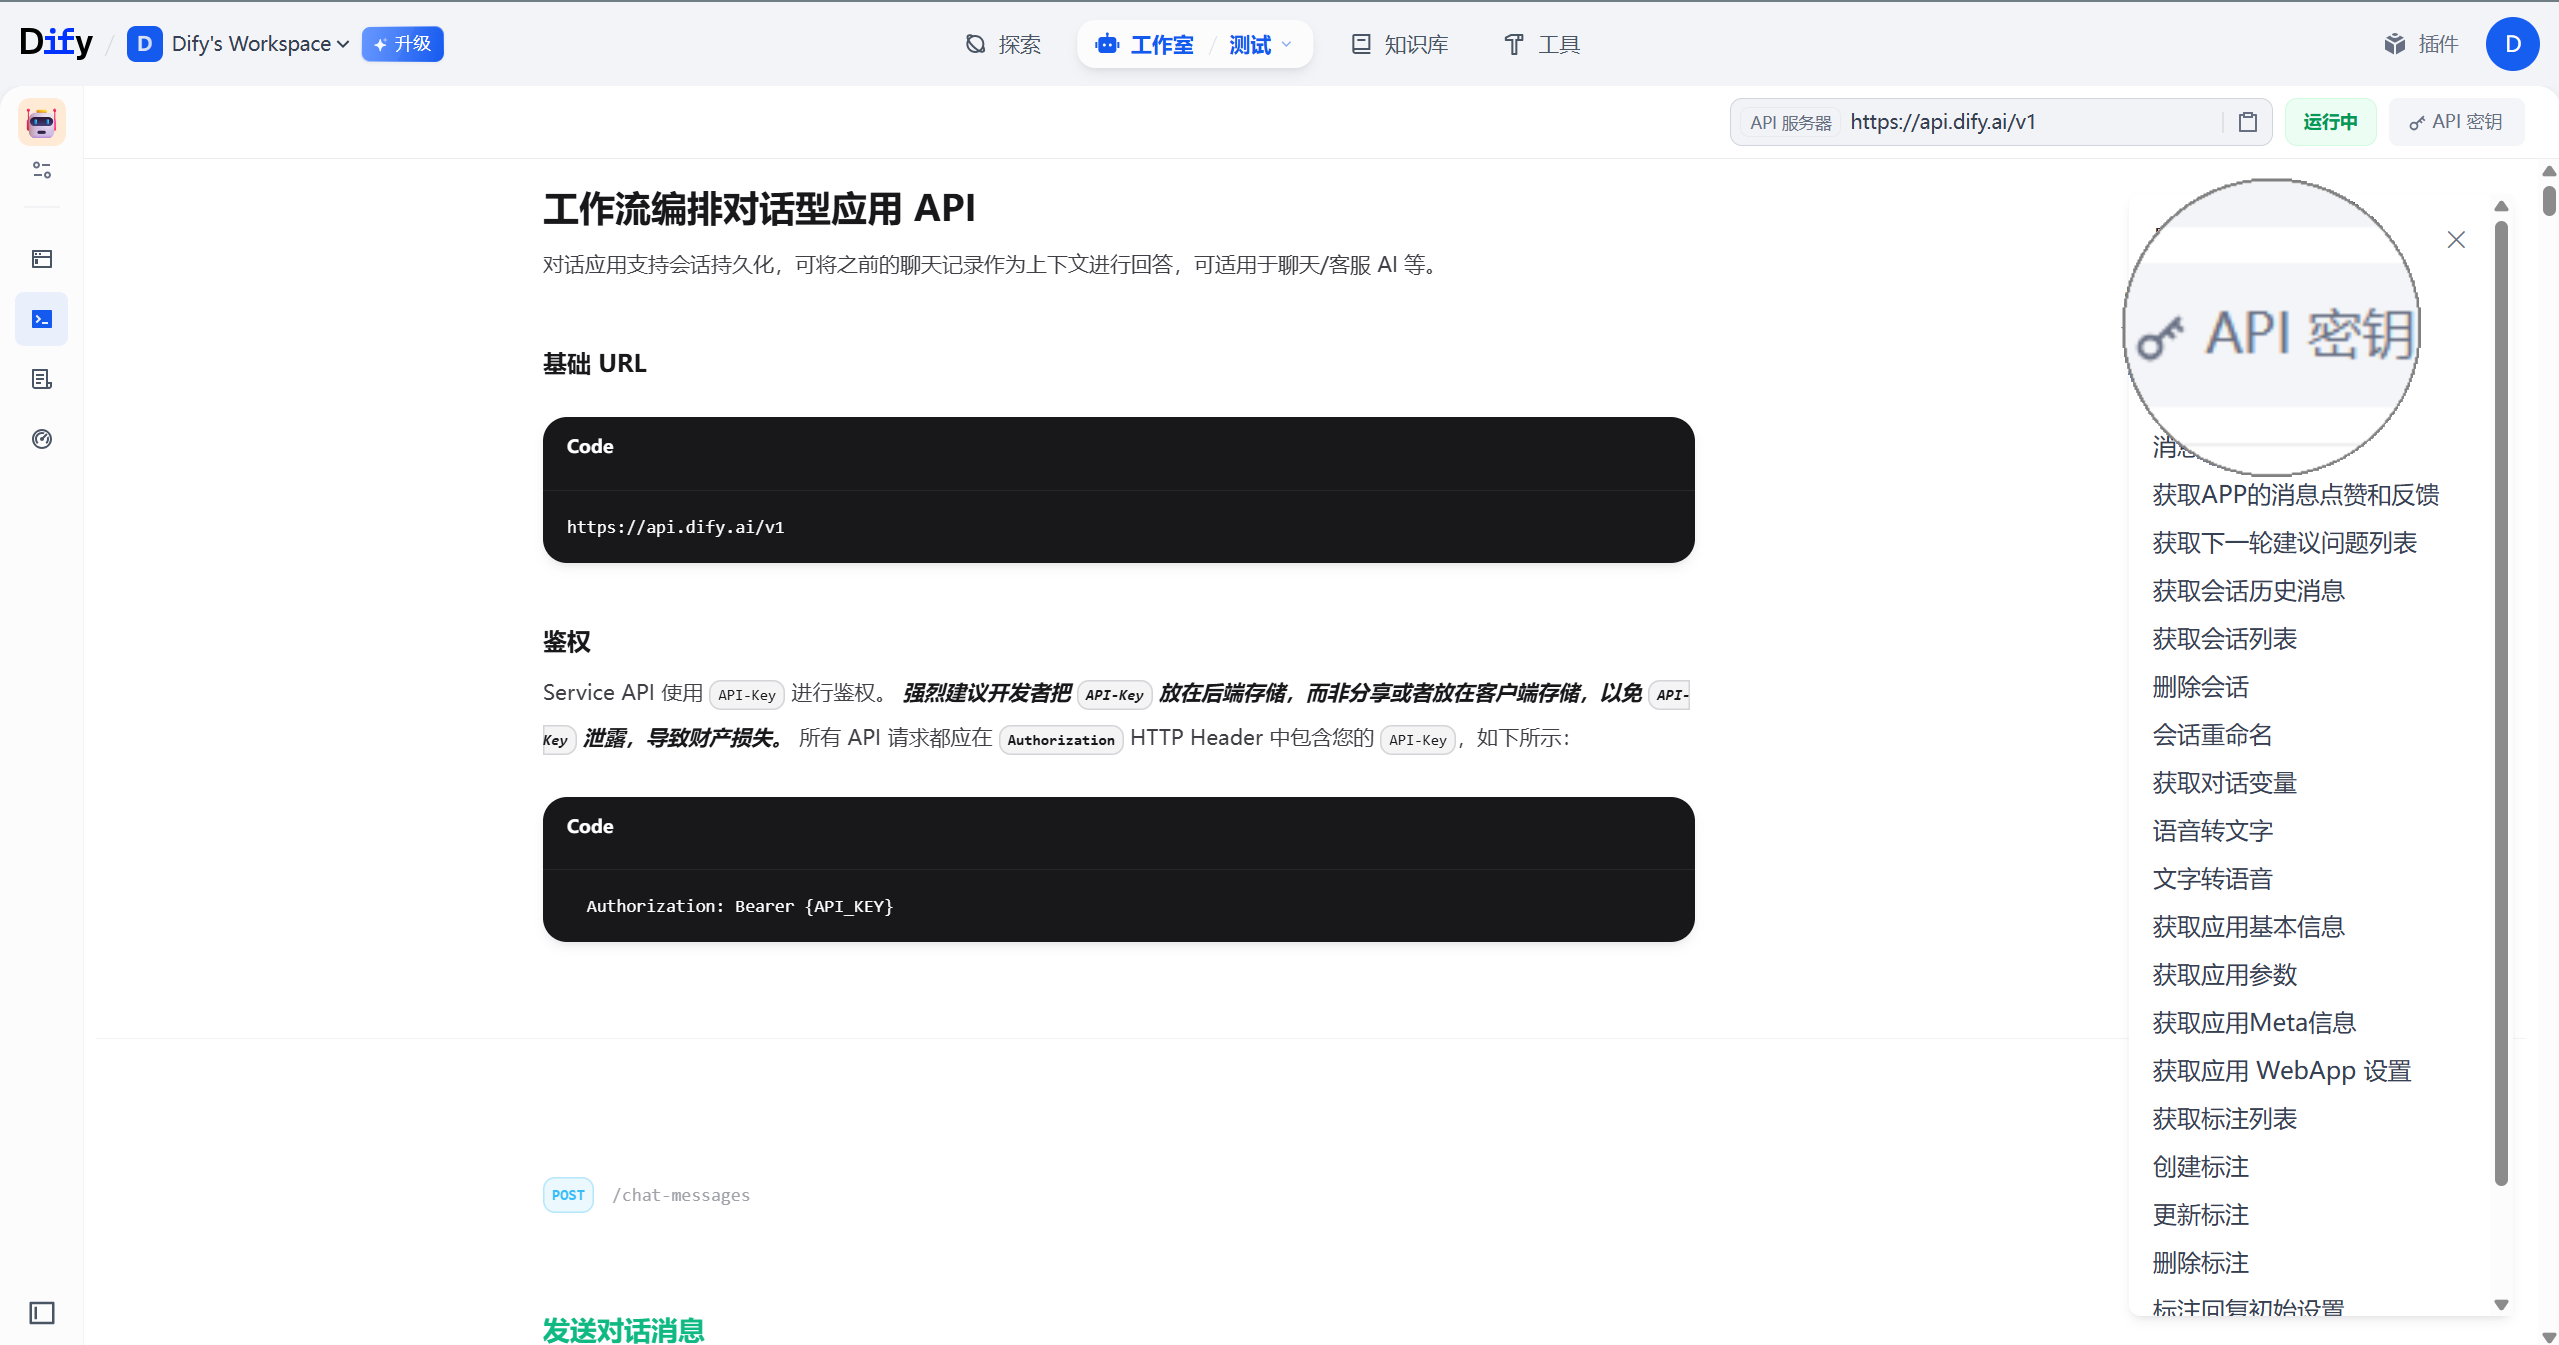
- 点击「访问 API」进入接口配置页面
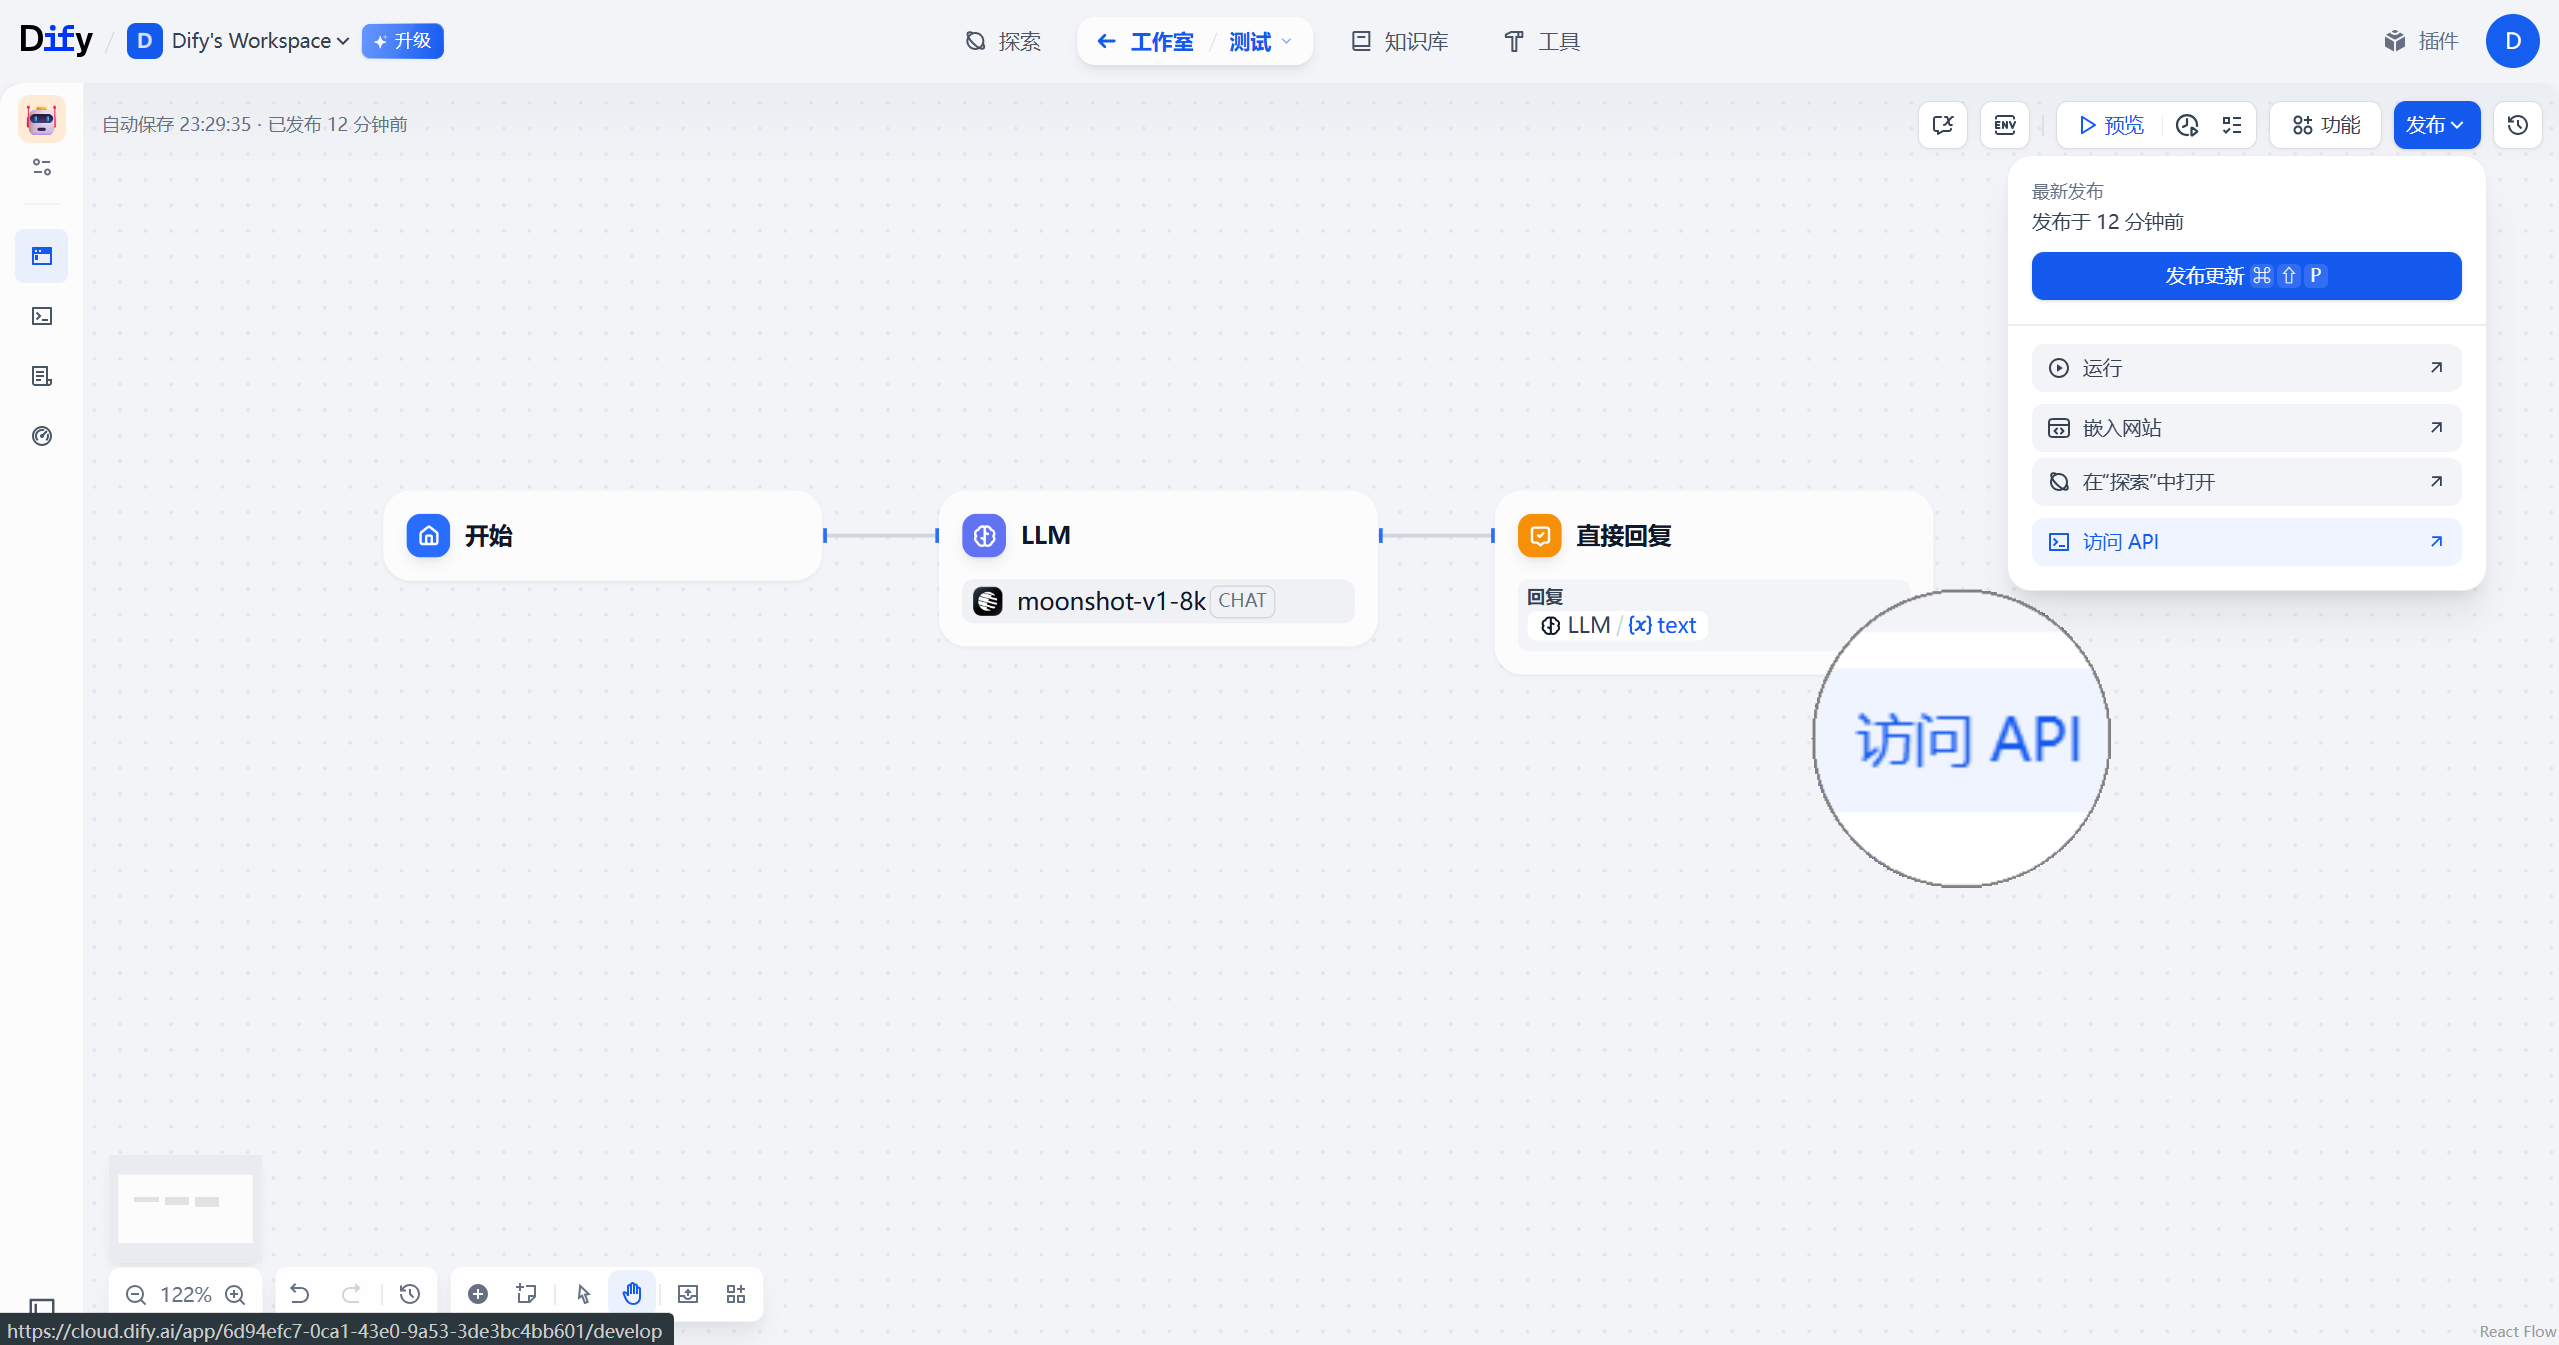
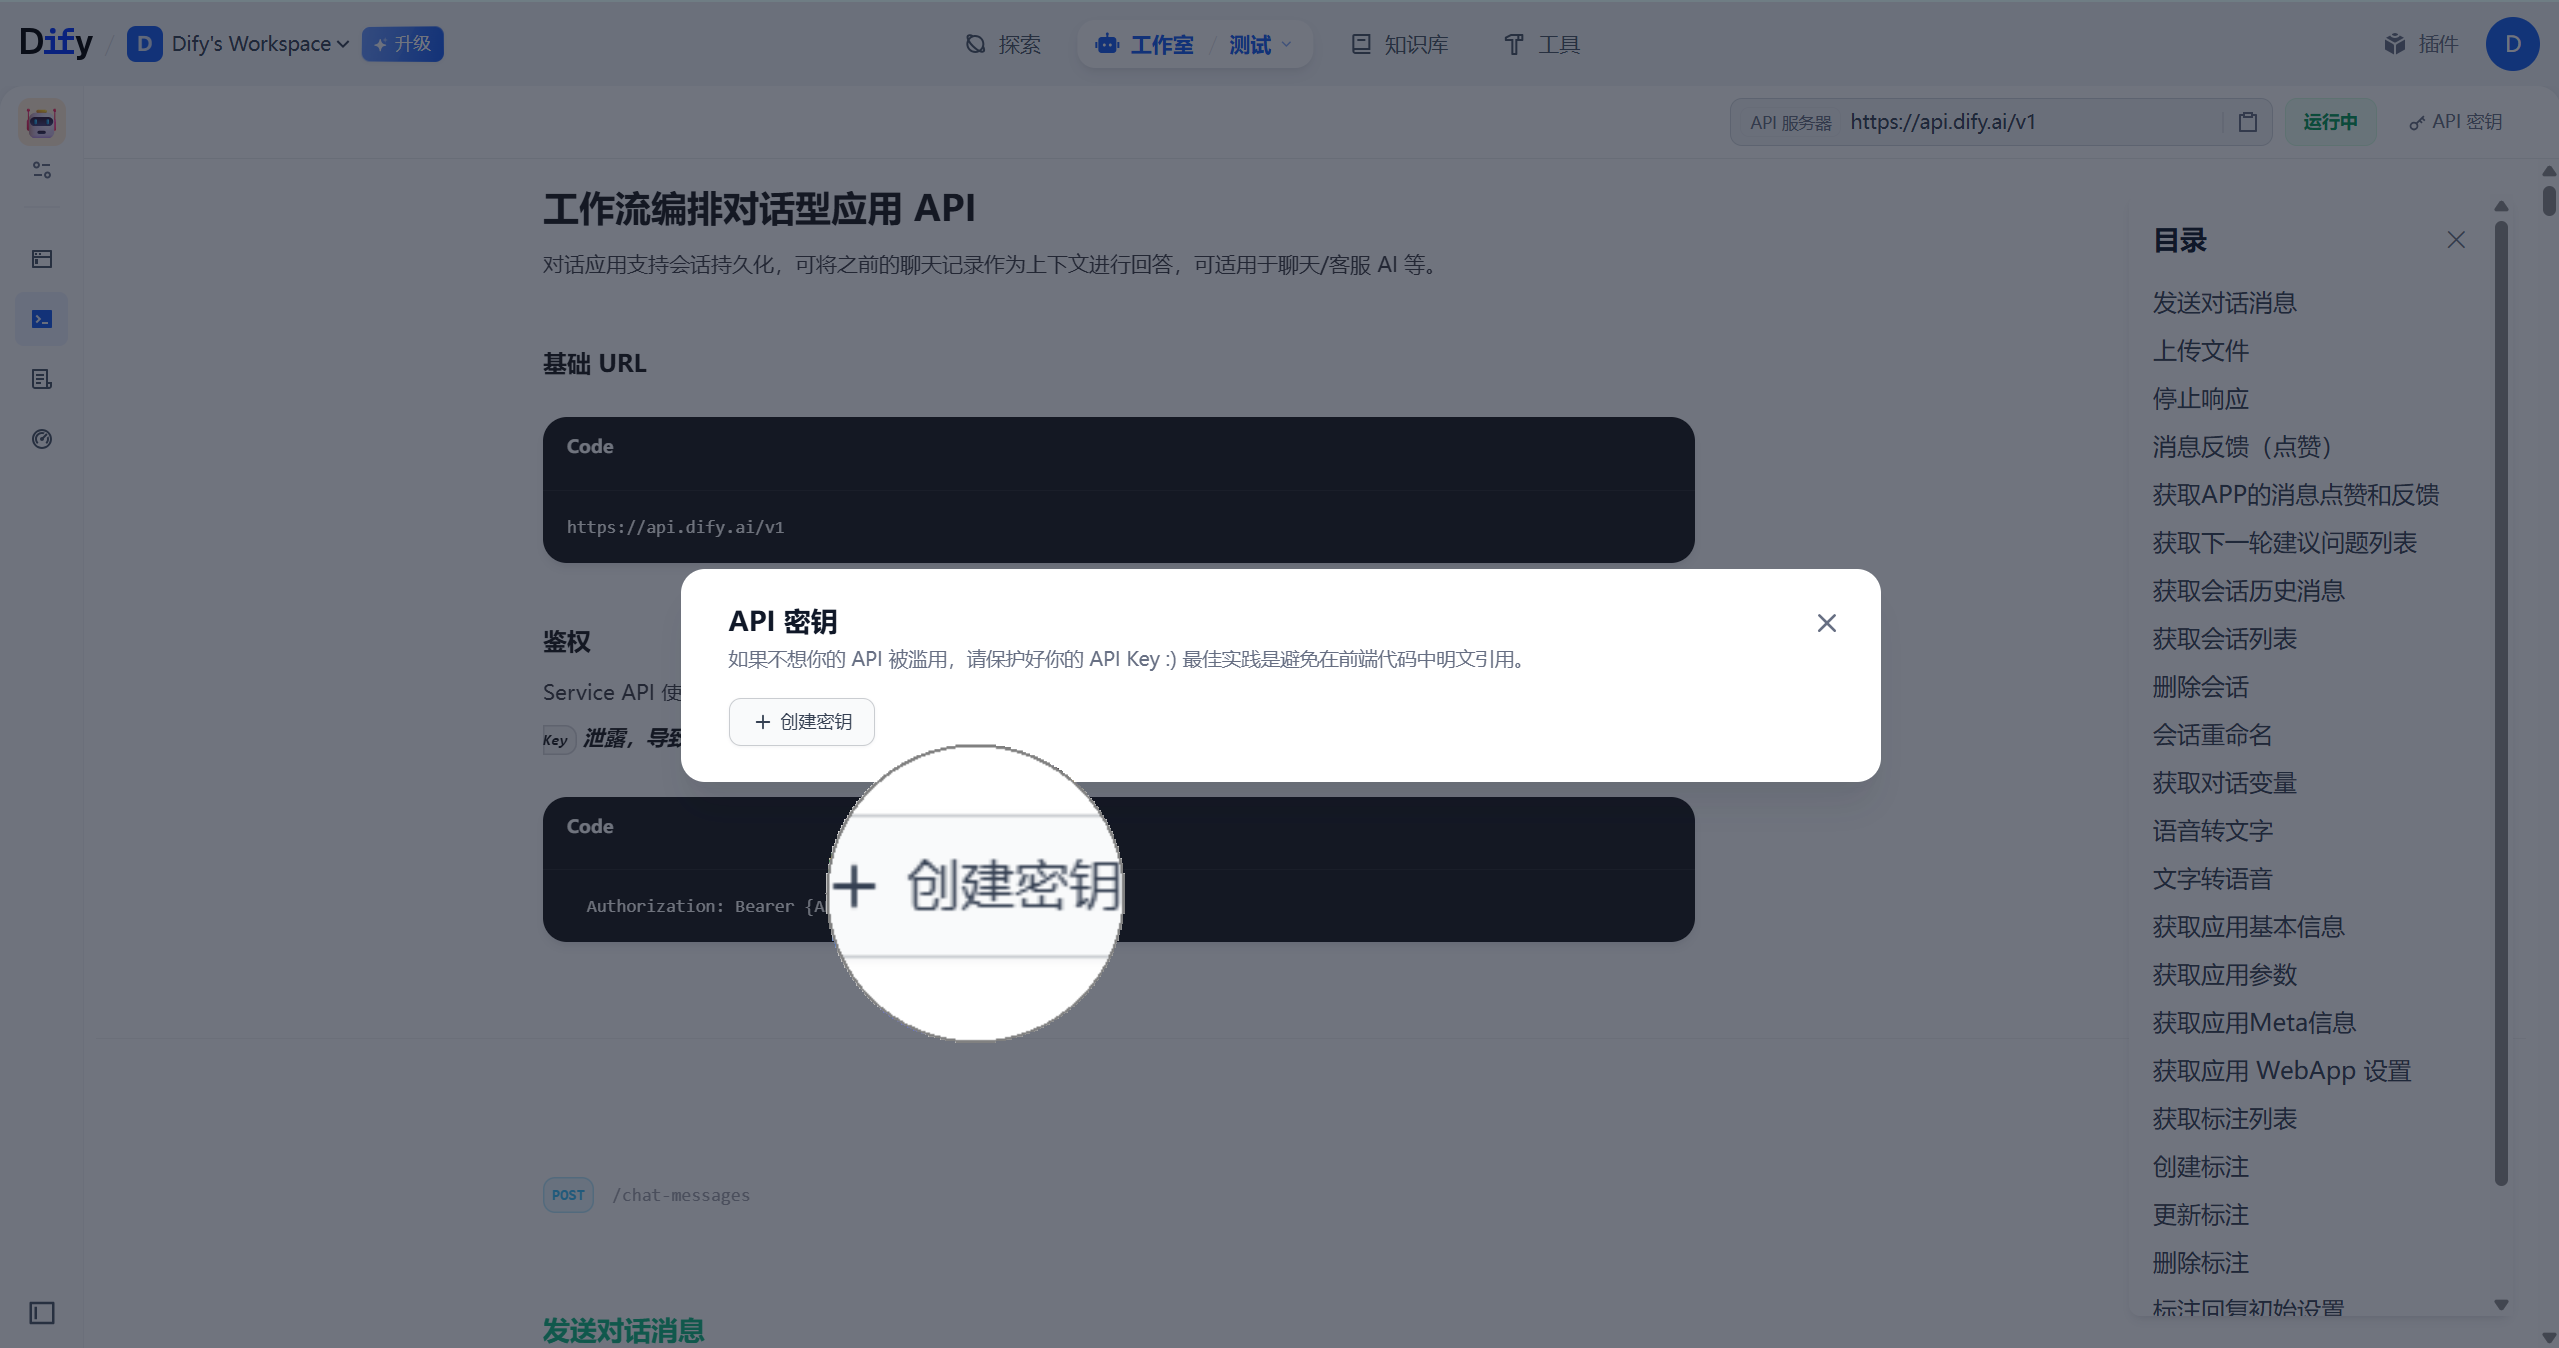
- 右上角点击「API 密钥」>「创建密钥」获取授权信息
在 53AI Hub 中的操作
· 添加平台信息
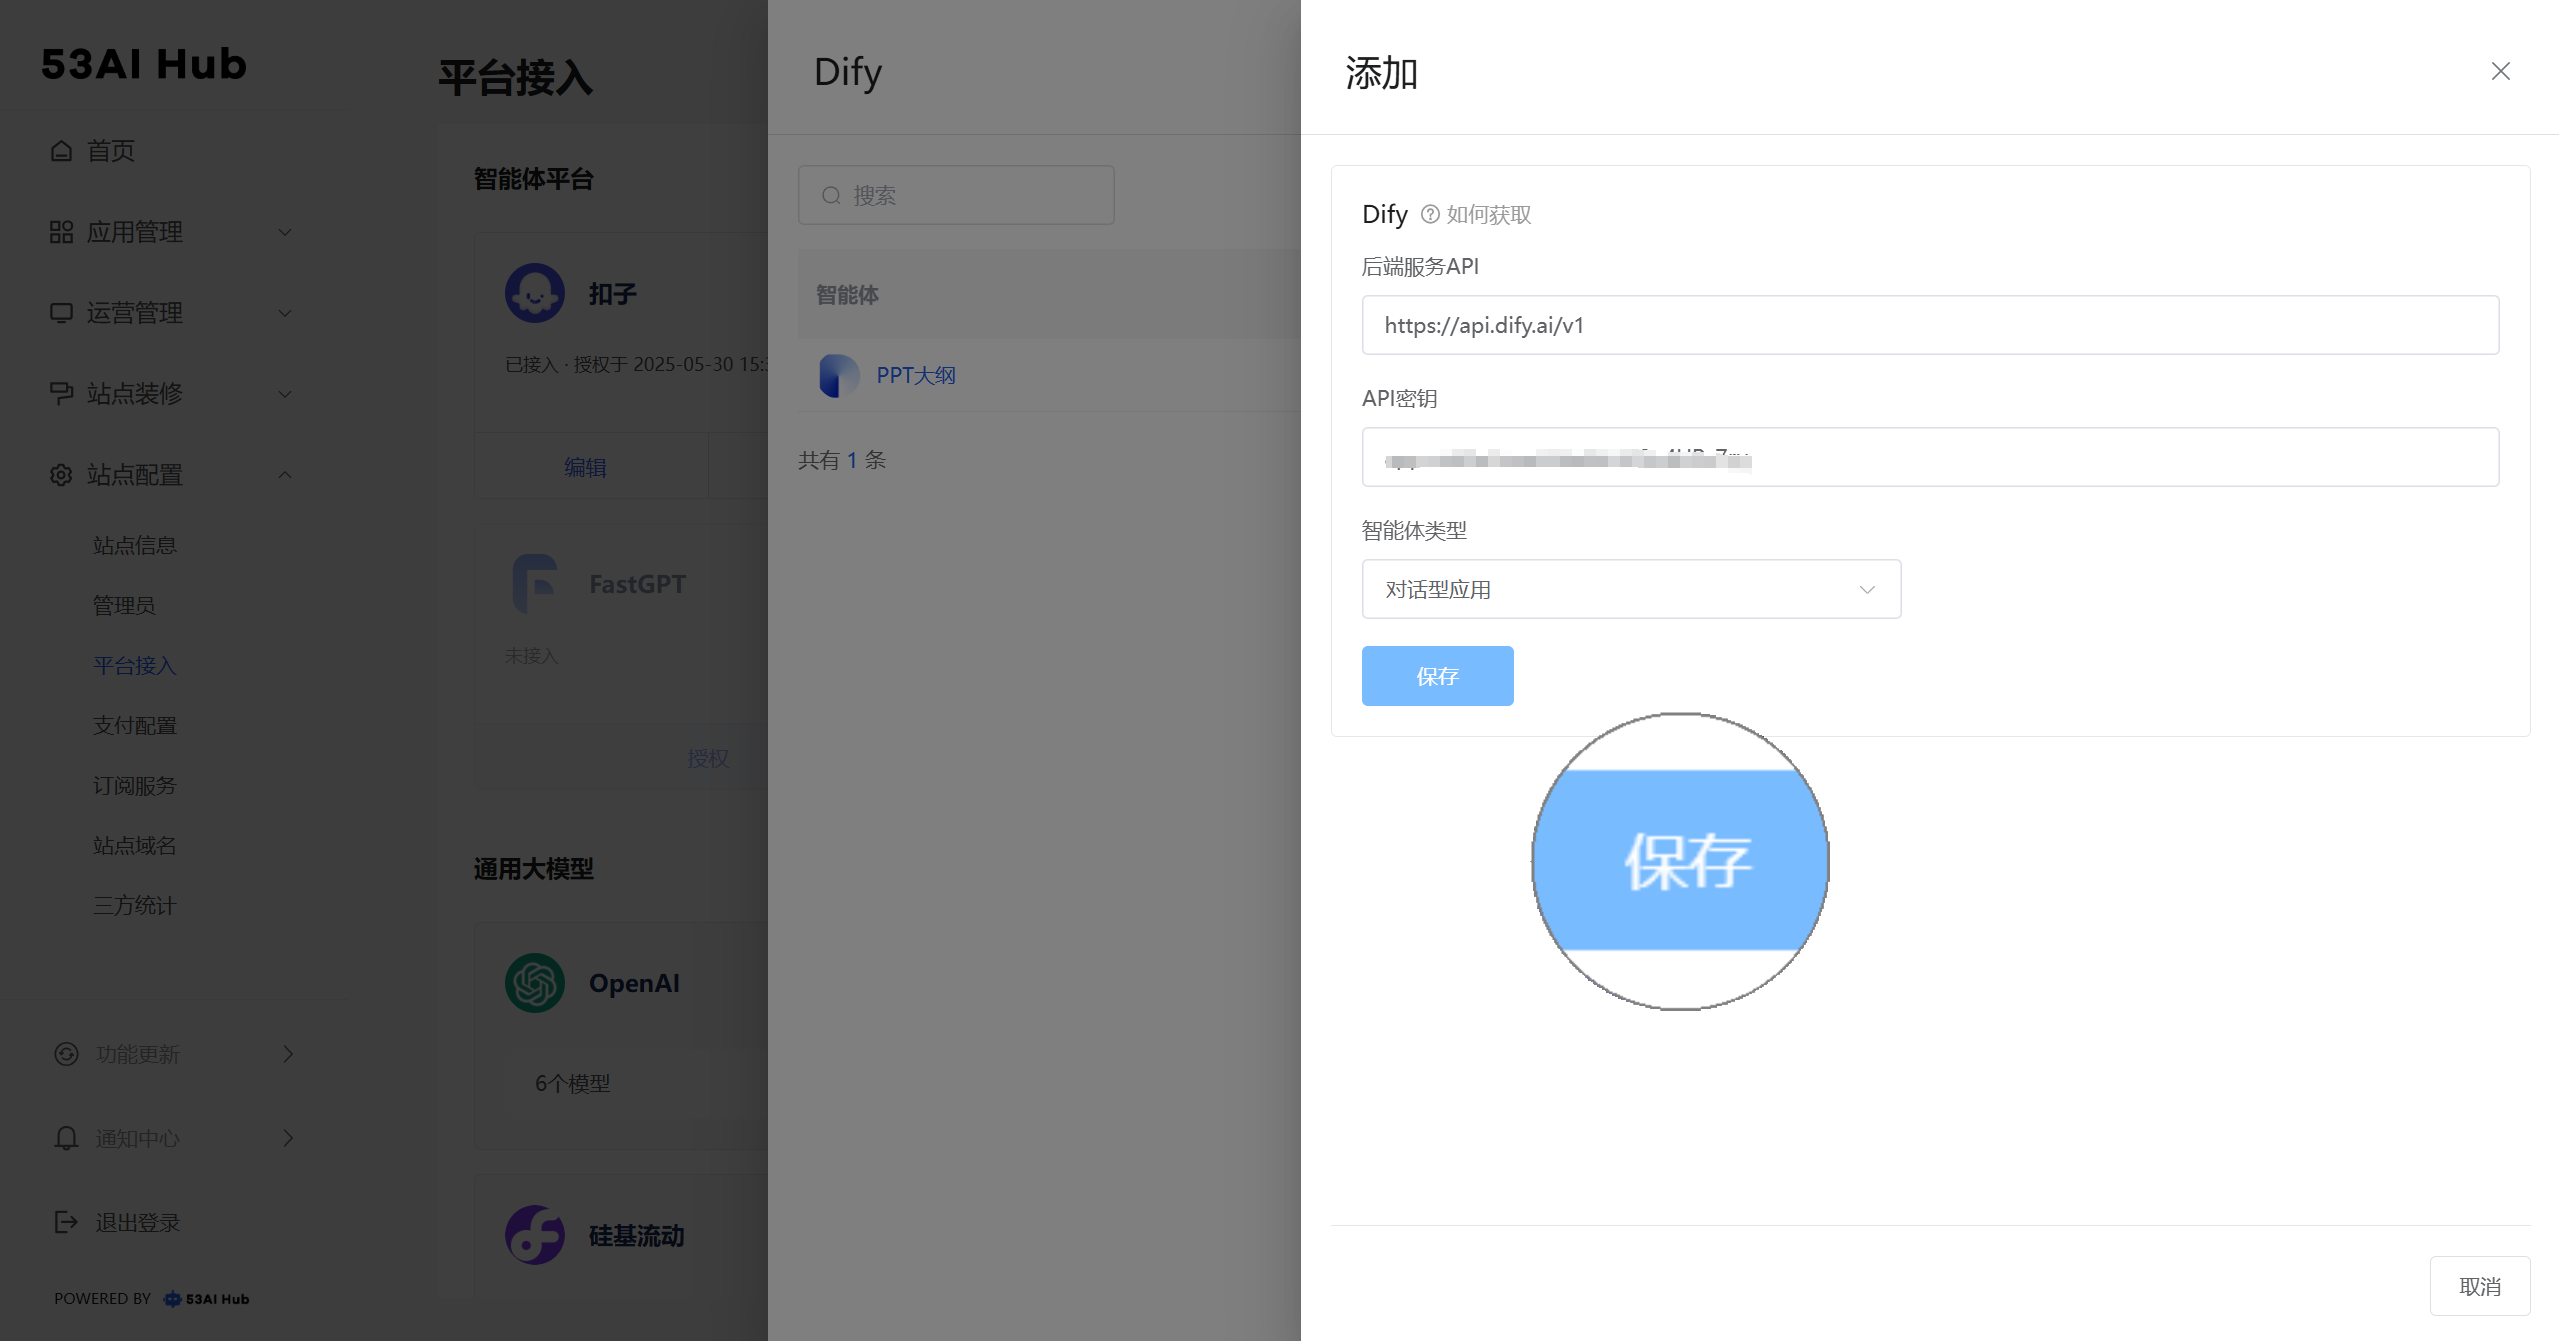
- 前往平台接入页,点击「Dify 平台 - 管理」
- 点击「添加」,将
API 密钥填入表单 - 点击「保存」完成平台信息配置
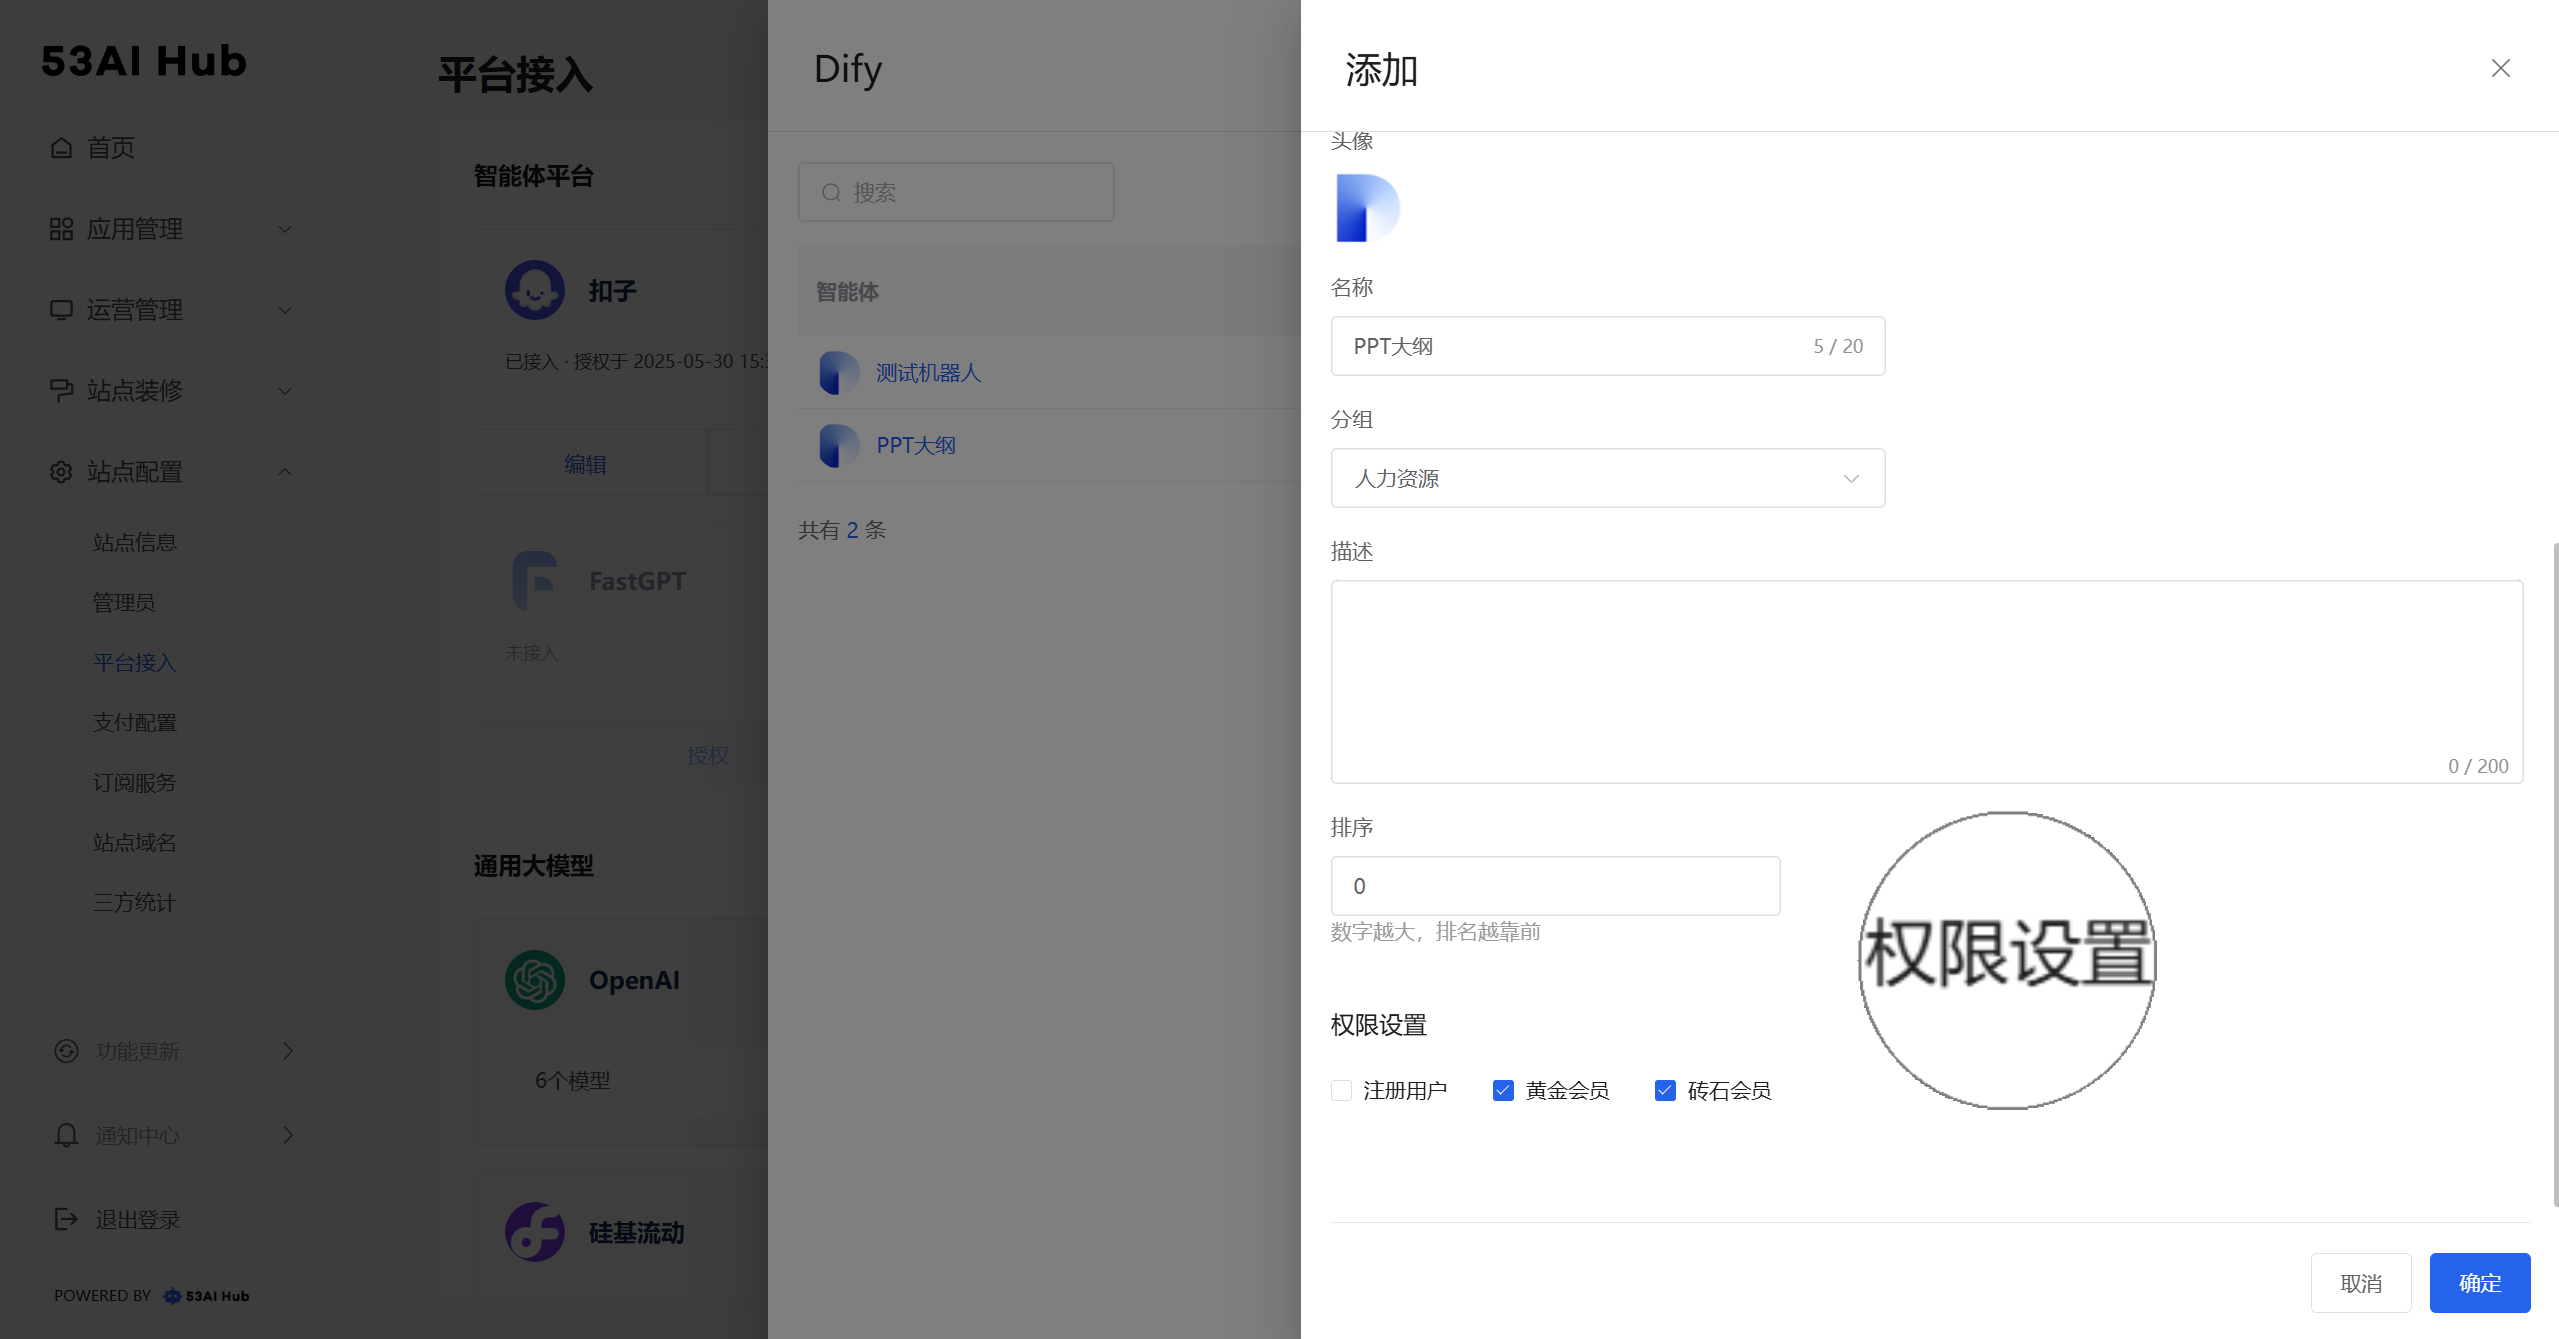
· 填写基础信息
- 接入成功后,需补充该智能体的基础信息,包括名称、分组、描述与头像
- 基础信息将展示在前台,建议命名简洁明确,便于使用者识别功能
· 权限设置
- 设置智能体的访问权限
- 可根据订阅等级或用户分组配置使用范围,实现权限精细化管理
云计算平台【暂无云计算平台】
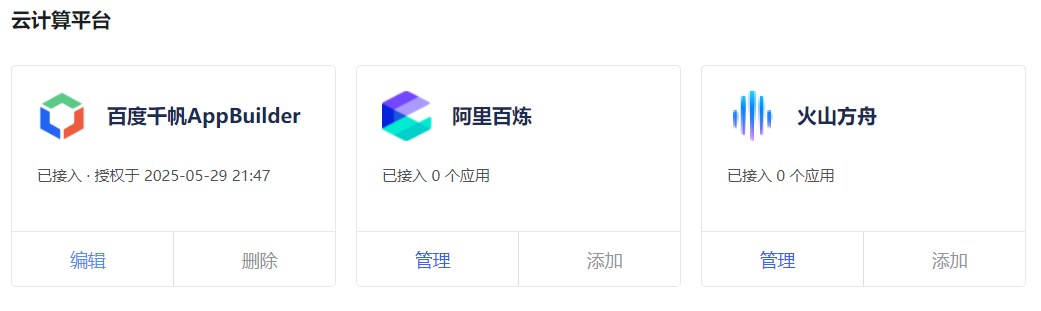
阿里百炼、火山方舟(逐一添加)
我们以火山方舟为例:
mermaid
flowchart LR

subgraph one["火山方舟 平台操作"]
direction TB
subgraph step1["创建并发布智能体"]
direction TB
A1["在「应用实验室」创建应用"] --> A2["编排并调试应用<br>点击「发布」"]
end
subgraph step2["获取API信息"]
direction TB
A3["「系统管理」中<br>创建 API Key"] --> A4["在应用实验室中<br>获取 Bot ID"]
end
end
subgraph two["53AI Hub 平台操作"]
direction TB
subgraph step3["添加平台信息"]
B1["点击「火山方舟 - 管理」"]-->B2["点击「添加」<br>填写 API Key 和 Bot ID"]
end
subgraph step4["基础信息与配置权限"]
B3["填写基础信息<br>名称 / 分组 / 描述 / 图标"]-->B4["配置权限<br>绑定订阅等级 / 用户分组"]
end
end
C1["接入成功<br>显示为“已接入*个应用”"]

step1 ==> step2==>step3==>step4 ==>C1

classDef difyStep fill:#FFE0B2,stroke:#FB8C00,stroke-width:2px,color:#000000
classDef hubStep fill:#BBDEFB,stroke:#1E88E5,stroke-width:2px,color:#000000
classDef successStep fill:#C8E6C9,stroke:#2E7D32,stroke-width:4px,color:#000000

classDef stepBox1 fill:#FFF3E0,stroke:#FFCC80,stroke-width:3px,color:#000000
classDef stepBox2 fill:#E3F2FD,stroke:#90CAF9,stroke-width:3px,color:#000000

class A1,A2,A3,A4 difyStep
class B1,B2,B3,B4 hubStep
class C1 successStep

class step1 stepBox1
class step2 stepBox1
class step3 stepBox2
class step4 stepBox2

style one fill:transparent,stroke:#F57C00,stroke-width:4px,stroke-dasharray: 30 8,font-weight:bold
style two fill:transparent,stroke:#1976D2,stroke-width:4px,stroke-dasharray: 30 8,font-weight:bold
在火山方舟中的操作
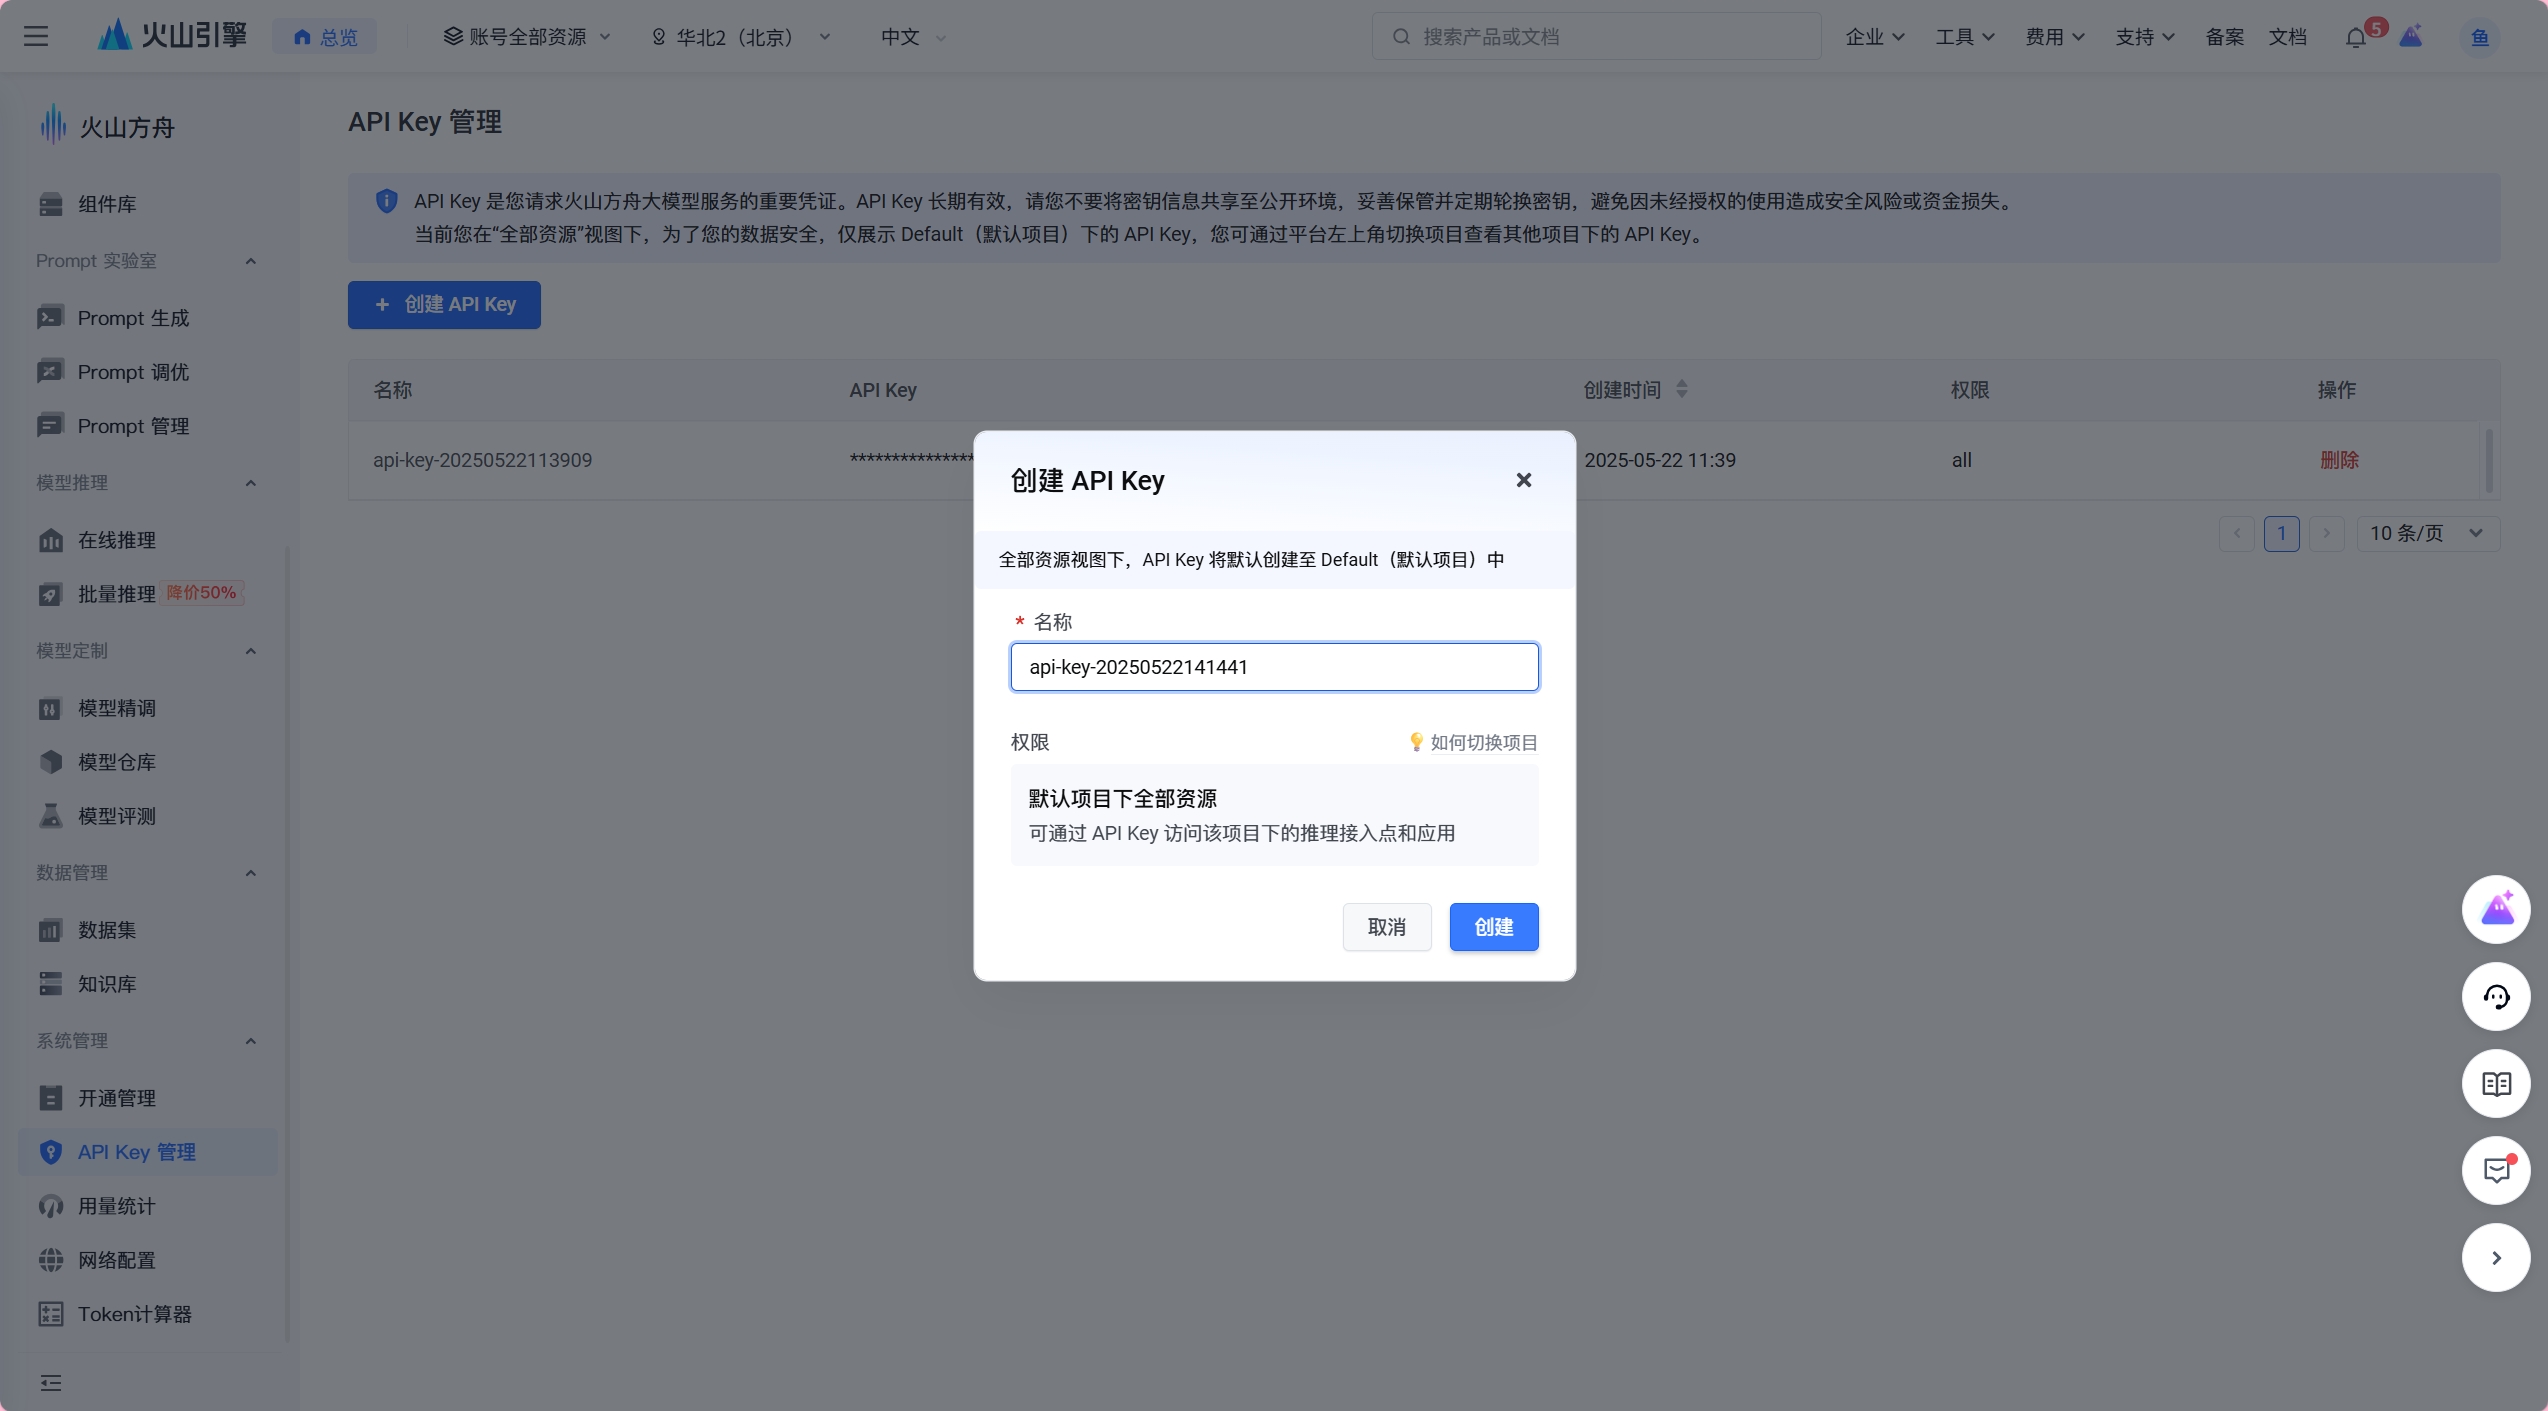
- 在火山引擎中搭建所需的智能体
- 进入「系统管理 - API Key 管理」,点击「创建 API Key」获取密钥
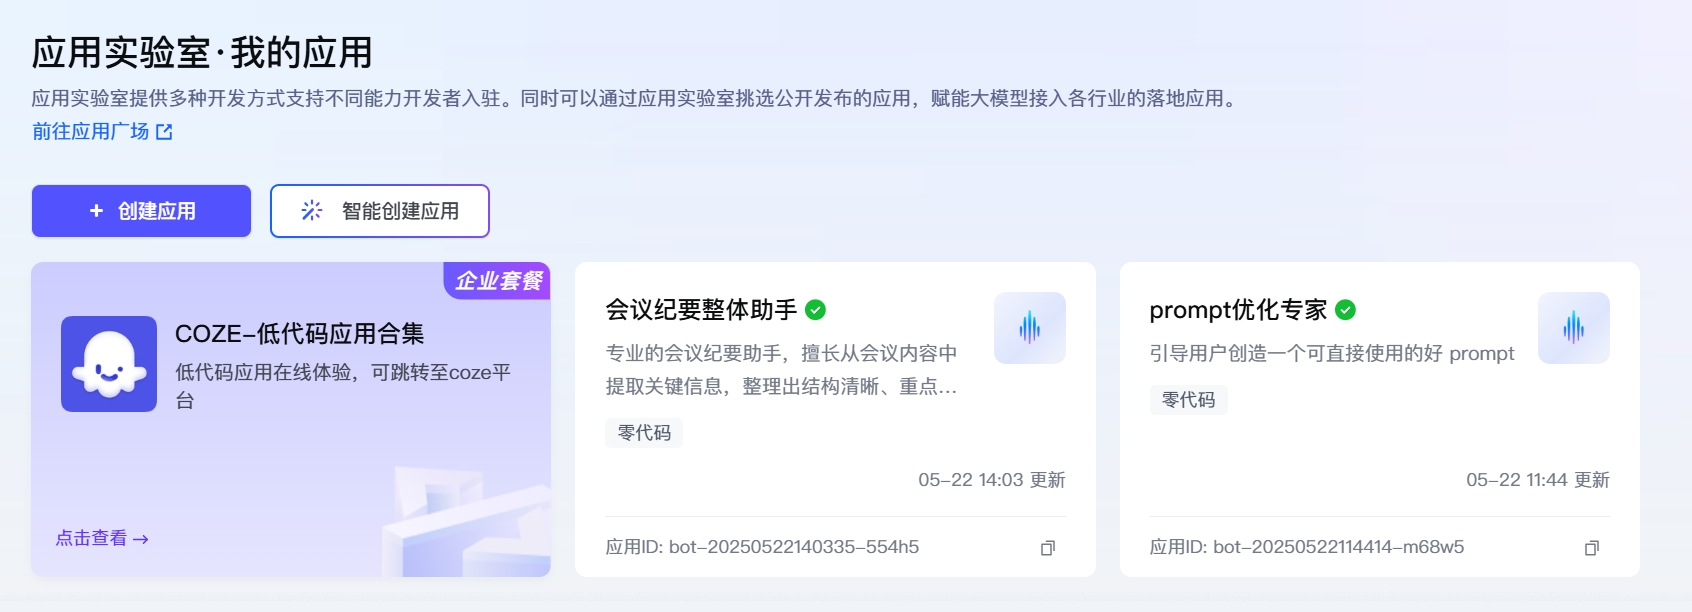
- 前往「应用实验室 - 我的应用」,在对应应用下方可查看并复制
Bot ID
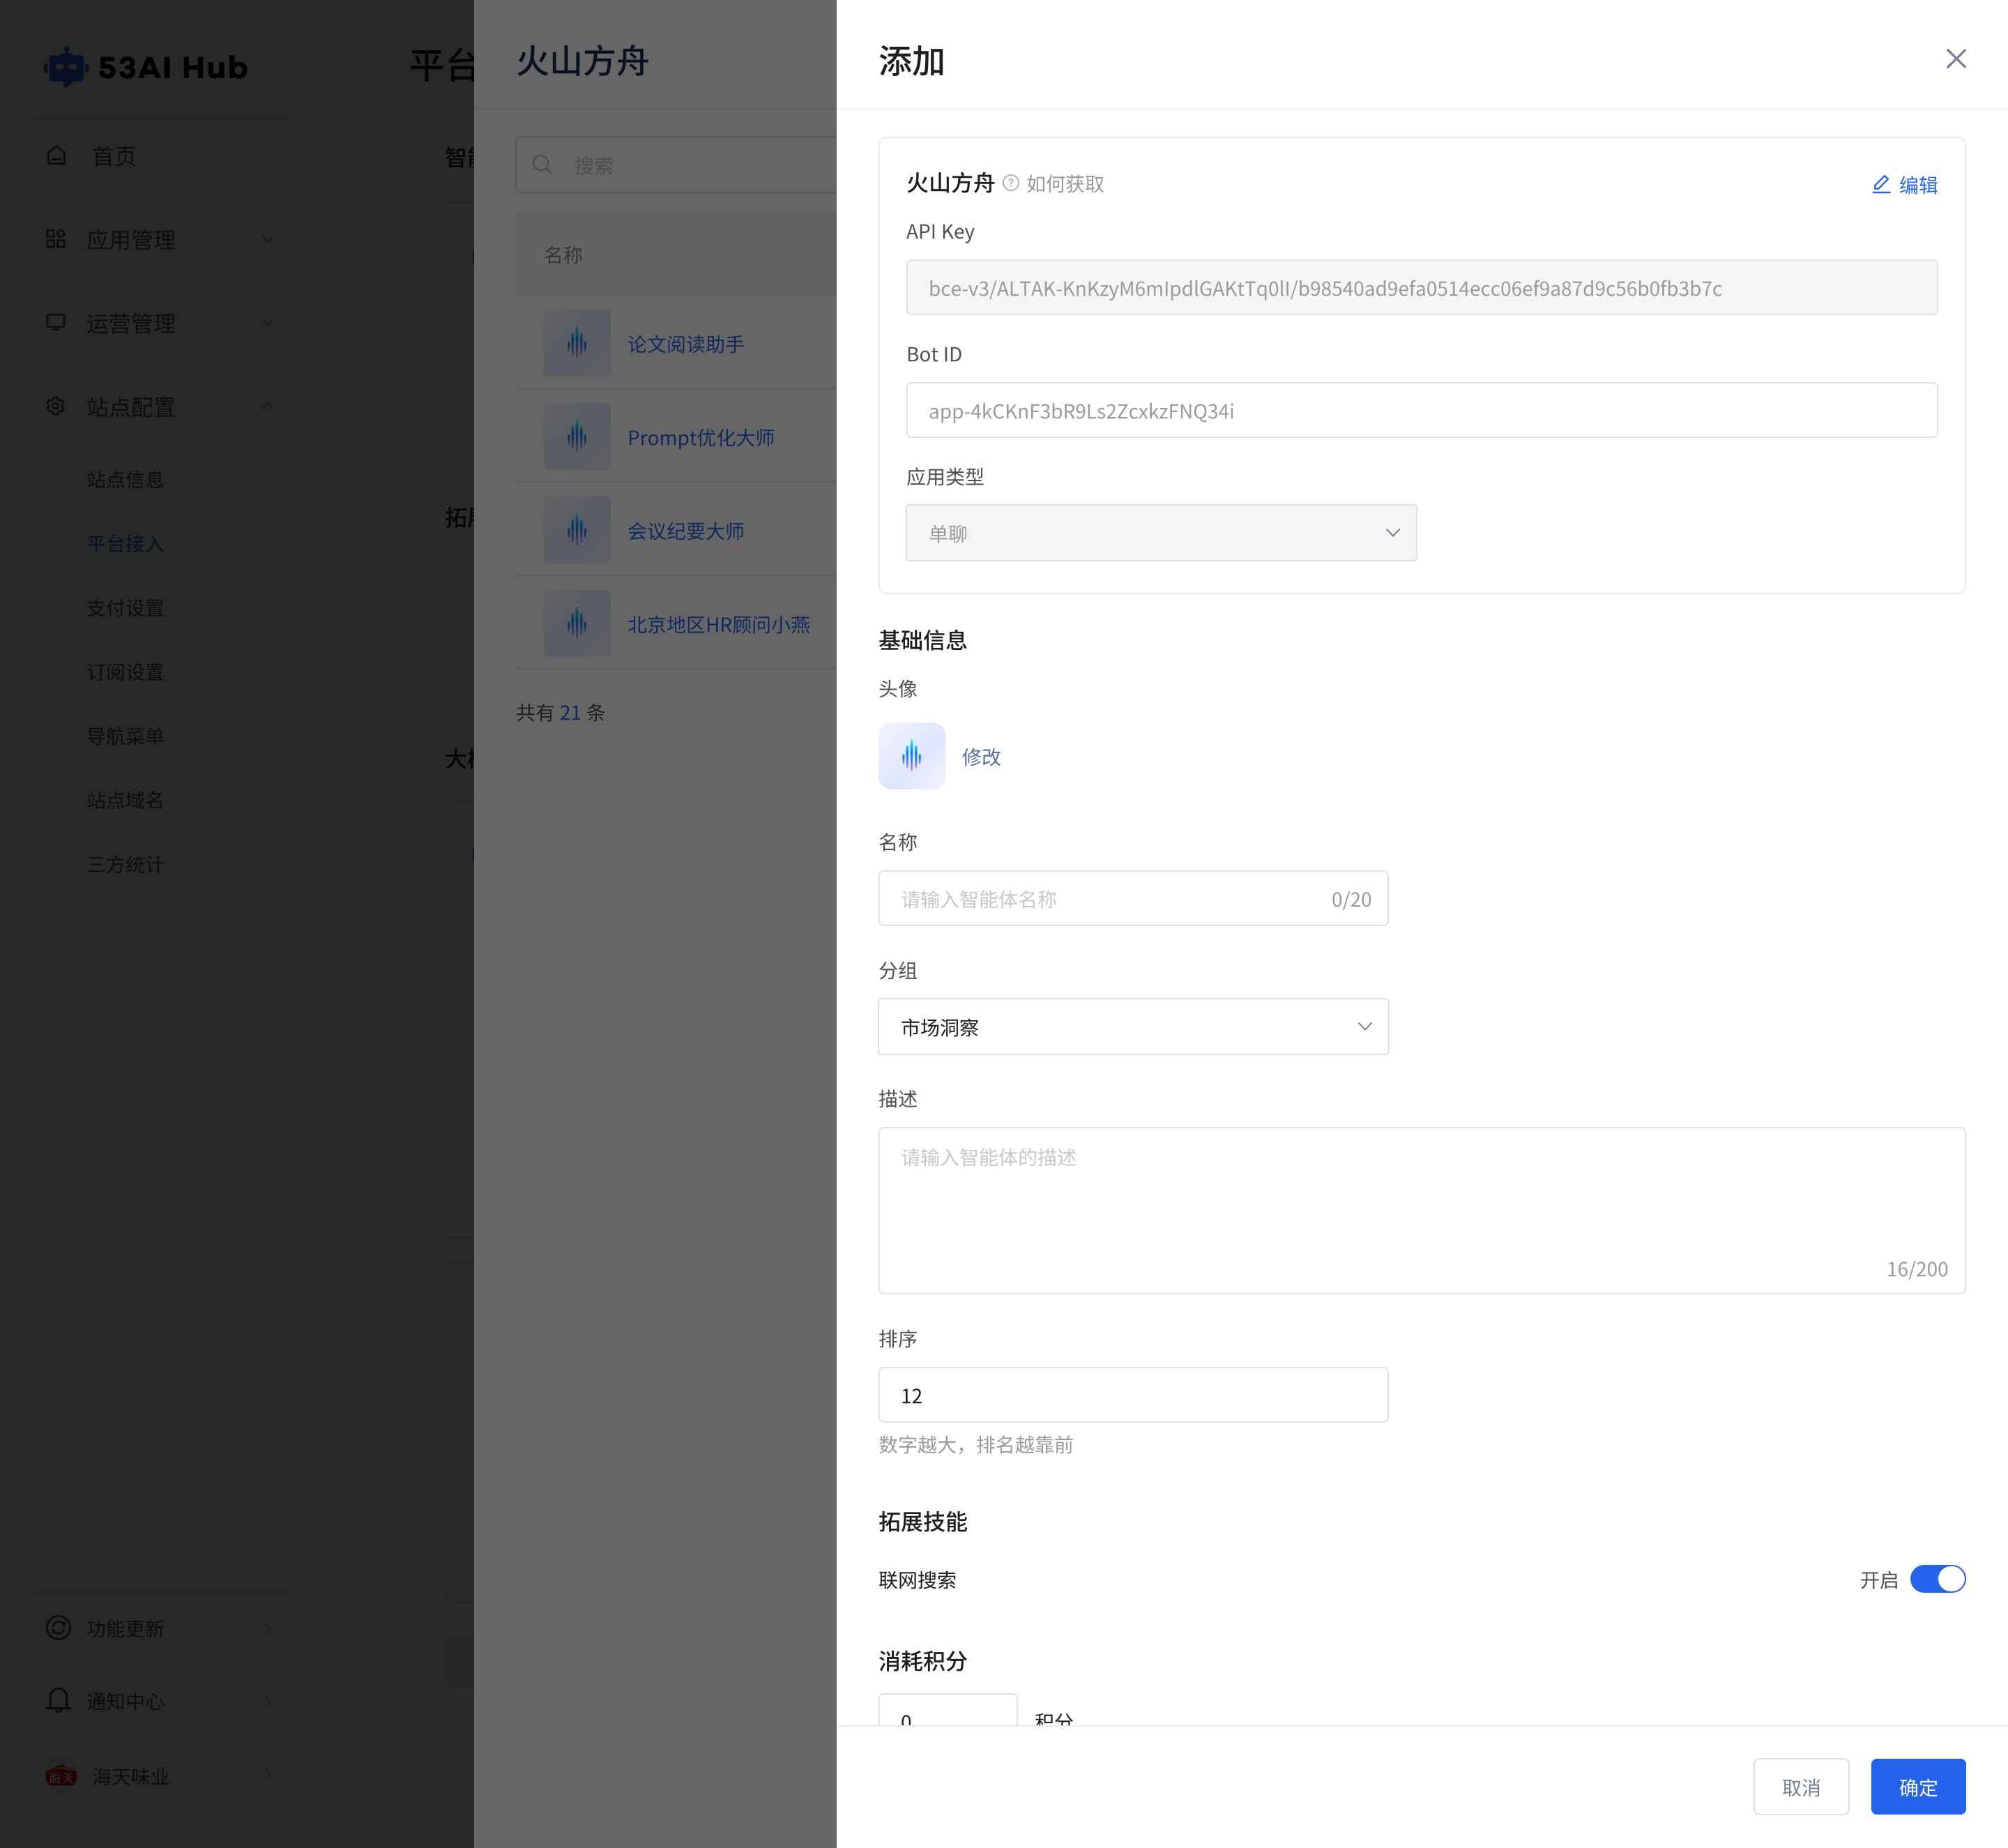
在 53AI Hub 中的操作
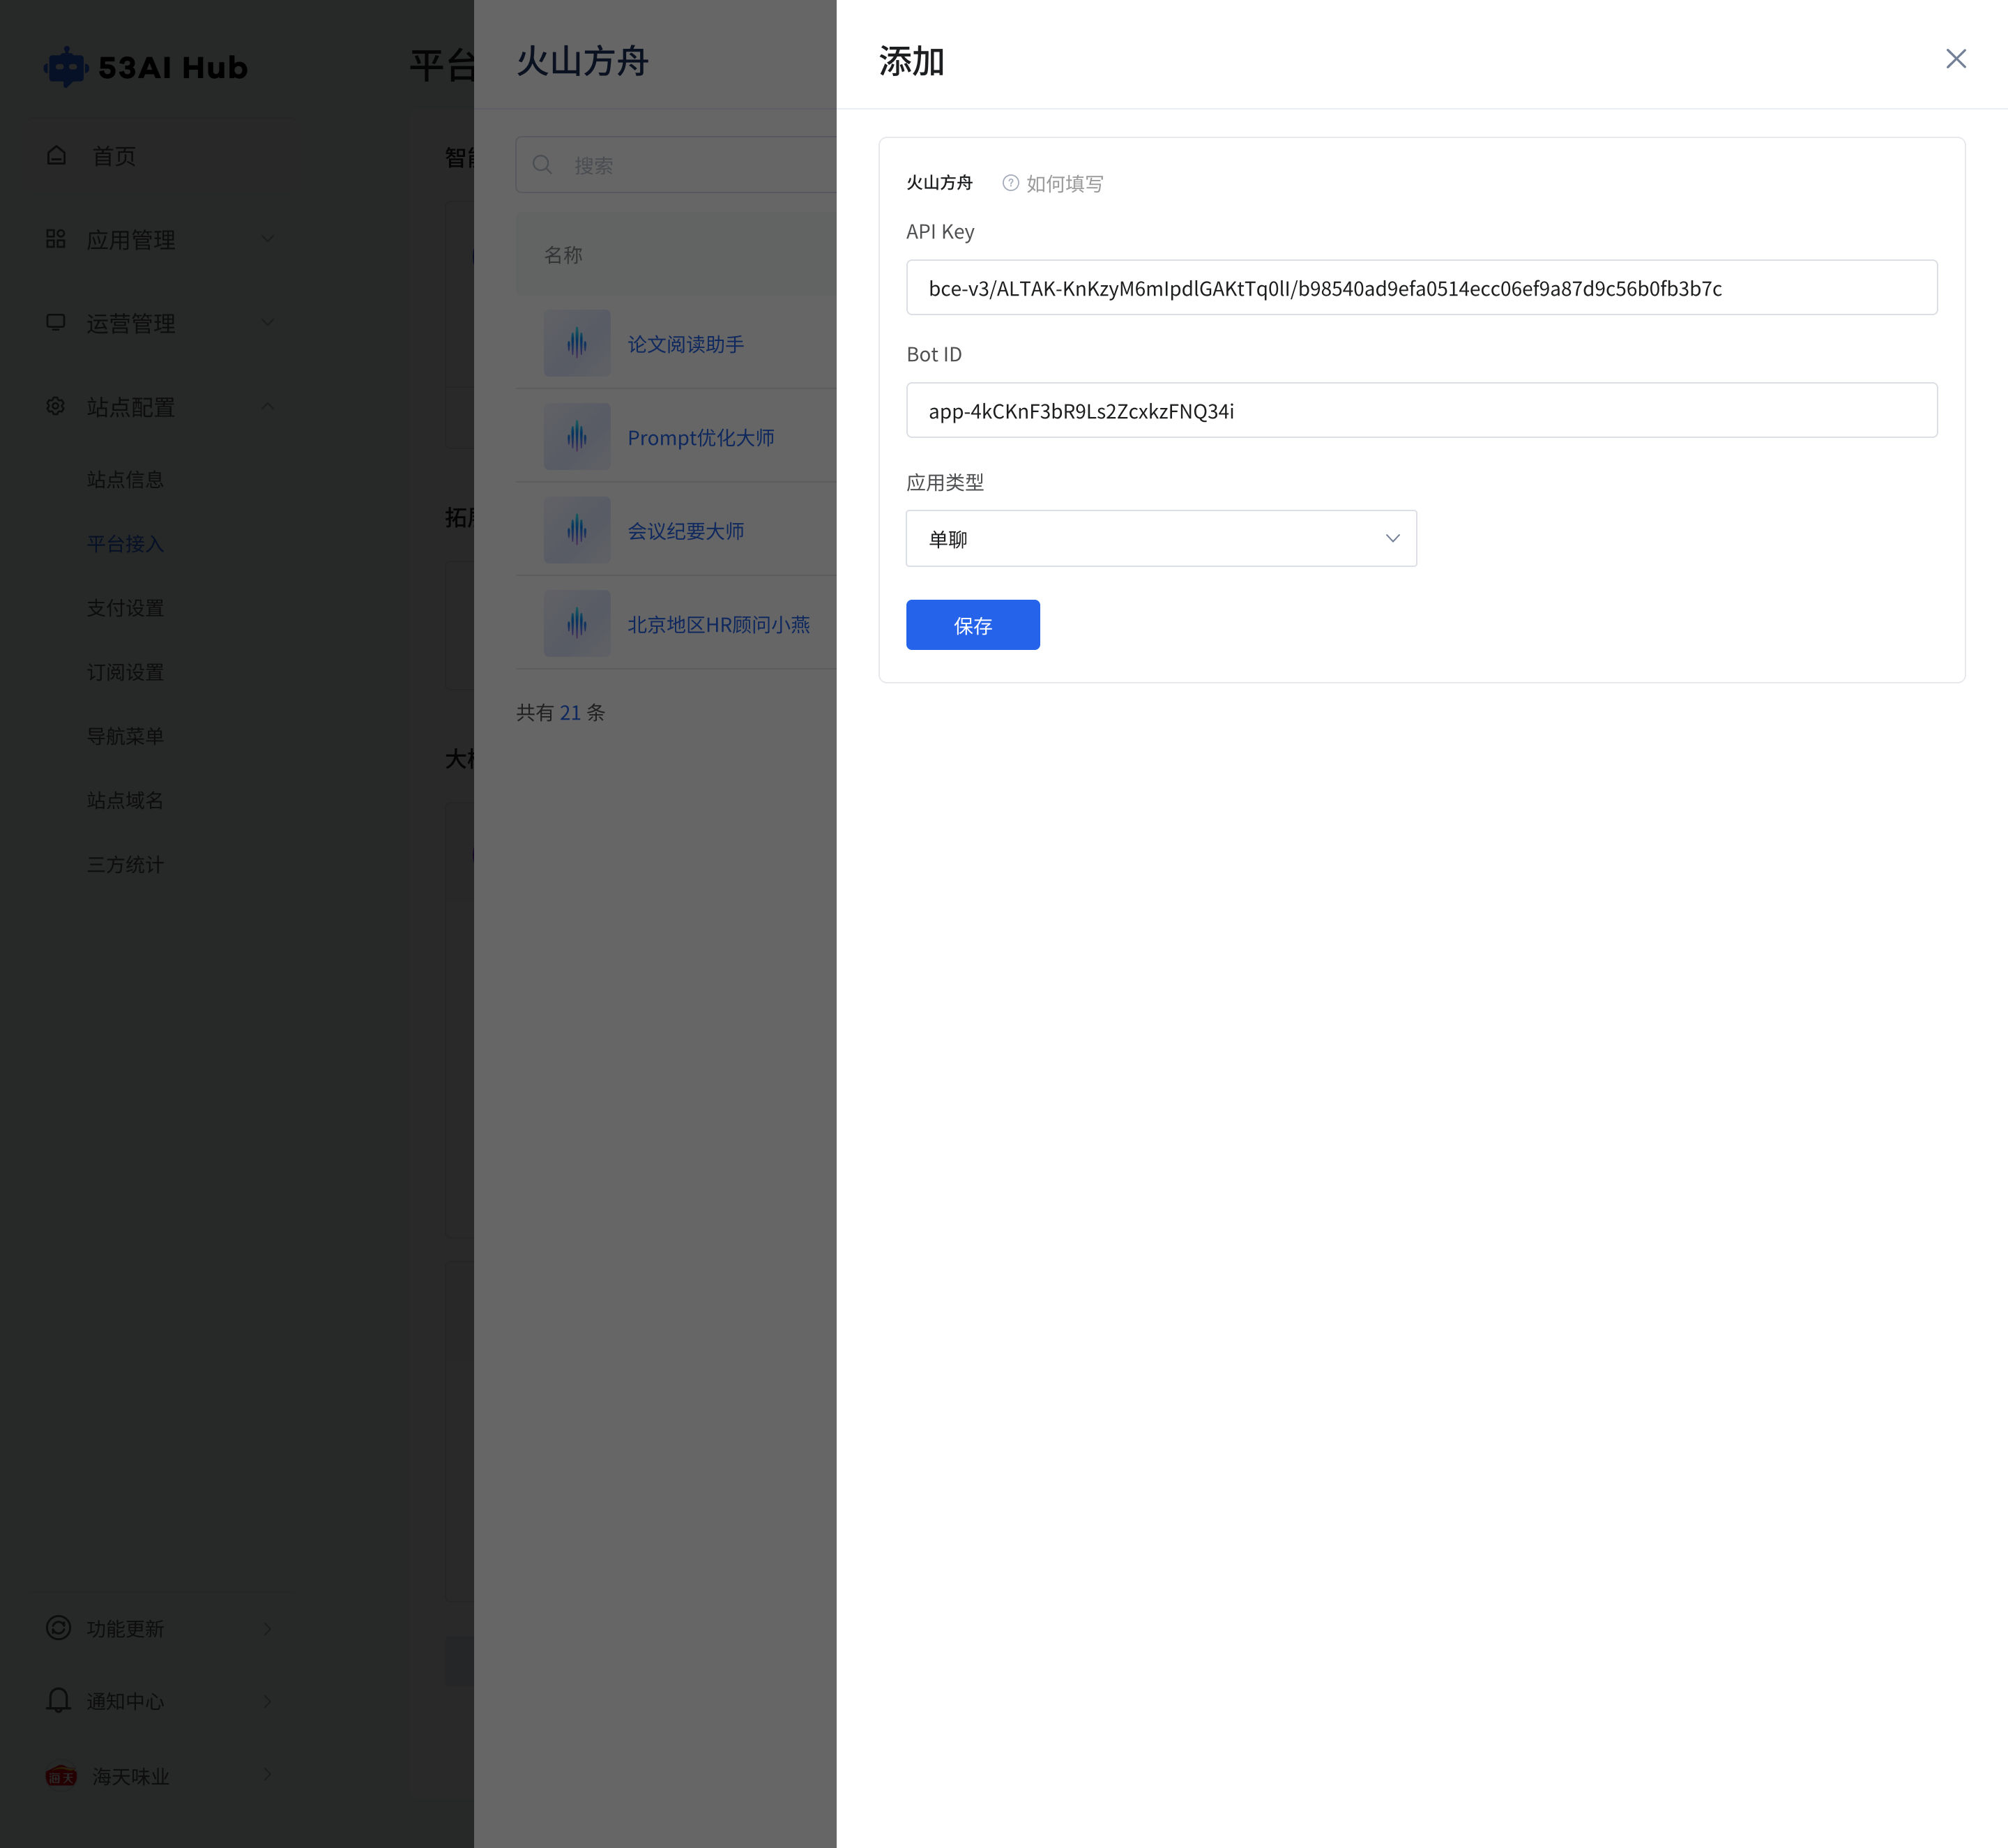
· 添加平台信息
- 前往平台接入页,点击「火山方舟 - 管理」
- 点击「添加」,将
API Key和Bot ID填入表单 - 点击「保存」完成平台信息配置
· 填写基础信息
- 接入成功后,需补充该智能体的基础信息,包括名称、分组、描述与头像
- 基础信息将展示在前台,建议命名简洁明确,便于使用者识别功能
· 权限设置
- 设置智能体的访问权限
- 可根据订阅等级或用户分组配置使用范围,实现权限精细化管理
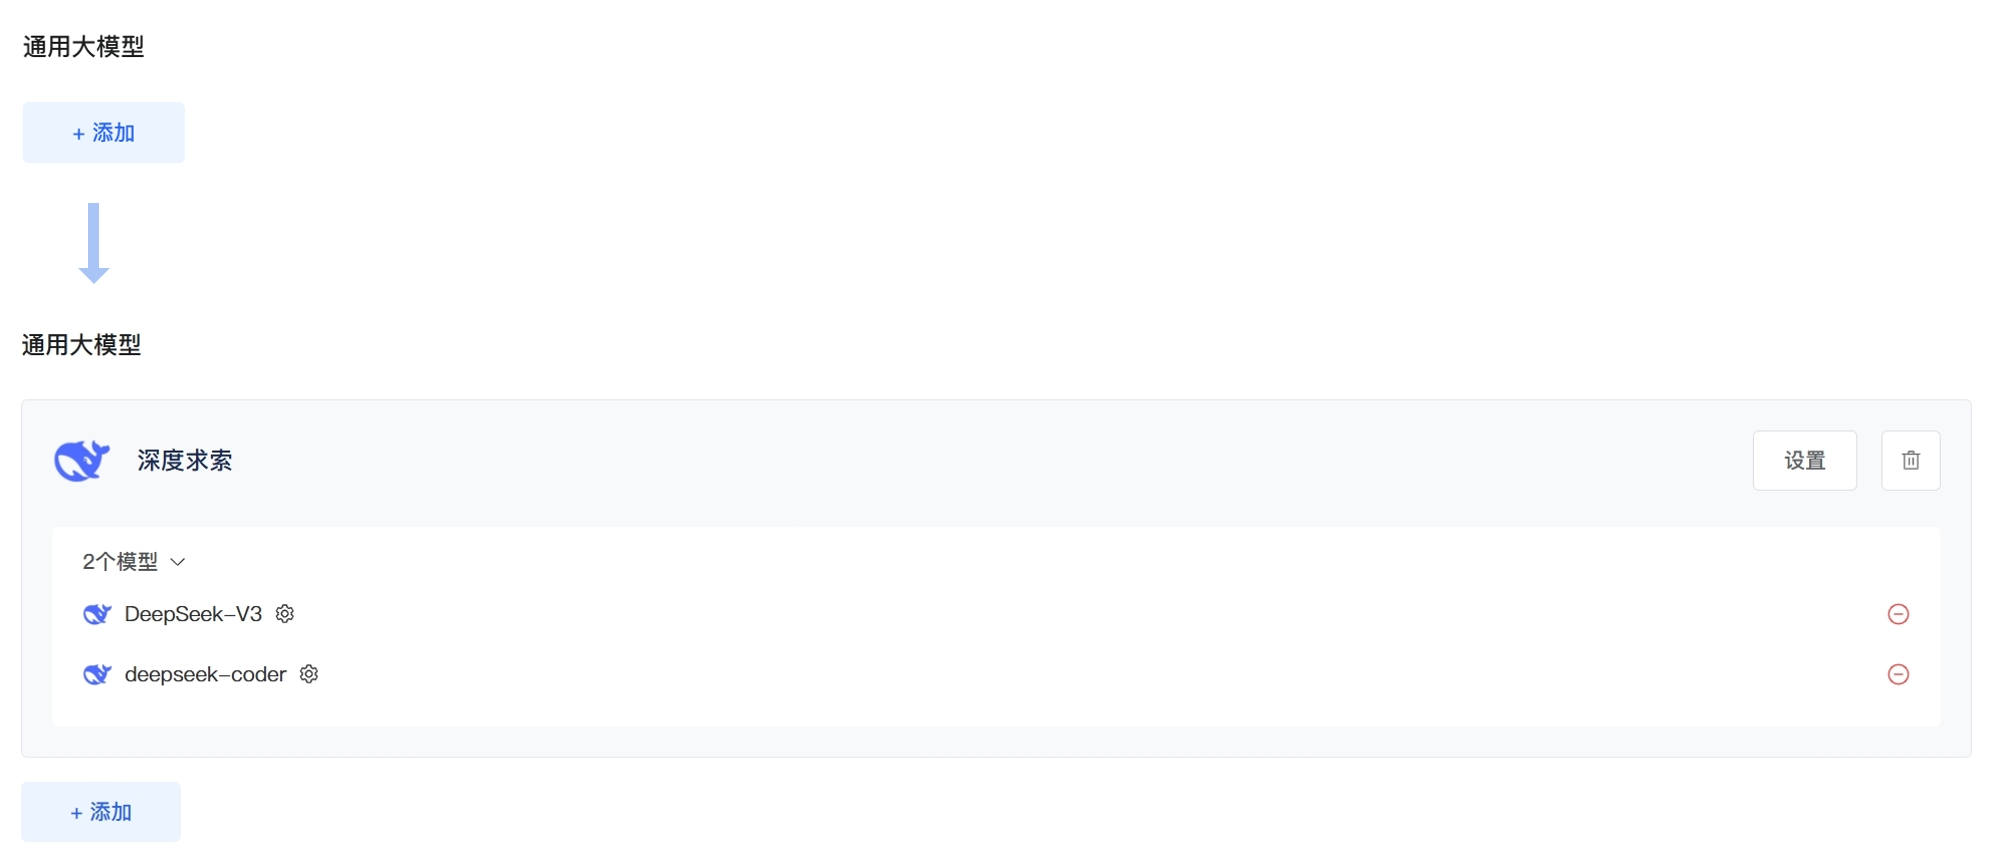
通用大模型
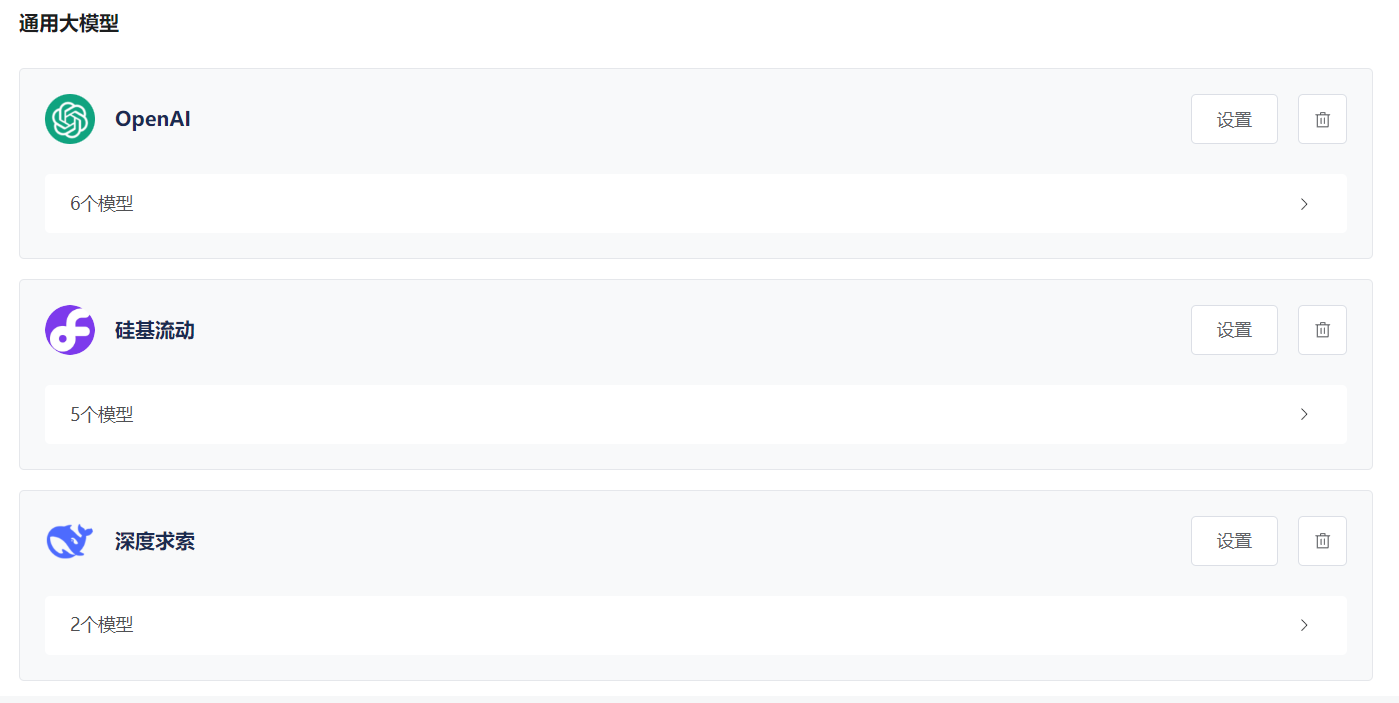
我们以深度求索为例:
mermaid
flowchart LR
subgraph one["深度求索平台操作"]
direction TB
A1["前往开放平台<br>进入授权页面"] --> A2["在 API Keys 中<br>点击「创建 API Key」"]
end
subgraph two["53AI Hub 平台操作"]
direction TB
B1["点击「通用大模型-添加」"]-->B2["点击「深度求索-添加」"]
-->B3["填写 API Key <br> API endpoint 地址<br>启用模型"]
end
C1["完成大模型接入配置"]
one ==> two==>C1
classDef deepseekStep fill:#FFE0B2,stroke:#FB8C00,stroke-width:2px,color:#000000
classDef hubStep fill:#BBDEFB,stroke:#1E88E5,stroke-width:2px,color:#000000
classDef successStep fill:#C8E6C9,stroke:#2E7D32,stroke-width:4px,color:#000000
class A1,A2 deepseekStep
class B1,B2,B3 hubStep
class C1 successStep
style one fill:transparent,stroke:#F57C00,stroke-width:4px,stroke-dasharray: 30 8,font-weight:bold
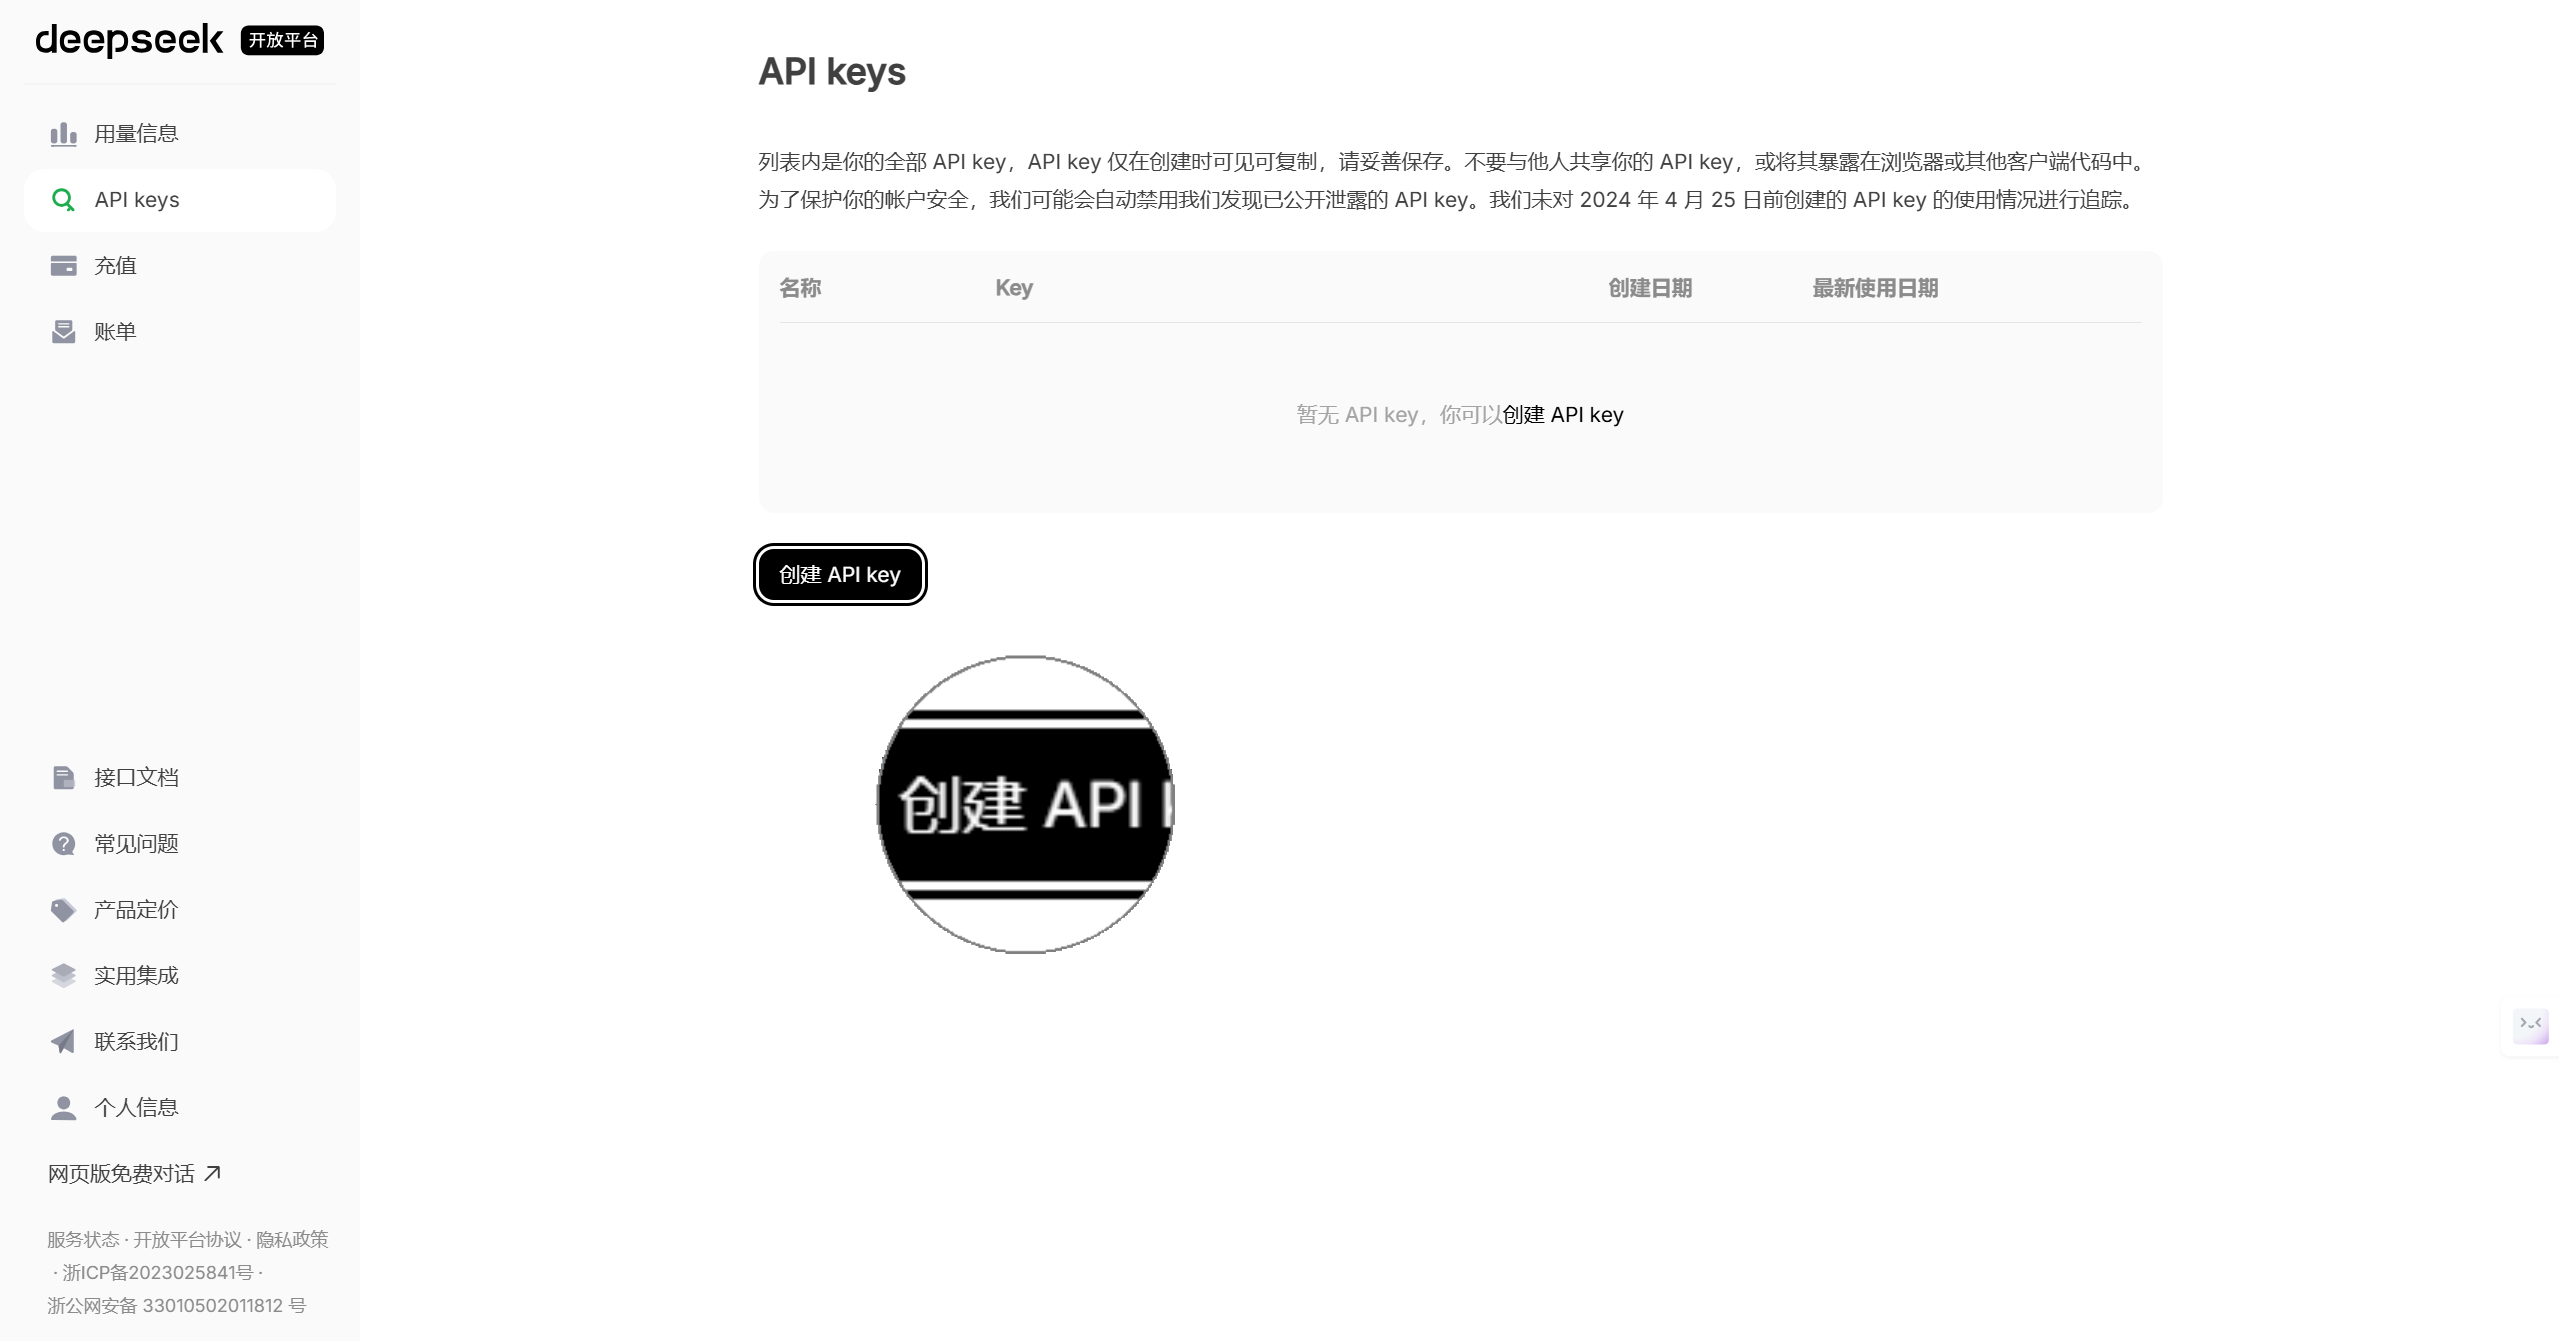
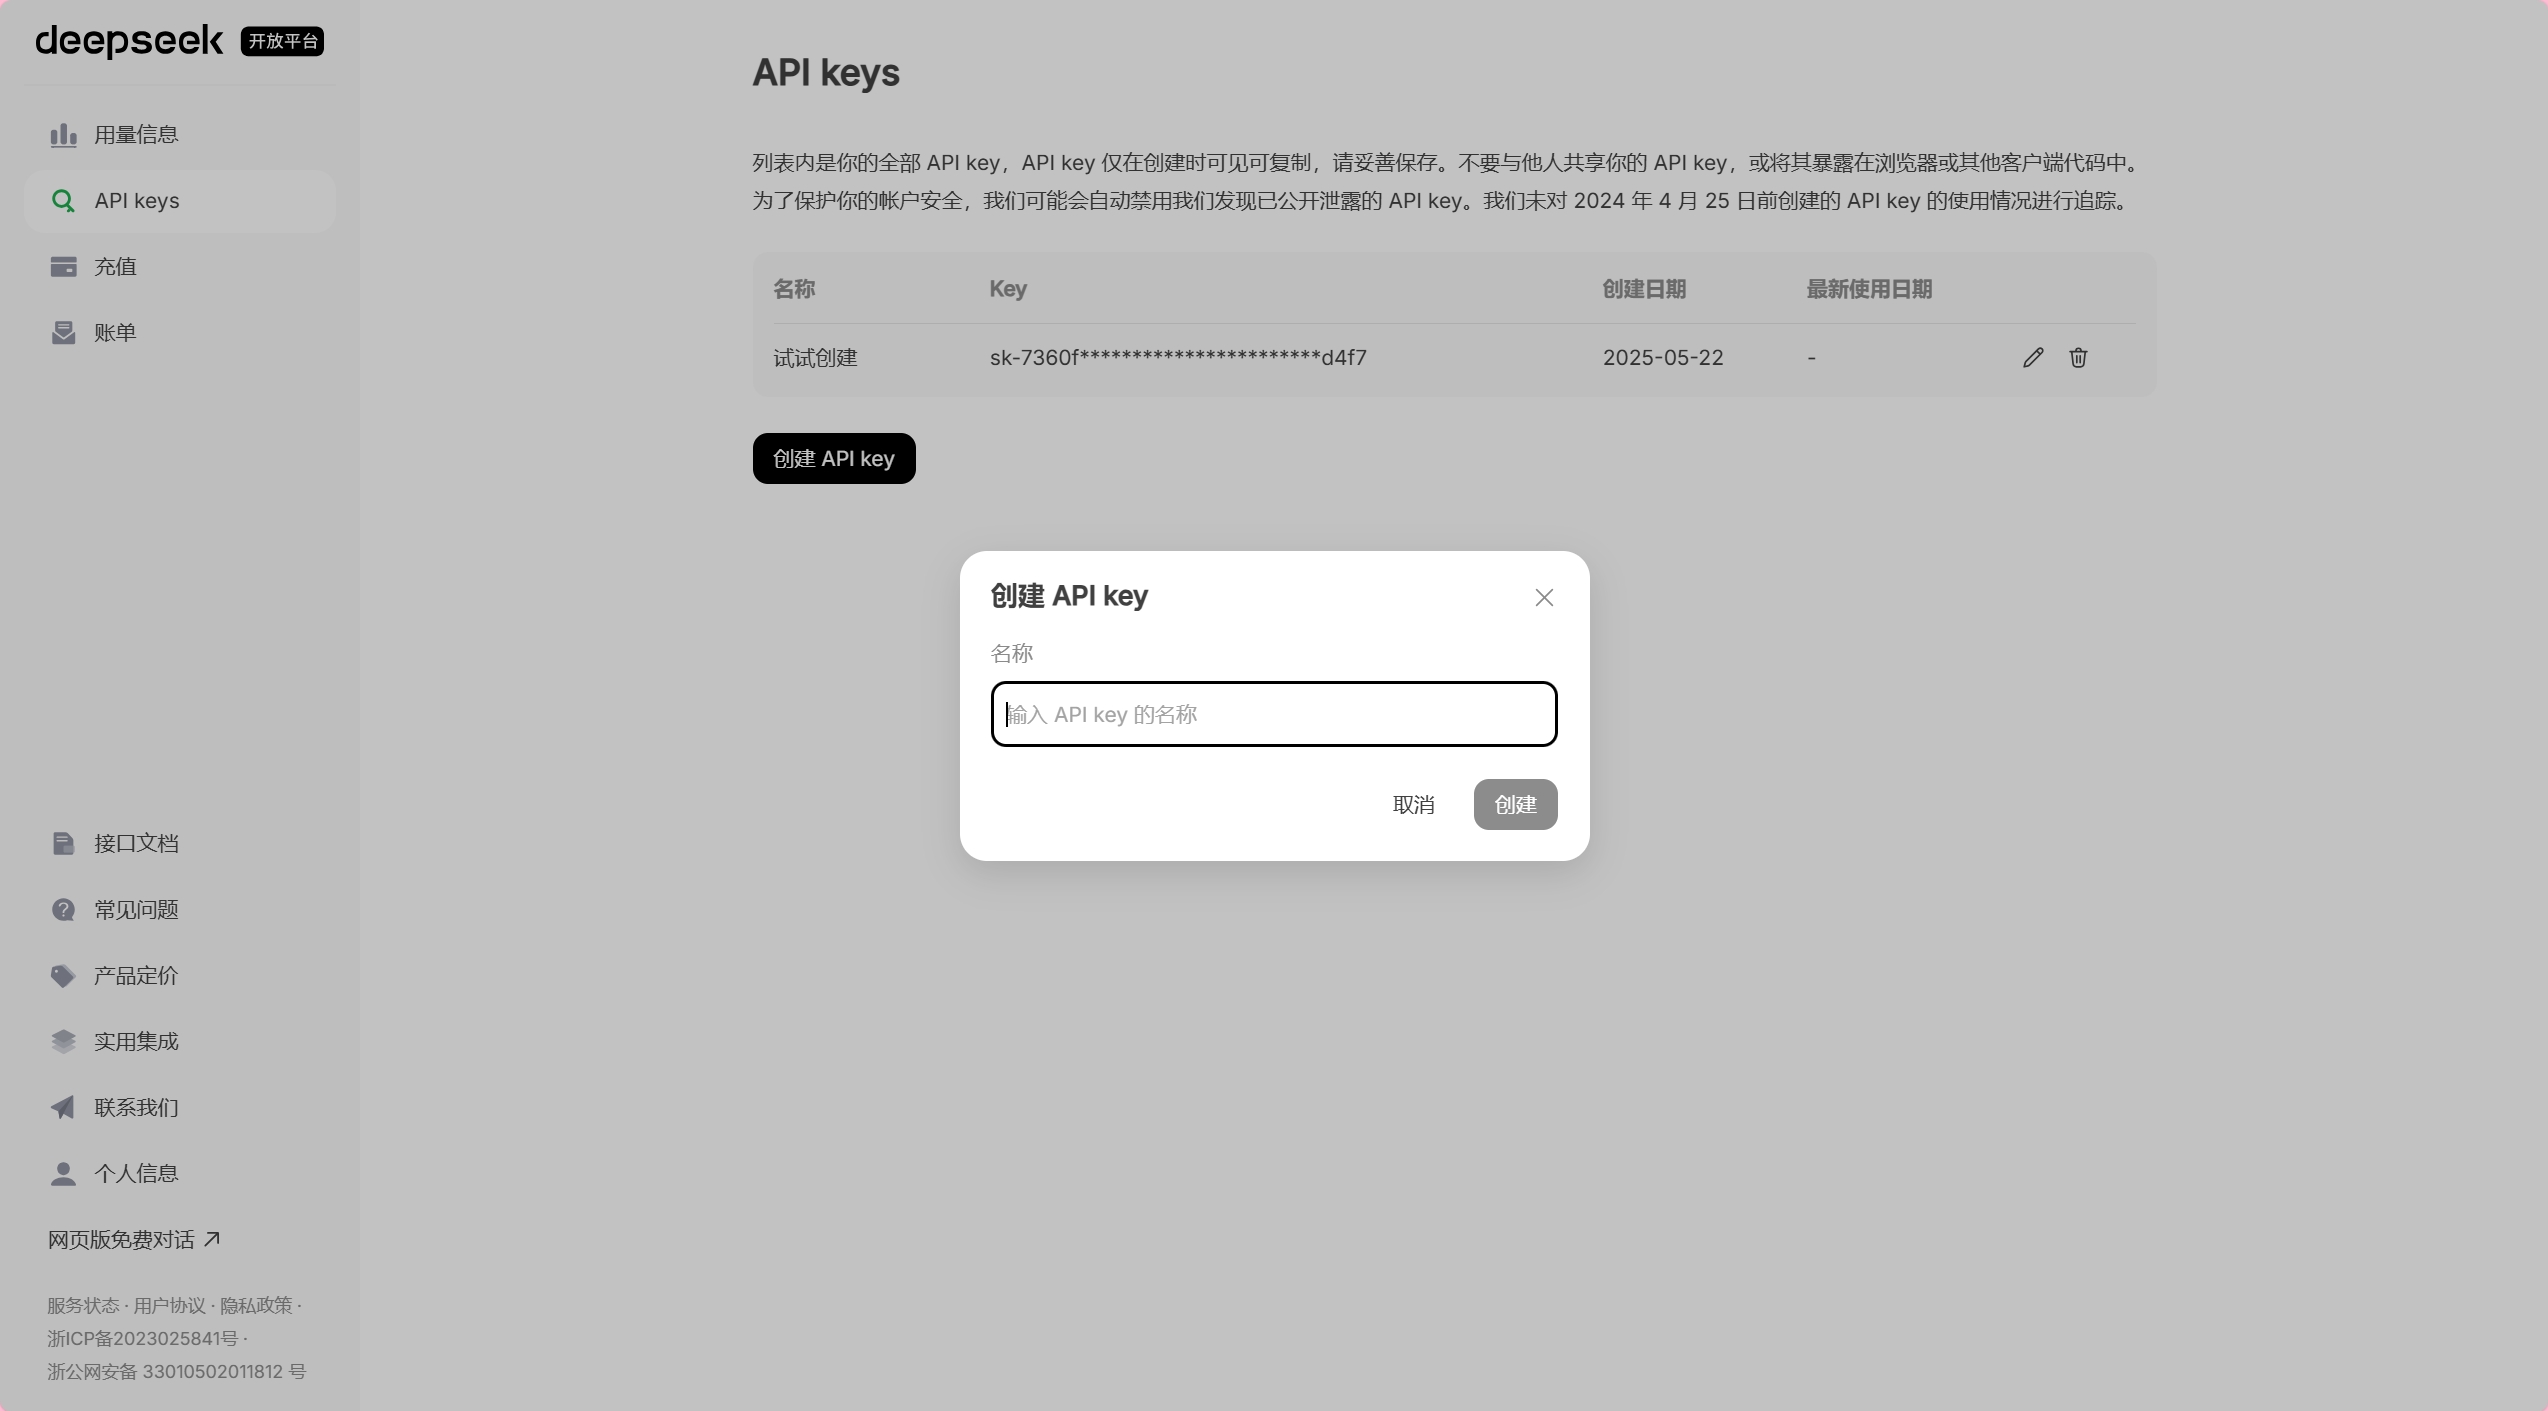
style two fill:transparent,stroke:#1976D2,stroke-width:4px,stroke-dasharray: 30 8,font-weight:bold在深度求索中的操作
- 前往深度求索开放平台授权页面
- 在「API Keys」栏目点击「创建 API Key」获取密钥
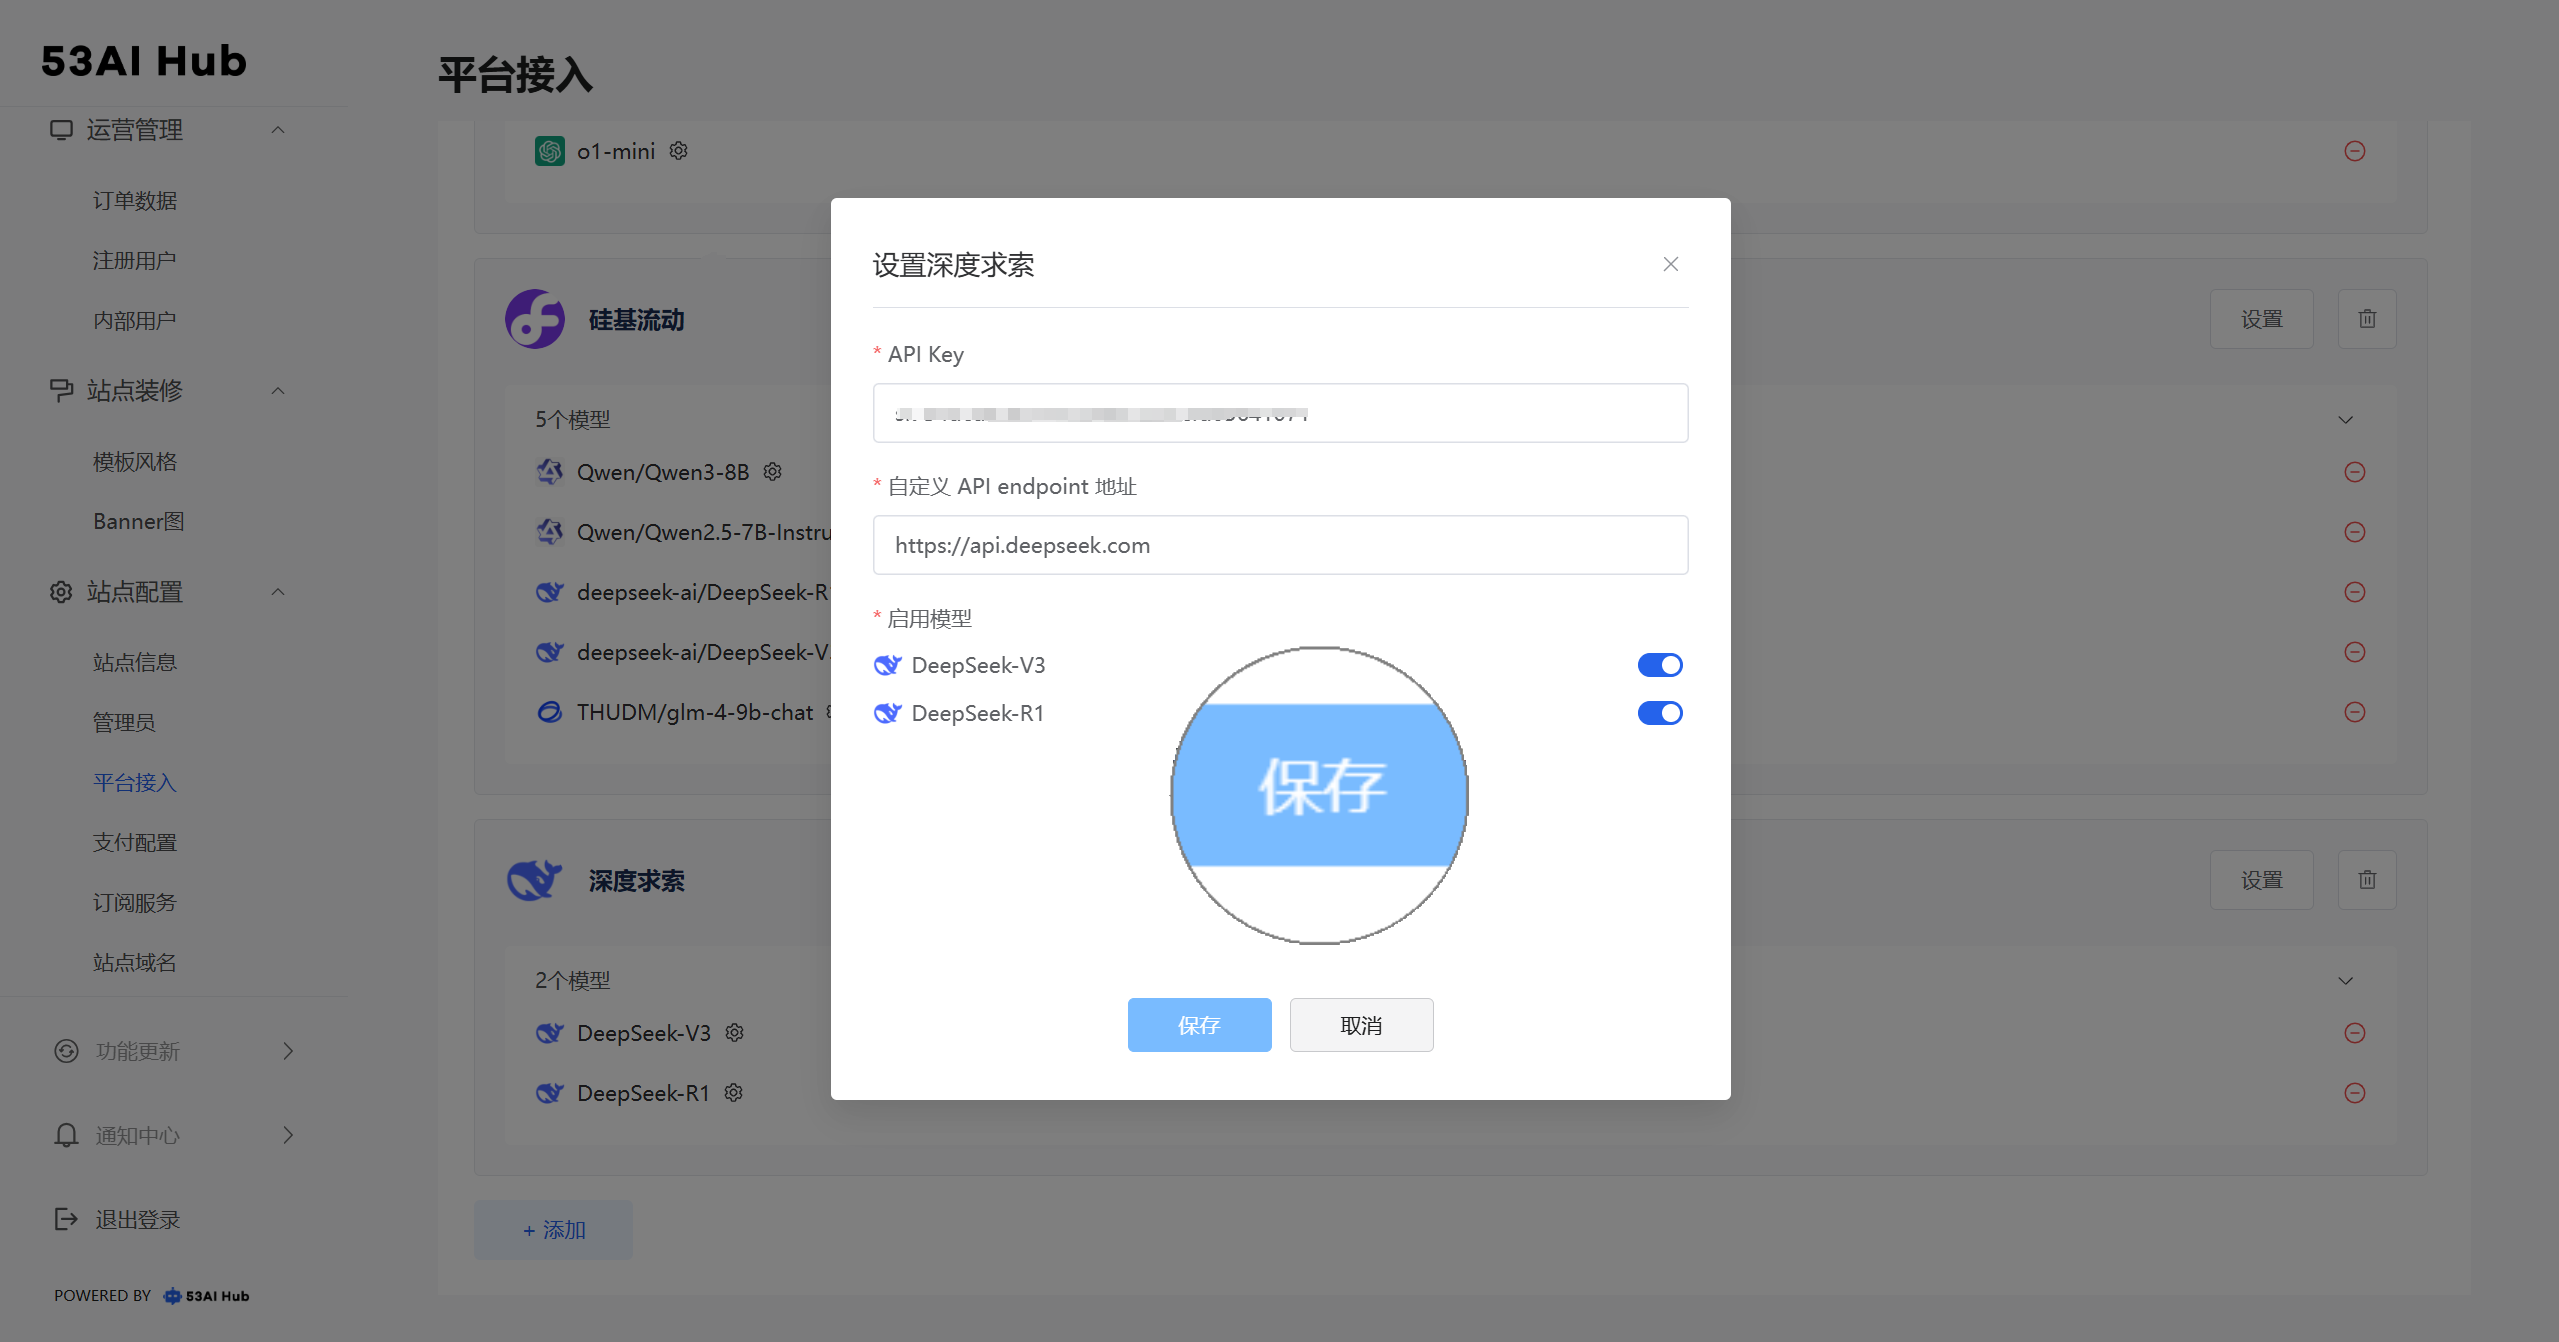
在 53AI Hub 中的操作
· 添加平台信息
- 前往平台接入页,点击「添加」
- 在「选择模型接入」中选择「深度求索」
- 输入
API Key - 选择要启用的模型
- 点击「保存」完成大模型接入配置
使用模型
配置完模型后,就可以在应用中使用这些模型了
常见问题
xxxxxx